Glitchy TV, phone that won’t charge, Bluetooth that keeps dropping, Wi‑Fi that crawls, or a laptop that sounds like a jet engine—most of these problems have simple, fix‑it‑now solutions. You don’t need a workbench full of tools or an engineering degree. You just need a clear process, a bit of patience, and a checklist you can actually follow.
This guide walks through five common electronics problems and shows you how to fix them safely, step by step.
1. Phone Not Charging Reliably
A loose cable or dirty port is one of the most common—and most fixable—issues.
Step‑by‑step: Clean and test the charging path
Power down first
- Turn the phone completely off. - Unplug the charger from the wall and from the phone.
Inspect the charging cable
- Run your fingers along the cable to feel for kinks, bulges, or cuts. - Bend the cable gently near both ends; if charging cuts in/out when moved, the cable is likely bad. - Try another known‑good cable if you have one. If the problem disappears, recycle the faulty cable.
Check the power source
- Plug the charger into a different wall outlet. - Try a different power adapter (use one that’s certified for your brand and supports your phone’s voltage/amperage). - Avoid cheap, unbranded adapters—they’re often unstable and can damage your device.
Clean the charging port (carefully)
- Use a bright light to look inside the port. Lint and pocket debris are common. - Use a wooden toothpick or plastic dental pick—never metal—to gently loosen debris. - Hold the phone with the port facing down so loosened debris falls out, not deeper inside. - Finish with a short burst of compressed air (held upright, short bursts only).
Check for loose fit
- Plug the cable in and gently wiggle it. - It should feel snug; if it moves a lot or falls out easily, the port might be worn or damaged. - If cleaning doesn’t fix a very loose port, stop forcing it—this is the point to see a professional repair shop.
Rule out software issues
- While charging, leave the phone on the lock screen (no apps). See if it charges steadily. - Boot into safe mode (varies by brand) to see if a misbehaving app is causing battery or charging confusion. - Update the OS and check the battery/charging section in settings for error messages.
If the phone still won’t charge after a known‑good cable, adapter, and a clean port, the issue is likely the internal charging board or battery—a shop repair, not a home fix.
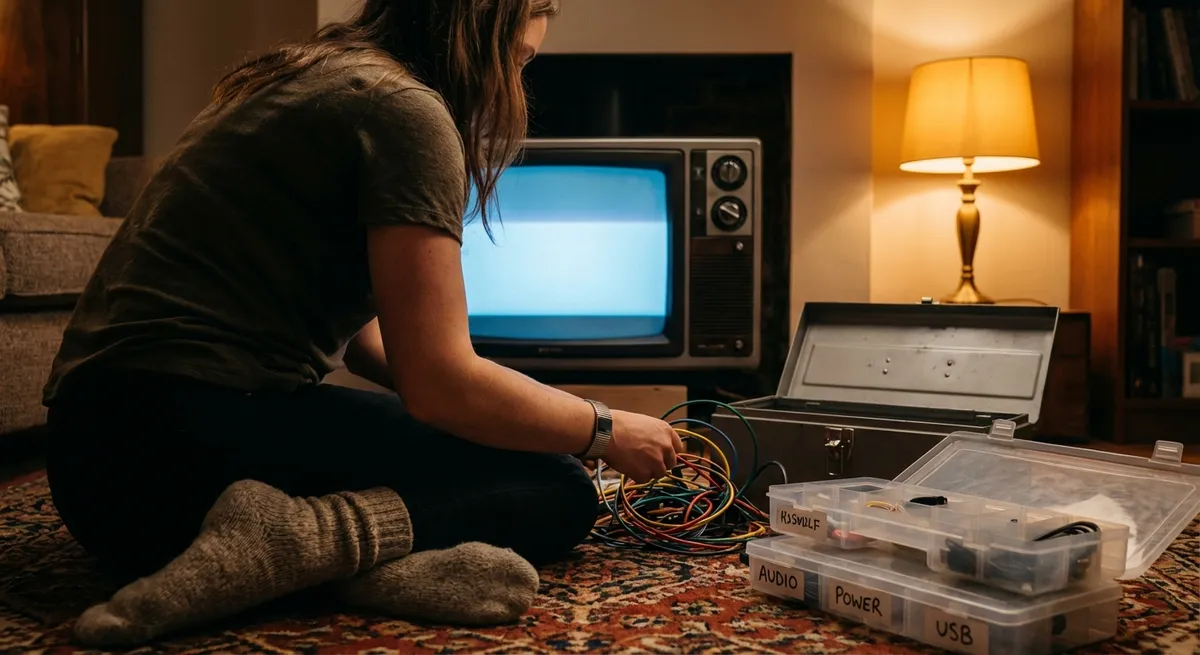
2. TV With No Signal or Random Black Screen
Before blaming your TV, isolate whether the problem is the source, the cable, or the TV’s settings.
Step‑by‑step: Trace the signal from source to screen
Confirm power and status lights
- Make sure the TV’s standby light is on. - Use the TV’s physical power button (not just the remote) to wake it.
Check your input source
- Use the TV remote’s “Input” or “Source” button. - Cycle through HDMI 1/2/3, AV, etc., pausing a few seconds on each. - Match the input label with where your device is actually plugged in.
Test the HDMI cable and port
- Turn the TV and source device (cable box, console, streaming stick) off. - Unplug and firmly re‑plug both ends of the HDMI cable. - Try another HDMI port on the TV. - If available, try a different HDMI cable. If that fixes it, discard the old one.
Check the source device
- Make sure it has power and any status lights look normal. - Reboot it: unplug from power for 30 seconds, then plug back in. - If you have another TV, test the source and cable there; if it works, the issue is more likely on the original TV.
Adjust TV picture/power settings
- Disable power‑saving modes like “Eco” or “Automatic power off” that might dim or blank the screen. - In settings, look for HDMI‑CEC or similar options; turn them off temporarily to see if behavior improves.
Perform a “soft reset” of the TV
- Unplug the TV from the wall. - Press and hold the TV’s power button (on the set) for 10–15 seconds to discharge residual power. - Wait another 30–60 seconds, then plug it back in and power on.
If the TV powers on but randomly goes black while audio continues, it could be an internal backlight or power board issue. At that point, consider a repair estimate and compare it to the TV’s replacement cost.
3. Bluetooth Audio Cutting Out or Refusing to Pair
Most Bluetooth problems come from interference, old firmware, or too many saved devices.
Step‑by‑step: Get a clean, stable Bluetooth connection
Start close and simple
- Move the phone/tablet and Bluetooth speaker/headphones within 1–2 meters, with no walls between. - Turn off or move away from microwaves, wireless speakers, or 2.4 GHz cordless phones during testing.
Forget old connections
- On your phone: go to Bluetooth settings. - Tap each device you don’t use anymore and select “Forget” or “Remove.” - Clear out as many old entries as possible—some devices have a limit and behave badly when it’s reached.
Reset the Bluetooth accessory
- Turn it off, wait 10 seconds, then turn it back on. - Many headphones/speakers have a specific reset combo (e.g., hold power + volume up for 5–10 seconds). - Check the manual or manufacturer website for model‑specific reset instructions.
Toggle Bluetooth and restart your phone
- Turn Bluetooth off on your phone, wait 10 seconds, then turn it on again. - If that fails, restart the phone completely. This clears temporary connection glitches.
Update firmware and apps
- Check for OS updates on your phone. Install pending updates. - If your Bluetooth device has a companion app, open it and check for firmware updates. - Updated firmware often fixes connection drops or odd pairing behavior.
Re‑pair from scratch
- Put the device into pairing mode (usually flashing light; follow device instructions). - Find it in your phone’s Bluetooth list and tap to pair. - If you’re prompted for a code, the default is often 0000 or 1234 (check the manual).
If audio still stutters in one location but not another, you’re likely dealing with interference or a weak radio. Try a different room, keep devices away from thick walls or metal surfaces, and avoid carrying your phone in a back pocket with your body between it and the headphones.
4. Home Wi‑Fi Is Slow or Keeps Dropping
You don’t have to accept bad Wi‑Fi as “just how it is.” Basic checks often restore usable speed and stability.
Step‑by‑step: Stabilize and speed up your connection
Check whether it’s Wi‑Fi or the internet itself
- Connect a laptop directly to the router/modem with an Ethernet cable. - Run a speed test (e.g., speedtest.net) and compare it to your plan. - If wired speeds are good but Wi‑Fi is bad, the problem is local Wi‑Fi, not your provider.
Reboot the modem and router properly
- Unplug the modem and router from power. - Wait at least 30 seconds. - Plug the modem back in, wait until all lights are stable. - Then plug in the router and wait 1–2 minutes before testing.
Reposition the router
- Place it out in the open, as central in your home as possible. - Avoid inside cabinets, low on the floor, or next to thick walls/metal appliances. - Stand near the router with your device—if things improve drastically, you have coverage, not service, issues.
Reduce interference and congestion
- If your router supports both 2.4 GHz and 5 GHz: - Use 5 GHz for nearby devices (higher speed, shorter range). - Use 2.4 GHz for farther rooms (lower speed, longer range). - Change the Wi‑Fi channel in router settings (often under “Wireless” or “Advanced”). Use a less crowded channel if possible.
Secure your network
- Ensure you’re using WPA2 or WPA3 encryption with a strong password. - Change the default Wi‑Fi password if you never have. - Too many unknown devices can slow your connection; remove unfamiliar clients in the router’s device list.
Test with one device at a time
- Turn off or disconnect all but one device and test speed/quality. - Gradually add other devices back; note when performance drops. - This helps you spot a single misbehaving device (e.g., a security camera saturating the upload).
If you still have dead zones after these steps, a mesh Wi‑Fi system or a properly placed wired access point is a more reliable upgrade than random plug‑in “boosters.”
5. Laptop Overheating or Running a Loud Fan
Heat slows systems down and shortens component life. Often the fix is cleaning and better airflow.
Step‑by‑step: Cool your laptop safely
Rule out heavy software first
- On Windows, open Task Manager (Ctrl+Shift+Esc); on macOS, open Activity Monitor. - Check CPU usage. If one program is stuck at very high usage, close it or restart the laptop. - Install pending system updates; sometimes they fix runaway processes.
Check your environment and positioning
- Use the laptop on a hard, flat surface, not on a blanket, couch, or bed. - Make sure side and bottom vents aren’t blocked. - If you must use it on your lap, use a tray or cooling pad.
Clean external vents
- Power the laptop down and unplug the charger. - Use compressed air in short bursts to blow dust out of vents. - Hold the can upright and don’t spin the internal fan excessively—short, controlled bursts are key.
Adjust power and performance settings
- On Windows: - Go to Settings → System → Power & battery. - Choose a balanced or power‑saving mode instead of maximum performance. - On macOS: - Go to System Settings → Battery and adjust “Low power mode” or energy preferences.
Limit background apps
- Disable apps that auto‑start with the OS and aren’t needed (cloud sync, chat, game launchers). - Use built‑in tools (Task Manager → Startup on Windows, Login Items on macOS) to trim the list.
Know when to get internal cleaning or service
- If the fan is loud constantly, even at idle, or you feel very hot spots on the underside, dust may be packed inside. - Opening modern, thin laptops can be tricky; if you’re not comfortable, ask a repair shop for a professional cleaning and fresh thermal paste. - If your laptop suddenly shuts down under load, that’s a thermal protection reaction—don’t ignore it.
Cooler laptops are faster, more reliable, and less annoying to sit next to. A basic cleaning plus better positioning solves most home‑use overheating issues.
Conclusion
Most electronics problems start with small, fixable issues: a dirty port, a bad cable, cluttered settings, or dust buildup. When you move methodically—inspect, clean, test with known‑good parts, and adjust basic settings—you solve a surprising number of problems without spending much money.
Use this article as a quick reference:
- Charging issues → clean ports, swap cables/adapters, check software.
- TV glitches → confirm inputs, test HDMI, reboot gear.
- Bluetooth drops → reset, forget/re‑pair, update firmware.
- Sluggish Wi‑Fi → reboot, reposition, secure, and de‑congest.
- Overheating laptops → clean vents, adjust power settings, reduce load.
When the fix requires specialized tools or internal board work, that’s when a professional is worth calling. But for the issues above, you can usually get back up and running today with a bit of targeted troubleshooting.
Sources
- [Apple Support – If your iPhone or iPod touch won't charge](https://support.apple.com/en-us/HT201569) – Official guidance on diagnosing and improving charging behavior on Apple devices
- [Samsung Support – What to do when my TV has no signal?](https://www.samsung.com/us/support/troubleshooting/TSG01001012/) – Step‑by‑step checks for TVs that display “No Signal” or similar errors
- [Microsoft Support – Improve PC performance](https://support.microsoft.com/en-us/windows/tips-to-improve-pc-performance-in-windows-10-0bb630a8-74e0-40db-b0a3-2b5893e333f8) – Practical tips on managing power, apps, and heat‑related performance problems
- [Federal Communications Commission – Interference to Home Electronic Equipment](https://www.fcc.gov/consumers/guides/interference-home-electronic-equipment) – Explains common causes of wireless interference and how to minimize them
- [Harvard University – Basic Computer Maintenance Tips](https://huit.harvard.edu/news/basic-computer-maintenance-tips) – General best practices for keeping computers running reliably over time
Key Takeaway
The most important thing to remember from this article is that this information can change how you think about Electronics.


