Electronics rarely fail out of nowhere—most “dead” gadgets are just confused, dirty, or poorly connected. Before you replace anything or book a repair, there are simple checks that solve a surprising number of problems. This guide walks you through five common issues and gives you clear, practical steps to fix them safely at home.
1. When Your TV Won’t Turn On (But the Standby Light Is On)
A TV that won’t fully power up often has a simple cause: input confusion, a frozen system, or a bad connection. Work through these steps in order; stop if you see sparks, burning smells, or hear popping sounds.
Power reset the TV (soft reboot)
- Turn the TV off with the remote. - Unplug the TV from the wall outlet. - Hold the TV’s physical power button (on the frame or underside) for 15–20 seconds. - Wait 1–2 minutes, then plug it back in and turn it on. This discharges residual power and clears minor firmware glitches.
Confirm the correct input/source
- Press the “Input” or “Source” button on the remote or TV. - Cycle through HDMI1, HDMI2, AV, etc., slowly. - Make sure the device you’re trying to use (cable box, console, streaming stick) is powered on. - If you see a logo from your streaming device or console, your TV is probably fine.
Test the wall outlet and power strip
- Plug a lamp or phone charger into the same outlet to confirm it works. - If you use a surge protector or power strip, bypass it: plug the TV directly into the wall. - Check that any wall switches controlling the outlet are ON.
Inspect and reseat all cables
- With the TV off and unplugged, gently disconnect and reconnect: - The power cable at both ends (TV and outlet/brick). - HDMI cables and antenna cables. - Look for bent pins, loose plugs, or damaged insulation. Replace visibly damaged cables.
Check for overheating and ventilation
- Make sure vents are not blocked by cabinets, walls, or dust. - If the TV was very hot to the touch, let it cool for 30 minutes before trying again. - Avoid stacking streaming boxes or consoles directly on top of the TV.
When to stop and call a pro:
- No standby light at all and a known‑good outlet.
- Burning smell, cracking sounds, or visible damage to the power cord or TV chassis.
- The screen flashes briefly then goes black every time you power on.
2. Laptop That Runs But Shows a Black Screen
If you hear fans or see keyboard lights, but the screen stays black, don’t assume the laptop is dead. Often the display, brightness, or memory needs a basic reset.
Confirm the laptop is actually on
- Press the power button once and watch for: - Keyboard backlight. - Power LED lighting up. - Fan noise or drive activity. - If nothing changes, plug in the charger and wait a full 5 minutes before trying again.
Force a hard reset
- Turn the laptop fully off: hold the power button for 10–15 seconds until all lights go out. - Disconnect the charger. - If the battery is removable, take it out. - Hold the power button for another 15–20 seconds to discharge residual power. - Reinsert the battery (if removable), plug in the charger, and power it on.
Adjust brightness and external display settings
- Tap the screen brightness keys (often F1/F2 or icons showing a sun). - Press the display toggle key (commonly Fn + F4/F5/F8, depending on brand) to switch between internal and external display modes. - If possible, connect the laptop to an external monitor or TV via HDMI or DisplayPort. - If the external display works, your laptop screen or cable may be faulty, but your data is likely safe.
Reseat RAM (only if you’re comfortable opening the laptop)
- Shut down and unplug the laptop. - Ground yourself by touching a metal object to discharge static. - Open the RAM access panel (check your laptop’s manual for location). - Gently release the RAM sticks, then firmly reinsert them until they click in. - Close the panel, reconnect power, and attempt to power on again.
Boot into basic diagnostic mode
- Many laptops have a built‑in diagnostics menu: - HP: Power on, repeatedly press Esc or F2. - Dell: Power on, tap F12, select Diagnostics. - Lenovo: Tap F1 or the small Novo button. - If diagnostics appear on screen, your display is working and the issue might be software‑related (graphics driver, OS corruption).
Stop and seek professional help if:
- You see vertical lines, flickering colors, or cracks in the panel.
- The laptop repeatedly shuts off after a few seconds.
- You’re not comfortable opening the case; forcing it can break clips or cables.
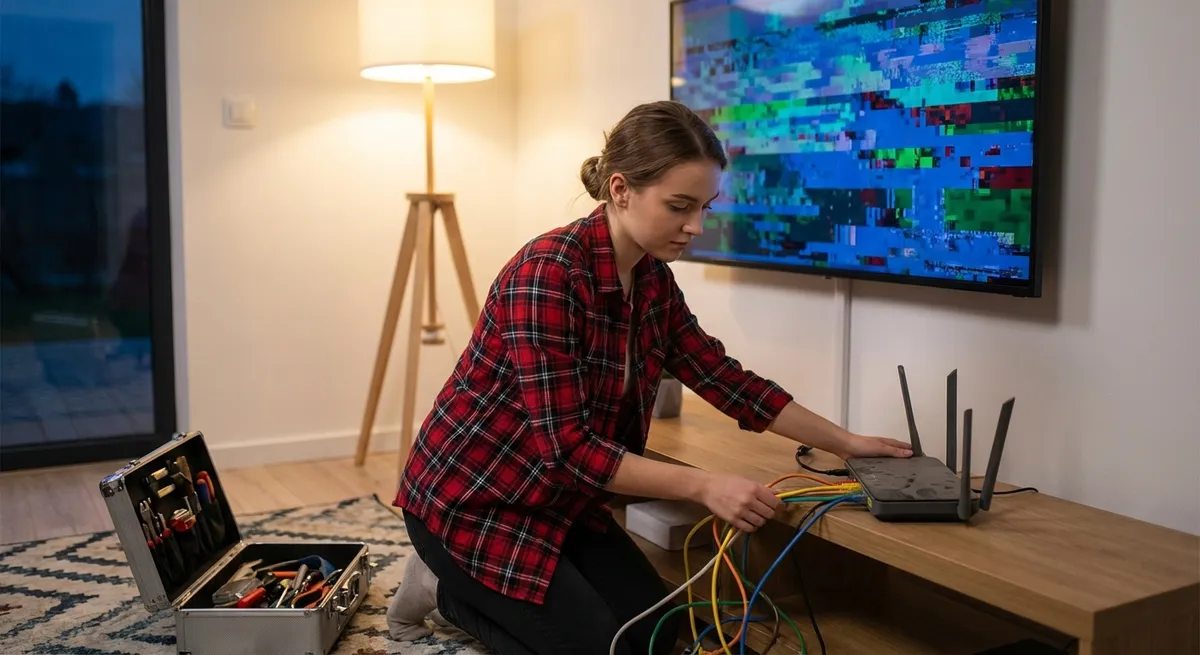
3. Wi‑Fi That Keeps Dropping or Crawls at a Snail’s Pace
Slow or unstable Wi‑Fi is often about interference, placement, or overloaded hardware, not your internet provider. Before calling your ISP, work through these steps.
Power‑cycle modem and router in the right order
- Unplug the power from both modem and router. - Wait 30–60 seconds. - Plug in the modem first; wait until all status lights stabilize (this can take 2–3 minutes). - Then plug in the router; wait another 2 minutes. - Test again with a single device near the router.
Test speed and rule out one device
- On a phone or laptop close to the router, run a speed test via a browser (e.g., speedtest.net). - Then connect that same device directly to the router with an Ethernet cable (if possible) and test again. - If Ethernet is fast but Wi‑Fi is slow, the Wi‑Fi network (not the internet connection) is your main issue.
Optimize router placement
- Place the router in a central, elevated, open location (not in a cabinet, behind a TV, or on the floor). - Keep it away from: - Microwaves - Cordless phone bases - Large metal objects and thick concrete walls - Reboot after moving and test again.
- Split and rename Wi‑Fi bands (2.4 GHz vs 5 GHz)
- Log into your router (address is usually on a sticker: e.g., 192.168.0.1 or 192.168.1.1).
- Find Wireless or Wi‑Fi settings.
- Make sure both 2.4 GHz and 5 GHz bands are enabled, and give them distinct names (e.g., “Home‑2G” and “Home‑5G”).
- Connect nearby devices (laptops, phones, TVs in the same room) to 5 GHz for speed.
- Connect distant devices or smart home gadgets to 2.4 GHz for better range.
Reduce congestion and update firmware
- Disconnect or power off devices you’re not using (old phones, tablets, smart bulbs). - Change your Wi‑Fi channel (especially on 2.4 GHz) if your router supports it; auto is usually best, but manually trying channels 1, 6, or 11 can help in crowded areas. - Check the router admin page for a “Firmware Update” option and apply any available updates, then reboot.
Call your ISP or consider new hardware when:
4. Smartphone That Won’t Charge Reliably
If you have to wiggle the cable to get your phone to charge—or it charges very slowly—the problem is often dirt, a bad cable, or software settings.
Inspect and clean the charging port
- Power off your phone. - Use a bright light to look inside the charging port. - Use a wooden or plastic toothpick (never metal) to gently lift out lint and debris. - Blow gently or use short bursts of compressed air (from a safe distance) to clear dust. - Reconnect the charger and check for a firm, snug fit.
Test with known‑good charger and cable
- Use an original or certified charger and cable (e.g., MFi for Apple). - Avoid ultra‑cheap, no‑name cables. - Plug the same charger into another device to confirm it works. - If the other device charges fine but your phone doesn’t, the phone is likely the issue.
Check for moisture and temperature warnings
- If your phone shows a “moisture detected” or similar warning, unplug immediately. - Power off the device and let it air dry at room temperature for several hours. - Do NOT use a hair dryer, oven, or direct sunlight. - Once dry, try charging again with a different cable/charger.
Review power and battery settings
- On Android: - Open Settings > Battery or Battery & Device Care. - Disable any aggressive power‑saving modes temporarily. - Check for “Battery health” if available. - On iPhone: - Go to Settings > Battery > Battery Health & Charging. - Review Maximum Capacity and any warnings about degraded battery. - If battery health is very low (e.g., under 80% on iPhone), it may charge slowly and drain fast.
Try safe‑mode or clean boot (advanced but useful)
- Sometimes apps interfere with charging behavior. - On Android, you can usually enter Safe Mode by holding the power button, then long‑pressing “Power off” and selecting “Safe Mode.” - In Safe Mode, only core apps run; test charging again. - If charging improves in Safe Mode, an installed app may be causing issues.
Seek professional repair if:
- The charging port feels loose, wobbly, or physically damaged.
- The phone only charges at certain angles even with a clean port and good cable.
- The device gets hot while charging or shows repeated “Accessory not supported” errors.
5. Bluetooth Devices That Won’t Connect or Keep Dropping
From headphones to speakers and keyboards, Bluetooth problems are often about pairing memory and radio interference. Clearing and re‑pairing properly usually fixes it.
Turn Bluetooth off and on (both devices)
- On your phone or computer, toggle Bluetooth OFF, wait 10 seconds, then turn it back ON. - Power off the Bluetooth accessory (headphones, speaker, etc.), wait 10 seconds, then power it back on.
Forget and re‑pair the device
- On your phone/computer: - Go to Bluetooth settings. - Locate the problematic device. - Tap “Forget,” “Remove,” or “Delete.” - Put the accessory into pairing mode (often by holding the power or Bluetooth button for 5–10 seconds until a light blinks). - Reconnect from the Bluetooth menu.
Check distance and obstacles
- Stay within 1–2 meters (3–6 feet) for initial pairing. - Avoid placing your body, thick walls, or appliances between devices. - Move away from Wi‑Fi routers, microwaves, and cordless phone bases while pairing.
Limit connected devices and clear old pairings
- Many Bluetooth accessories can only remember a small number of devices (often 2–8). - Clear pairing memory on the accessory (check its manual or manufacturer’s website for the exact reset method). - Delete old or unused Bluetooth profiles from your phone/computer.
Update firmware and system software
- Check for system updates on your phone or computer; install any available. - For brand‑name devices (e.g., Bose, Sony, JBL), install their companion app and check for firmware updates. - After updating, restart both devices and attempt pairing again.
Consider repair or replacement if:
- The Bluetooth accessory never enters pairing mode or its light never blinks.
- It fails to appear in any device’s Bluetooth list even at close range.
- You hear constant audio dropouts at very short distances despite trying multiple phones/computers.
Conclusion
Most “broken” electronics aren’t truly broken—they’re confused, blocked, or poorly connected. By following structured steps, starting with the simplest and safest checks, you can often revive TVs, laptops, Wi‑Fi, phones, and Bluetooth gear in minutes. When you do hit a hard limit—burning smells, physical damage, or repeated failures—that’s your cue to stop and bring in a professional or consider replacement. Use this guide as your go‑to checklist before you spend money on a new device or a service call.
Sources
- [Samsung Support – TV Will Not Turn On](https://www.samsung.com/us/support/troubleshooting/TSG01001027/) – Official troubleshooting steps for TVs that won’t power on and basic power checks
- [Dell Support – How to Troubleshoot Display or Video Issues on a Laptop](https://www.dell.com/support/kbdoc/en-us/000132424/how-to-troubleshoot-display-or-video-issues-on-a-laptop) – Detailed guidance on black screens, external displays, and diagnostics
- [Federal Communications Commission (FCC) – Interference FAQs](https://www.fcc.gov/consumers/guides/interference-faq) – Explains how wireless interference affects Wi‑Fi and Bluetooth performance
- [Apple – If your iPhone or iPod touch won’t charge](https://support.apple.com/en-us/HT201569) – Official instructions on cleaning ports, charger checks, and battery guidance
- [US-CERT (CISA) – Securing Wireless Networks](https://www.cisa.gov/resources-tools/resources/securing-wireless-networks) – Best practices for home Wi‑Fi setup and router configuration
Key Takeaway
The most important thing to remember from this article is that this information can change how you think about Electronics.


