When your electronics act up, it’s tempting to panic, restart everything, or assume it’s time to buy a replacement. In reality, many “serious” issues come down to loose cables, clogged vents, or simple settings gone wrong. This guide walks you through five common electronic problems and shows you, step by step, how to fix them safely at home—before spending money on a new device or a repair shop visit.
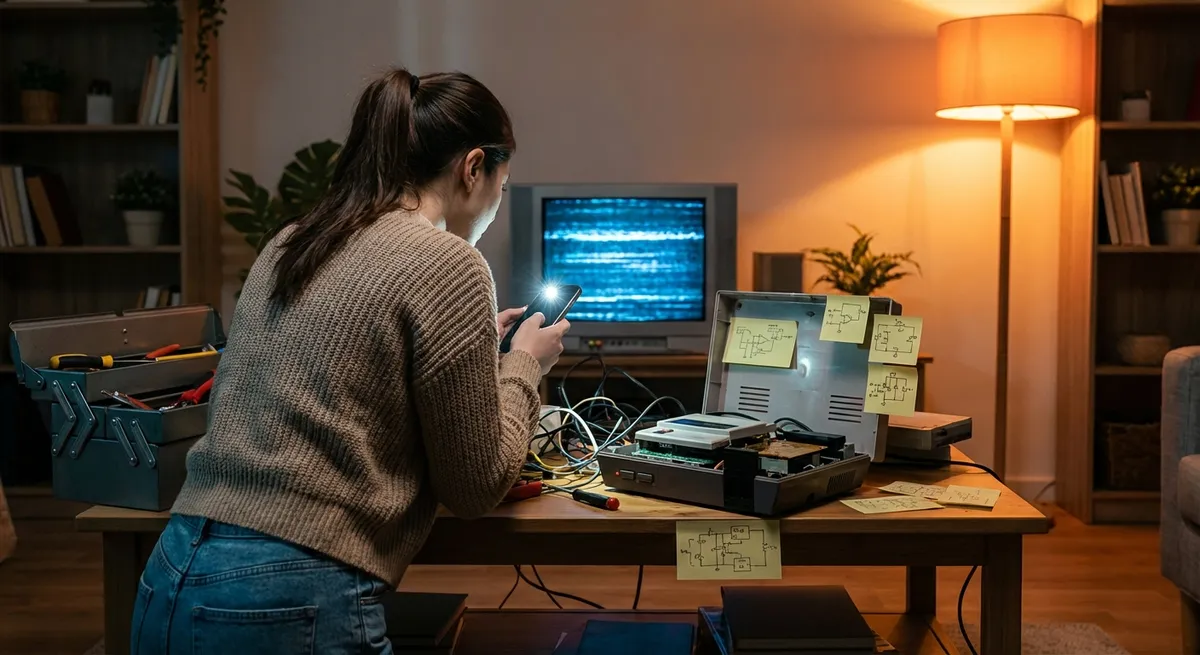
1. TV Won’t Turn On (or Has No Signal)
Modern TVs are picky about power and input settings. Before you assume it’s dead, run through this quick recovery process.
Step‑by‑step fix
Check the power source
- Make sure the TV’s power cable is fully seated in the wall outlet and the TV. - Test the outlet with a lamp or phone charger to ensure it has power. - If it’s on a power strip, press the strip’s reset or on/off button and verify the strip is working.
Look for a standby light
- Most TVs have a small LED (red, white, or blue) when plugged in. - If there’s no light at all: - Try a different outlet. - Try a different power cable if it’s removable. - If still dead, the internal power board may be faulty—time to call a professional.
Do a power reset
- Unplug the TV from the wall. - Hold the TV’s physical power button (on the frame, not the remote) for 10–15 seconds. - Wait 1–2 minutes, then plug it back in and try turning it on.
Fix “No Signal” or input issues
- Press the Input or Source button on your remote (or TV) and cycle through HDMI 1, HDMI 2, etc. - Verify the device (cable box, game console, streaming stick) is: - Turned on. - Firmly connected with the HDMI cable. - Swap the HDMI cable or try a different HDMI port on the TV.
Check for backlight problems
- Turn the TV on in a dark room. - Shine a flashlight at an angle onto the screen. - If you can faintly see images, the backlight may be failing—this usually needs a technician, but at least you know the TV isn’t “dead,” just dim.
2. Laptop Overheating, Loud Fan, or Sudden Shutdowns
Overheating can shorten your laptop’s life and cause surprise shutdowns. Dust, poor airflow, and heavy apps are usually to blame.
Step‑by‑step fix
Give it breathing room
- Use the laptop on a hard, flat surface (desk or table), not on beds or couches. - Lift the rear slightly with a book or stand to improve airflow to the vents.
Clean the vents safely
- Shut down the laptop and unplug the charger. - If the battery is removable, remove it. - Use a can of compressed air: - Short bursts into side and bottom vents. - Keep the nozzle a few inches away to avoid moisture. - Avoid opening the case unless your warranty allows and you’re comfortable doing it.
Reduce background load
- Open Task Manager (Windows) or Activity Monitor (macOS). - Sort by CPU usage and close apps using a lot of resources that you don’t need. - Disable unnecessary startup apps: - Windows: Task Manager → Startup tab. - macOS: System Settings → General → Login Items.
Check for software or driver issues
- Run OS updates (Windows Update or macOS Software Update). - Update graphics drivers from the laptop manufacturer’s support site. - Scan for malware, which can quietly max out your CPU.
Use cooling assist
- Consider a laptop cooling pad with fans. - If the laptop still overheats and shuts down after all this, the internal thermal paste or fan may need service—contact a repair center.
3. Phone Won’t Charge or Charges Very Slowly
A phone that refuses to charge usually has either a dirty port, a bad cable, or a failing charger—often all fixable at home.
Step‑by‑step fix
Inspect the charging cable and adapter
- Look for fraying, kinks, or exposed wires on the cable. - Try a different known‑good cable and charger. - Test your charger with another phone if possible.
Clean the charging port carefully
- Power off the phone. - Shine a flashlight into the charging port—lint and dust are common. - Use: - A wooden or plastic toothpick, or - A soft, dry brush (like a small paintbrush). - Gently scrape and brush out debris—do not use metal tools.
Check for moisture warning (especially on newer phones)
- If the phone displays a “moisture detected” message: - Unplug the cable. - Turn the phone off. - Let it dry in a cool, dry room for several hours. - Do not use a hairdryer or direct heat.
Try different power sources
- Plug into a wall outlet, not a laptop USB port. - Avoid cheap or unbranded adapters—stick to original or certified chargers (MFi for Apple, or manufacturer‑approved for Android).
Check software and battery health
- Restart the phone. - Update the operating system if updates are available. - On some phones, you can check battery health under Settings (e.g., iPhone: Settings → Battery → Battery Health). - If the phone only charges when held at a certain angle, the port may be loose—this typically needs professional repair.
4. Wi‑Fi Is Connected but the Internet Is Slow or Drops Out
Laggy streaming, buffering, and random disconnects are often fixable without calling your provider.
Step‑by‑step fix
Quick reset routine
- Unplug your modem and router from power. - Wait 30–60 seconds. - Plug in the modem first; wait until all lights stabilize. - Then plug in the router; wait a few minutes and test again.
Check how many devices are active
- Disconnect devices you’re not using (old tablets, smart TVs, consoles). - Pause large downloads or game updates. - Test your speed at [speedtest.net](https://www.speedtest.net) on a single device close to the router.
Improve router placement
- Place the router in a central, open location—not in a cabinet, corner, or behind a TV. - Elevate it on a shelf or table. - Keep it away from thick walls, microwaves, and cordless phone bases.
Change the Wi‑Fi channel or band
- Log in to your router (check the label on the router for the IP and login details). - Switch between 2.4 GHz and 5 GHz bands: - 2.4 GHz: better range, slower speeds. - 5 GHz: faster, but shorter range. - Try a less crowded channel if your router allows manual channel selection.
Bypass and isolate
- Connect a laptop directly to the modem with an Ethernet cable. - Test your speed again: - If wired speed is fine but Wi‑Fi is poor, your router is the likely culprit. - If wired speed is also slow, contact your internet provider.
5. Bluetooth Headphones Won’t Connect or Keep Cutting Out
Bluetooth issues usually come from pairing problems, interference, or outdated settings.
Step‑by‑step fix
Start with a clean pairing
- On your phone or laptop, forget/remove the headphones from the Bluetooth device list. - Turn Bluetooth off and back on. - Power off the headphones.
Reset the headphones
- Most Bluetooth headphones have a reset combo (e.g., hold Power + Volume Down for 10 seconds). - Check the manual or manufacturer’s website for the exact method. - After reset, put them into pairing mode (usually holding the power button until a light flashes).
Re‑pair the connection
- Enable Bluetooth on your device. - Select the headphones when they appear in the device list. - If prompted, accept pairing and any permissions.
Reduce interference and distance
- Stay within 1–3 meters (3–10 feet) for testing. - Move away from: - Microwaves - Wi‑Fi routers - Other Bluetooth devices - Put your phone in your front pocket or in clear line of sight when walking.
Check for firmware or app updates
- Some brands (Sony, Bose, Apple, Samsung) offer apps to update headphone firmware. - Install updates to fix known connection bugs. - If they still drop with multiple devices, the internal Bluetooth radio might be failing—contact support or a repair service.
Conclusion
Most everyday electronic “emergencies” can be turned into quick repair wins with a structured approach: check power, inspect connections, clean, reset, and update. By working through these five step‑by‑step solutions—TV power issues, laptop overheating, phone charging problems, Wi‑Fi instability, and Bluetooth glitches—you can often restore performance without replacing anything.
If you run through these steps and the problem doesn’t budge, that’s your signal it might be a hardware failure instead of a quick fix. At that point, getting a professional diagnosis makes more sense than endless trial and error. But in many cases, a few minutes of targeted troubleshooting is all it takes to get your electronics back on track.
Sources
- [Federal Trade Commission – Electronics and Appliances: Tips for Buying and Repairing](https://www.consumer.ftc.gov/articles/electronics-and-appliances) – Guidance on dealing with electronics issues, repairs, and warranties
- [Apple Support – If your iPhone or iPod touch won’t charge](https://support.apple.com/en-us/HT201569) – Official instructions for troubleshooting iPhone charging problems
- [Microsoft Support – Troubleshoot blue screen errors and device performance](https://support.microsoft.com/en-us/windows/troubleshoot-blue-screen-errors-and-device-performance-issues-efc0a46a-7c66-76f5-0a4d-ecba1c49b41f) – Addresses overheating, performance, and system stability issues on Windows
- [Samsung – How to fix Wi-Fi connection issues](https://www.samsung.com/us/support/troubleshooting/TSG01001559/) – Practical router and Wi‑Fi troubleshooting steps from a major manufacturer
- [Bose – Resolving Bluetooth connection issues](https://www.bose.com/en_us/support/articles/HC2480/productCodes/headphones/article.html) – Detailed advice on Bluetooth pairing and connection stability for wireless headphones
Key Takeaway
The most important thing to remember from this article is that this information can change how you think about Electronics.


