When a gadget suddenly stops working, most people jump straight to “I need a new one.” In reality, many common electronics issues can be solved in minutes with basic tools and a calm, methodical approach. This guide walks you through five practical, step‑by‑step fixes you can safely try before paying for a repair or replacing your device.
Safety First: What To Do Before Any Electronic Fix
Before you open, poke, or press anything, set yourself up to work safely and effectively.
Power down the device
Always turn the device off. If it has a removable battery, take it out. For plug‑in devices, unplug from the wall, not just from an extension cord or surge protector.
Discharge and de‑static
Static electricity can damage sensitive components. Touch a metal object (like a table leg or radiator) before handling electronics. Avoid working on carpets if possible.
Work in a clear, dry space
Use a clean, flat surface with good lighting. Keep drinks and liquids away. Lay down a towel or mat so small screws don’t roll away.
Gather basic tools
A small toolkit will solve most home electronics issues: - Precision screwdriver set (with Phillips, flat, and Torx bits) - Plastic pry tools or guitar picks - Isopropyl alcohol (≥90%) and cotton swabs - Microfiber cloth - Compressed air can - Zip bags or cups to hold screws
Know when to stop
If you smell burning, see swollen/bulging batteries, or notice exposed wiring, do not keep experimenting. Unplug immediately and consult a professional.
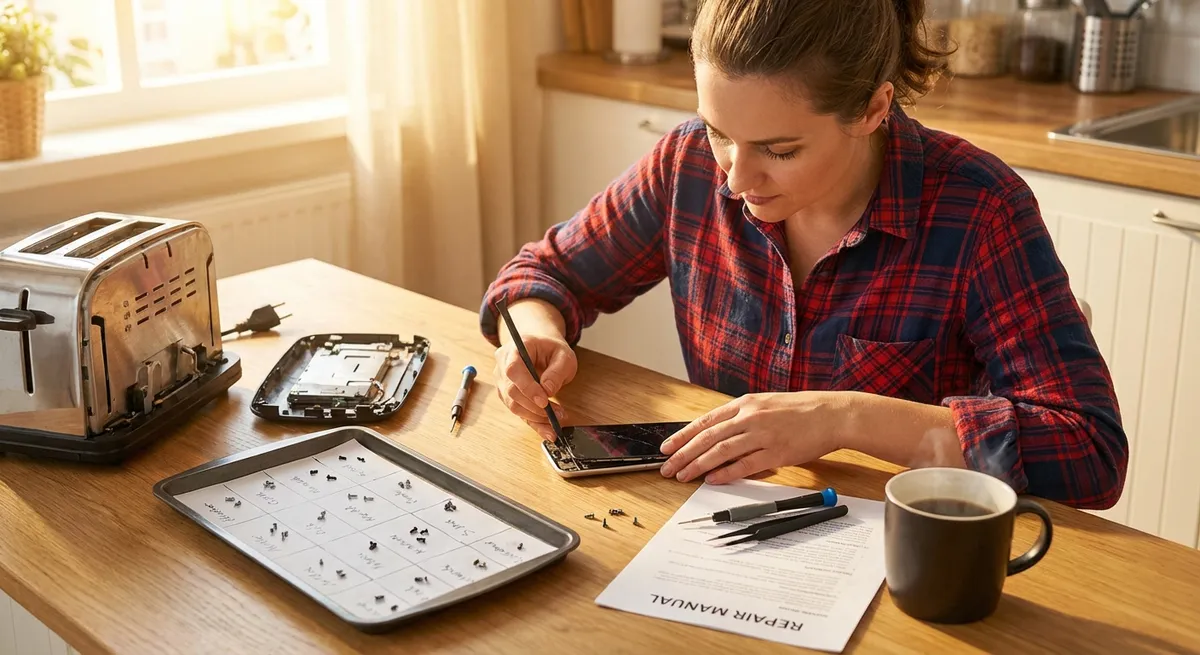
Solution 1: Revive a Phone That Won’t Charge Properly
A phone that charges only at certain angles or very slowly often has a dirty or partially blocked charging port, or a loose cable—not necessarily a dead battery.
Step‑by‑step:
Test the outlet and adapter first
- Try another wall outlet. - Test your charger with another device. - Try a known‑good cable and adapter with your phone.
Visually inspect the port
- Use a flashlight to look into the charging port. - Check for lint, dust, or bent pins.
Remove debris safely
- Power the phone off. - Use a wooden or plastic toothpick (not metal) to gently lift lint out of the port. - Blow short bursts of compressed air into the port from an angle. - Avoid inserting anything metal or applying excessive force.
Clean the connector area
- If you see sticky residue around the port, dampen a cotton swab with isopropyl alcohol (not dripping) and gently wipe the outer area—do not flood the port. - Let it dry for at least 10 minutes.
Retry with a quality cable
- Plug into a high‑quality, undamaged cable. - Check if the connection now feels snug and if charging is stable without needing to wiggle the plug.
Check for software or battery issues
- Restart the phone. - If available, check battery health in settings (many phones offer this). - If the battery drains extremely fast or the phone gets hot while charging, a battery replacement may be needed.
When to seek professional help:
- Bent or missing pins in the port
- Port feels loose or wobbly inside the phone
- Phone gets very hot while charging or emits a smell
Solution 2: Fix a Laptop That Overheats or Shuts Down
Laptops that overheat, run loudly, or suddenly shut off are often suffering from dust buildup or poor airflow.
Step‑by‑step:
Check for basic airflow issues
- Make sure the laptop is on a hard surface, not a bed, pillow, or couch. - Avoid blocking vents on the sides, back, or bottom.
Restart and close heavy apps
- Save your work and restart. - After booting, close apps you don’t need, especially games or video editors. - On Windows, check Task Manager; on macOS, check Activity Monitor for CPU‑heavy processes.
Clean external vents
- Power down and unplug the laptop. - Use compressed air to blow into the vents from the outside in short bursts. - Do not hold the fan in place with a tool while blowing; simply use brief bursts to avoid overspinning the fan.
Inspect the bottom cover (if accessible)
- If your laptop allows it and you’re comfortable, remove the bottom panel using the correct screwdriver. - Blow out dust from fans and heat sinks using compressed air (again, short bursts). - Avoid touching components directly.
Improve cooling conditions
- Consider using a laptop cooling pad. - Elevate the rear of the laptop slightly with a stand to improve airflow.
Update your system and drivers
- Install the latest OS updates. - Visit your laptop manufacturer’s website and update BIOS/firmware and system drivers if recommended.
When to seek professional help:
- Laptop still overheats and shuts down after cleaning
- You’re uncomfortable opening the case
- Fan makes grinding or rattling noises (may require replacement)
Solution 3: Restore a TV With No Picture (But Sound Works)
A TV with sound but no picture can be caused by source issues, settings, or a failing backlight. Work from simplest to more involved checks.
Step‑by‑step:
Confirm the source
- Make sure the correct HDMI/input is selected. - Try a different HDMI port on the TV. - Test another device (game console, streaming stick) on the TV. - Test the original device on another TV if possible.
Check cables and connections
- Power everything off. - Unplug the HDMI cable on both ends, inspect for damage, and plug it back in firmly. - Try a different HDMI cable.
Adjust brightness and picture settings
- With the TV on, use the remote to open the menu. - Increase brightness and backlight settings. - Ensure any power‑saving mode is disabled, as it can sometimes dim the backlight dramatically.
Test with built‑in features
- Use the TV’s menu or built‑in apps. - If the menu and apps show clearly, the panel/backlight is likely fine and the issue is with the external source or cable.
Look for a faint image
- In a dark room, shine a flashlight at an angle on the screen while sound is playing. - If you see a faint picture, the backlight may have failed.
Perform a power reset
- Turn the TV off and unplug it from the wall. - Hold the power button on the TV (not the remote) for 10–15 seconds, if available. - Leave it unplugged for 5–10 minutes, then plug back in and turn on.
When to seek professional help:
- Faint image visible only with a flashlight (likely backlight failure)
- TV shows vertical or horizontal lines regardless of input
- Screen is cracked or physically damaged
Solution 4: Recover a Wi‑Fi Router That Keeps Dropping Connection
Frequent disconnects don’t always mean you need a new router. They can be caused by interference, overheating, or simple misconfiguration.
Step‑by‑step:
Confirm the problem is the router, not the device
- Check if all devices (phone, laptop, tablet) lose connection, or just one. - If only one device has issues, remove and re‑add the network on that device.
Power cycle the modem and router
- Unplug both modem and router from power. - Wait 30 seconds. - Plug in the modem first and wait until all lights stabilize. - Plug in the router and wait another 1–2 minutes.
Relocate the router for better signal
- Place the router in a central, elevated, open location. - Avoid placing it inside cabinets or next to thick walls, microwaves, or cordless phones.
Change the Wi‑Fi channel or band
- Log into the router’s admin page (usually listed on a sticker or the manual). - Change the 2.4 GHz channel to 1, 6, or 11 (these are non‑overlapping). - If your devices support it, enable or move more devices to 5 GHz for less interference.
Update firmware
- Check the router manufacturer’s website or admin interface for firmware updates. - Apply updates, then restart the router once more.
Check for overheating
- Make sure vents aren’t blocked and the router isn’t sitting on something soft. - If it feels hot to the touch, elevate it slightly and ensure good airflow.
When to seek professional help or replacement:
- Router is older than 5–7 years and frequently drops or slows
- You see repeated reboot cycles or flashing error lights
- Firmware won’t update or the router interface is inaccessible
Solution 5: Bring a “Dead” Remote Control Back to Life
A non‑responsive remote is often fixable with simple cleaning and battery maintenance.
Step‑by‑step:
Check the basics
- Confirm new batteries are oriented correctly (+/–). - Try a fresh set of high‑quality batteries to rule out power issues.
Test if the remote is sending a signal
- Point the remote at your smartphone camera. - Press a button while looking at the camera preview; most IR remotes will show a blinking light on screen when working. - If nothing blinks, the remote likely isn’t transmitting.
Clean battery contacts
- Remove the batteries. - Inspect contacts for white/green corrosion. - Lightly scrub the contacts with a cotton swab dipped in isopropyl alcohol. - Let dry fully before reinstalling batteries.
Clean the buttons and case
- Wipe the outer surface with a lightly damp microfiber cloth (water or minimal alcohol). - If some buttons stick or don’t respond, gently tap the remote against your palm to dislodge dust. - For deeper cleaning: - Remove screws (often hidden in the battery compartment). - Carefully separate the case using a plastic pry tool. - Wipe the rubber keypad and circuit board gently with alcohol and a lint‑free cloth. - Let dry fully, then reassemble.
Re‑pair or reset the remote (for smart devices)
- For TVs or streaming boxes, check the settings menu for “Remote” or “Accessories.” - Follow on‑screen steps to pair or reset the remote connection. - Some remotes have a small reset or pairing button inside the battery compartment.
When to replace the remote:
- No IR light visible through your phone camera after new batteries and cleaning
- Cracked casing or obvious water damage
- Buttons physically torn or missing
Conclusion
Most everyday electronics problems look worse than they are. By starting with safe, methodical checks—power, connections, cleanliness, and basic settings—you can often bring phones, laptops, TVs, routers, and remotes back from the brink without specialized skills. When you do hit a hard limit, you’ll at least know exactly what you’ve tried, which makes any professional repair faster and more cost‑effective.
Before you give up on a “dead” gadget, run through these steps. You may be a simple cleaning, cable swap, or setting adjustment away from a fully working device.
Sources
- [Apple Support – If your iPhone or iPad won’t charge](https://support.apple.com/en-us/HT201569) – Official guidance on diagnosing and resolving common charging issues.
- [Microsoft – How to manage overheating and loud fan issues on a laptop](https://support.microsoft.com/en-us/windows/reducing-fan-noise-and-heat-in-your-laptop-83b84670-6d88-df79-5f39-4187e2ed8c26) – Practical tips on laptop cooling and performance.
- [Samsung – Troubleshooting picture issues on your TV](https://www.samsung.com/us/support/troubleshooting/TSG01001012/) – Step‑by‑step checks for TVs with no or poor picture.
- [FCC – Interference and your home electronics](https://www.fcc.gov/consumers/guides/interference-home-electronics) – Explains how wireless interference affects routers and other devices.
- [Harvard University – Electronics Workbench Safety Guidelines](https://ehs.harvard.edu/programs/electrical-safety) – General safety principles for working with electrical and electronic equipment.
Key Takeaway
The most important thing to remember from this article is that this information can change how you think about Electronics.


