If every small issue in your home turns into a service call, you’re wasting money and time. Many “call the landlord” problems are actually safe, fixable jobs you can handle yourself with a few basic tools and a plan. This guide walks you through five core household repairs in clear, step‑by‑step detail so you can solve them quickly, safely, and confidently.
1. Silencing a Dripping Faucet
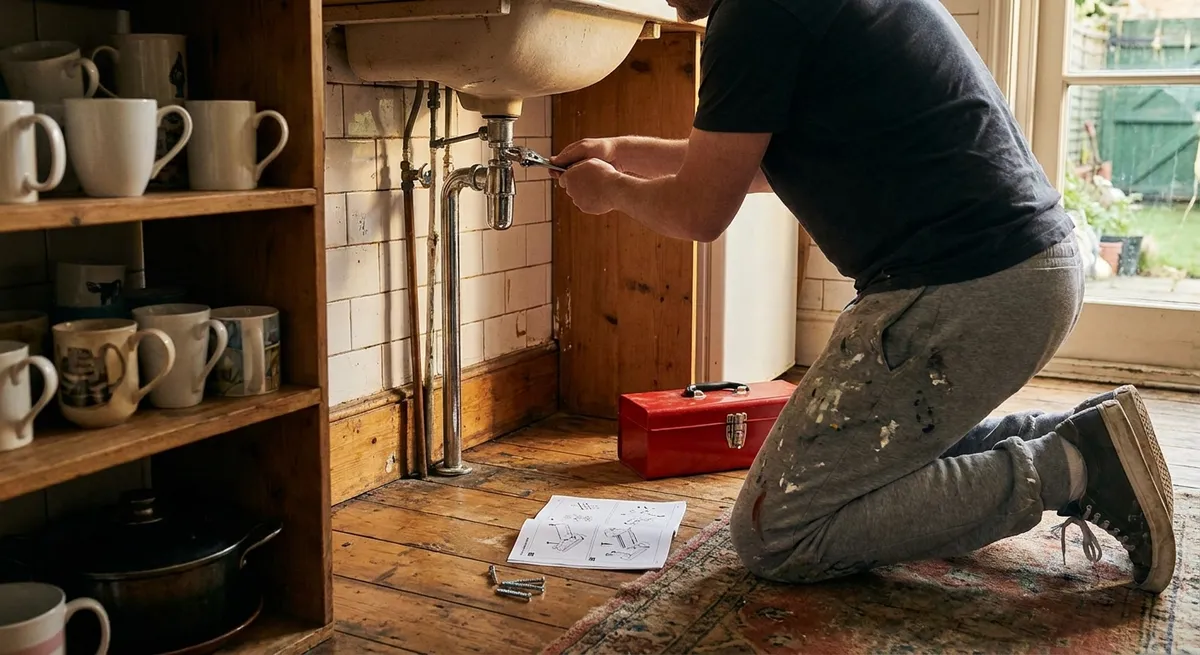
A dripping faucet wastes water and slowly drives you crazy. In most cases, the fix is a worn-out cartridge, washer, or O‑ring inside the handle. The process is similar for many common sink faucets.
Tools & materials
- Adjustable wrench or socket set
- Phillips and flathead screwdrivers
- Replacement cartridge/washer/O‑rings (match to your faucet model)
- Plumber’s grease
- Old towel or rag
Step‑by‑step
Shut off the water supply
- Look under the sink for two shutoff valves (hot and cold). - Turn them clockwise until they stop. Open the faucet to release pressure.
Plug the drain
- Use a sink plug or a rag so you don’t lose small screws or parts.
Remove the handle
- Pop off any decorative cap with a flathead screwdriver to reveal the screw. - Unscrew the handle and pull it off. You may need to gently wiggle it.
Access the cartridge or stem
- Under the handle you’ll see a nut or retaining clip. - Use a wrench to loosen the nut or remove the clip. - Pull out the cartridge/stem straight up; note its orientation for reassembly.
Inspect and replace parts
- Check O‑rings and rubber seals for cracks or flattening. - If it’s a compression faucet, the rubber washer at the bottom of the stem is usually the culprit. - Replace with identical new parts; take old pieces to the hardware store to match size and type.
Apply plumber’s grease
- Lightly coat O‑rings and moving surfaces. This improves sealing and makes future repairs easier.
Reassemble the faucet
- Insert the new or refurbished cartridge/stem in the same orientation. - Tighten the retaining nut/snug the clip (firm, but don’t overtighten). - Reattach the handle and decorative cap.
Turn the water back on and test
- Slowly open the shutoff valves under the sink. - Turn the faucet on and off several times. - Check for drips and look under the sink for leaks at connections.
When to stop and call a pro:
If your shutoff valves are corroded or won’t turn, or if the body of the faucet itself is cracked, bring in a plumber.
2. Unclogging a Slow or Backed‑Up Sink (Without Damaging Pipes)
Chemical drain cleaners can damage pipes and are tough on indoor air. You can usually clear a clog mechanically in under 30 minutes.
Tools & materials
- Plunger (cup-style for sinks)
- Bucket
- Adjustable pliers
- Old toothbrush or small nylon brush
- Zip‑it style plastic drain tool or small hand auger (optional)
- Rubber gloves
Step‑by‑step
Clear and prepare the area
- Remove everything from under the sink. Put a bucket underneath the P‑trap (the U-shaped pipe). - Wear gloves; sink gunk is exactly as gross as you imagine.
Try plunging first
- Block any overflow holes with a wet rag. - Fill the sink with a few inches of warm water. - Place the plunger firmly over the drain and plunge in strong, steady motions for 20–30 seconds. - Lift quickly to see if the water drains. Repeat a few times if needed.
If still slow, clean the stopper and drain opening
- In bathroom sinks, hair around the stopper is a top cause. - Remove the stopper (often a small rod/nut combination under the sink; loosen, slide out rod, then lift stopper). - Use a plastic drain tool or your fingers (with gloves) to pull out hair and debris. - Scrub around the opening with an old toothbrush. Rinse with hot water.
Remove and clean the P‑trap
- With the bucket in place, use pliers to loosen the slip nuts on either side of the P‑trap. - Carefully lower the trap and empty its contents into the bucket. - Clean out sludge using the brush. Ensure the inside is clear. - If needed, run a small hand auger into the pipe going into the wall to break up further clogs.
Reassemble and test
- Reinstall the P‑trap, hand‑tightening the slip nuts first, then giving them a gentle snug with pliers (don’t overtighten). - Run hot water for a few minutes and check for leaks at all joints. Tighten slightly if there’s a drip.
When to stop and call a pro:
If you hear gurgling in other fixtures, multiple drains are backing up, or there’s sewage smell or water, you may have a main line issue.
3. Fixing a Toilet That Won’t Stop Running
A running toilet can waste hundreds of gallons of water a day. The good news: most fixes involve adjusting or replacing a couple of cheap internal parts.
Tools & materials
- Adjustable wrench or pliers
- Replacement flapper (match style and size)
- Optional: replacement fill valve assembly
- Towel or sponge
Step‑by‑step
Remove the tank lid and observe
- Flush and watch what happens. - Common issues: - Flapper not sealing properly - Water level too high and flowing into overflow tube - Fill valve not shutting off
Check the flapper first
- Turn off water at the shutoff valve behind the toilet (clockwise). - Flush to empty most of the water from the tank. - Inspect the rubber flapper for warping, slime, or deterioration. - Ensure the chain has a bit of slack; too tight and it won’t let the flapper fully close.
Replace the flapper if needed
- Unhook the chain from the flush handle. - Detach the flapper from the pegs on the overflow tube. - Attach the new flapper, then hook the chain back up with slight slack (1–2 chain links).
Adjust the water level
- Turn the water back on and let the tank refill. - The water line should sit about 1 inch below the top of the overflow tube. - For float‑cup fill valves, adjust the metal or plastic screw on top, or slide the float up/down the rod. - For float‑ball types, gently bend the float arm downward so it shuts off earlier.
Replace the fill valve if it still runs
- Turn off water and drain the tank. - Disconnect the water supply line under the tank with a wrench. - Unscrew the old fill valve locknut from under the tank and lift out the valve. - Insert the new valve per instructions, adjust the height, and tighten the locknut. - Reattach the water line, turn water on, and adjust the water level.
Final test
- Flush several times, watching for: - Proper tank refill level - No water entering the overflow tube - Quiet shutoff after refilling
When to stop and call a pro:
If the tank or bowl has visible cracks, the shutoff valve is leaking, or you’re uncomfortable loosening the supply line.
4. Resetting Power on a Dead Outlet (Safely)
When an outlet suddenly stops working, you may not need an electrician. Often, a tripped GFCI or breaker is the problem.
Tools & materials
- Plug‑in device (lamp or phone charger)
- Flashlight
- Access to your electrical panel
- Non‑contact voltage tester (recommended)
Step‑by‑step
Confirm the outlet is dead
- Plug in a lamp or charger you know works. - If it doesn’t power on, try another outlet to ensure the device itself isn’t faulty.
Look for a nearby GFCI outlet
- GFCI outlets have “Test” and “Reset” buttons and often protect several regular outlets. - Check bathrooms, kitchen, laundry, garage, basement, and outdoor outlets on the same wall or area.
Reset the GFCI
- Press the “Reset” button firmly until it clicks. - Test your dead outlet again. If it works, you’re done. - If the GFCI won’t reset or immediately trips again, unplug everything on that circuit and try once more.
Check the breaker panel
- Locate your home’s main electrical panel (often in a basement, hallway, garage, or utility room). - Open the panel and look for any breaker switch that’s in the middle or fully “off” position. - To reset: flip it fully to “off,” then firmly back to “on.”
Retest the outlet
- Use your lamp/charger again. - If it now works and doesn’t trip again, monitor it over the next day or two.
Use a non-contact tester (if available)
- Turn breaker off, remove the outlet cover plate, and gently pull the outlet forward (without touching bare wires). - Use the tester to confirm whether wires are live. If there is no power at the wires but the breaker and GFCI are fine, there may be a wiring fault upstream.
Safety line you don’t cross:
If breakers keep tripping, you feel heat from the outlet or smell burning, or you discover loose or damaged wiring, stop immediately and call a licensed electrician.
5. Sealing a Drafty Window to Cut Energy Waste
Drafty windows make rooms uncomfortable and drive up energy bills. You can improve comfort significantly with simple sealing techniques—no window replacement required.
Tools & materials
- Utility knife
- Caulk gun
- Exterior‑grade caulk (for outside gaps)
- Interior latex caulk (for inside trim gaps)
- Weatherstripping (adhesive foam or V-strip)
- Rubbing alcohol or mild cleaner
- Paper towels or rags
Step‑by‑step
Find the drafts
- On a windy day, slowly move your hand around the window frame and sash; feel for cold air. - You can also use a lit incense stick (careful with curtains): smoke movement shows where air leaks.
Clean the surfaces
- Wipe down window frames and the areas you’ll seal with a mild cleaner. - Let them dry completely—caulk and weatherstripping don’t adhere to dirty or damp surfaces.
Seal gaps around interior trim
- Use paintable interior caulk where the trim meets the wall or window frame. - Cut the caulk tube tip at a 45° angle for a small bead. - Apply a continuous bead along gaps, then smooth with a damp finger or caulk tool. - Wipe away excess with a damp rag.
Add weatherstripping where sashes meet
- Open the window and identify where the moving sash meets the frame when closed. - Measure and cut adhesive foam or V‑strip to length. - Apply along the meeting surfaces, pressing firmly for good adhesion. - Test closing the window; it should close fully without excessive force.
Seal exterior cracks (if safely accessible)
- From the outside, look for visible gaps where the window frame meets siding or masonry. - Use exterior‑grade caulk to fill these gaps, again with a small, continuous bead. - Avoid sealing weep holes or intended drainage paths at the bottom of frames.
Optional: use a window insulation kit in extreme weather
- In very drafty rooms, a clear plastic window film kit can add an extra air barrier. - Follow the package instructions: apply double‑sided tape, attach film, then shrink with a hair dryer.
When to stop and call a pro:
If the window frame is rotting, noticeably pulling away from the wall, or won’t open/close properly, you may need structural repair or replacement.
Conclusion
Most “small” problems around your home follow predictable patterns—and that’s what makes them repairable. When you learn how to shut off water, identify basic plumbing parts, reset electrical protection devices safely, and seal obvious gaps, you turn recurring annoyances into quick jobs you can control.
Start with one repair from this list the next time it appears instead of reaching for the phone. Each successful fix builds your confidence, cuts your costs, and makes your home more comfortable and reliable—exactly what Repair Now is all about.
Sources
- [U.S. Environmental Protection Agency – Fix a Leak](https://www.epa.gov/watersense/fix-leak-week) – Data and guidance on household water leaks, including faucets and toilets
- [Family Handyman – How to Fix a Leaky Faucet](https://www.familyhandyman.com/project/how-to-repair-a-compression-faucet/) – Detailed faucet repair techniques and part identification
- [Energy.gov – Air Sealing Your Home](https://www.energy.gov/energysaver/weatherize/air-sealing-your-home) – Official U.S. Department of Energy advice on sealing drafts and improving efficiency
- [International Association of Certified Home Inspectors – Common Drain Problems](https://www.nachi.org/sink-drain.htm) – Overview of typical sink drain issues and causes
- [Occupational Safety and Health Administration (OSHA) – Basic Electrical Safety](https://www.osha.gov/sites/default/files/publications/electrical_safety.pdf) – Safety principles relevant to working around home electrical systems
Key Takeaway
The most important thing to remember from this article is that this information can change how you think about Household Repairs.


