Most “simple” home issues turn into weeks of waiting for a repair person or landlord to show up. The truth: a lot of everyday problems are totally fixable with basic tools, a bit of patience, and clear instructions. This guide walks you through five practical household repairs you can safely handle yourself—without guesswork, drama, or wrecking your security deposit.
1. Silencing a Dripping Faucet
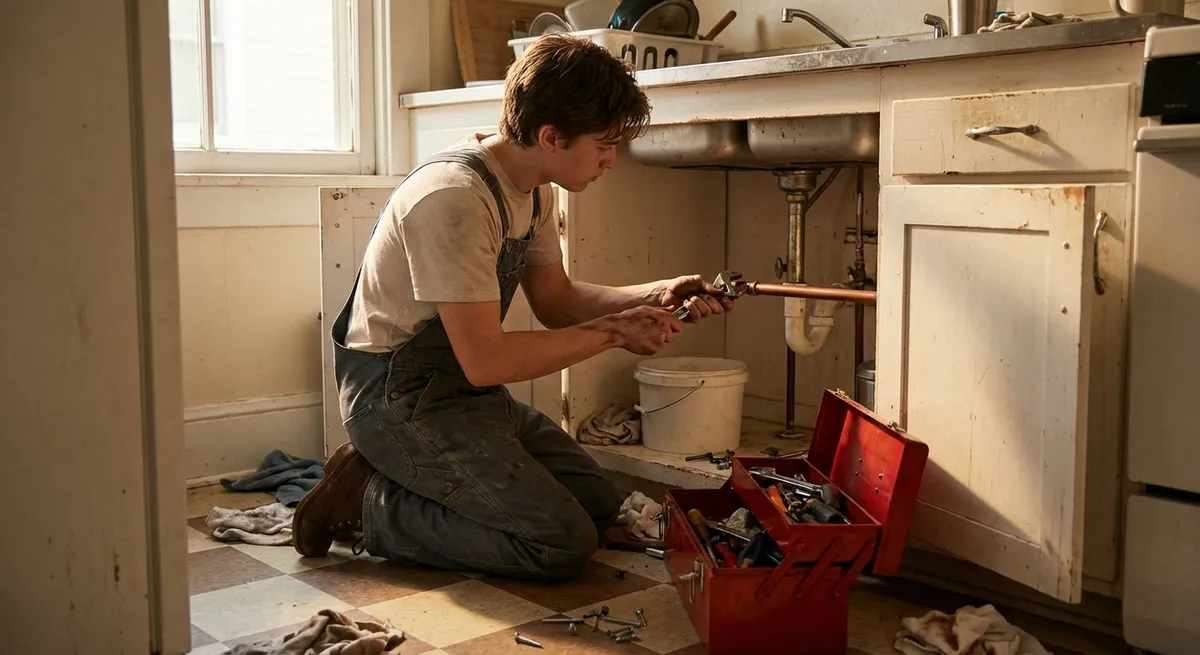
A constant drip isn’t just annoying—it wastes water and money. In many cases, the culprit is a worn-out washer or cartridge inside the faucet.
What you’ll need
- Adjustable wrench or basin wrench
- Flathead and Phillips screwdriver
- Replacement washer or cartridge (match to your faucet brand/model)
- Plumber’s grease (optional but helpful)
- Rag or small towel
Step-by-step
Shut off the water supply
Look under the sink for two shutoff valves (hot and cold). Turn them clockwise until snug. If there are no valves, shut off the main water supply to your home.
Plug the sink drain
Use the sink stopper or a rag so you don’t lose small screws or parts down the drain.
Remove the handle
- Pop off any decorative cap on top or side of the handle. - Unscrew the handle screw and gently lift off the handle.
Access the cartridge or stem
- For single-handle faucets: remove any retaining clip or nut, then pull the cartridge straight up. - For two-handle faucets: unscrew the packing nut and remove the stem.
Inspect and replace worn parts
- Look for cracked, brittle, or flattened rubber washers or O-rings. - Take the old parts to a hardware store to match exact replacements. - Lightly coat new O-rings/washer with plumber’s grease before installing.
Reassemble in reverse order
Put everything back exactly as it came apart. Don’t overtighten nuts—snug is enough.
Turn water back on slowly
Open shutoff valves and test the faucet. If it still drips, tighten the cartridge or stem slightly and test again.
When to call a pro: If the faucet body is cracked, heavily corroded, or you can’t get the old parts out without damaging it, you’re better off having it professionally replaced.
2. Fixing a Toilet That Won’t Stop Running
A running toilet can waste hundreds of gallons a day, but the fix is usually simple: adjust or replace parts in the tank.
What you’ll need
- Adjustable wrench or pliers
- Replacement flapper or fill valve kit (if needed)
- Towel or sponge
Step-by-step
Remove the tank lid and look inside
Flush once and watch how the water refills. Identify these parts: - Flapper: rubber piece at the bottom that lifts when you flush. - Fill valve: tall mechanism where water enters the tank. - Float: controls when the water shuts off.
Check the flapper first
- If it’s warped, deteriorated, or doesn’t sit flat, it’s likely the problem. - Turn off water at the shutoff valve behind the toilet. - Unhook the old flapper from the overflow tube and chain, then install the new one.
Adjust the chain length
The chain between the handle and flapper should have a slight slack—not so tight it holds the flapper open, not so loose it can’t lift. Adjust as needed.
Set the water level
- Look for a marked waterline inside the tank or set the level about 1 inch below the top of the overflow tube. - On newer fill valves, adjust the float height using the screw or sliding clip.
Replace the fill valve if needed
If water is constantly flowing into the overflow tube: - Turn off water and flush to empty the tank. - Disconnect the fill line and unscrew the locknut under the tank. - Remove the old valve and install the new one following package instructions.
Turn water back on and test
Let the tank refill. Listen for continuous running. If it’s quiet and the water stops at the right level, you’re done.
When to call a pro: If you see cracks in the tank, water leaking at the base of the toilet, or you’re uncomfortable disconnecting the water line.
3. Unclogging a Slow Drain Without Harsh Chemicals
Slow kitchen or bathroom drains are usually caused by buildup, not a serious blockage. You can often clear them safely without pouring chemicals down the pipes.
What you’ll need
- Cup plunger (for sinks/tubs; not a toilet plunger)
- Zip-it style plastic drain snake or small drain auger
- Baking soda and white vinegar (optional)
- Old rag or paper towels
Step-by-step
Remove the stopper or drain cover
- For sinks, unscrew or pull out the stopper. - For tubs/showers, remove screws or pry off the cover.
Physically remove debris
- Use a plastic drain snake: push it down the drain, twist gently, and pull out hair and gunk. - Wipe off debris into the trash, not the sink.
Use a plunger correctly
- Block any overflow holes with a wet rag. - Add a bit of water to cover the drain opening. - Place plunger firmly over the drain and plunge up and down in short, forceful motions 10–15 times. - Lift plunger to see if water drains faster.
Flush with hot (not boiling) water
Run hot tap water for a minute or two to move loosened debris through the pipes.
Optional: Baking soda and vinegar
- Pour about 1/2 cup baking soda into the drain, followed by 1/2–1 cup vinegar. - Let it fizz for 15–20 minutes. - Rinse with hot water again.
Reassemble the drain
Clean and reinstall the stopper or cover.
Avoid: Regular use of harsh chemical drain cleaners—they can damage pipes, especially older ones, and are dangerous if mixed with other cleaners.
When to call a pro: If multiple drains are slow or backing up at once (could be a main line issue), or you notice sewage odors or water backing up in low drains when you run water elsewhere.
4. Patching a Small Hole in Drywall
From door handles to misplaced furniture, small wall damage is common— and fixable. Patching properly makes repainting clean and nearly invisible.
What you’ll need
- Spackle or joint compound
- Putty knife (2–4 inch)
- Fine-grit sandpaper or sanding sponge
- Damp cloth or sponge
- Primer and matching paint
- Self-adhesive patch (for larger holes, about 1–4 inches)
Step-by-step
Prep the area
- Lightly scrape any loose drywall or paint around the hole with the putty knife. - Wipe away dust with a damp cloth and let dry.
For nail/screw holes and small dents
- Apply a small amount of spackle with the putty knife, pressing it into the hole. - Scrape off excess so it’s flush with the wall. - Let it dry according to the product’s instructions.
For larger holes (about 1–4 inches)
- Place a self-adhesive mesh patch over the hole. - Spread joint compound over the patch, feathering the edges into the surrounding wall. - Let dry completely.
Sand smooth
- Lightly sand the patched area until it’s smooth and level with the wall. - Wipe off dust with a clean, damp cloth.
Prime the patch
- Apply primer over the patched area. This prevents the patch from flashing (showing through) after painting. - Allow to dry.
Paint to blend
- Use matching wall paint and a small roller or brush. - Feather the paint slightly beyond the patched area for a smoother blend. - Apply a second coat if needed.
When to call a pro: For large holes (bigger than a dinner plate), cracks that keep returning, or damage near electrical or plumbing lines.
5. Resetting a Tripped Breaker and Restoring Power Safely
If part of your home suddenly loses power, you might not need an electrician—often it’s just a tripped circuit breaker.
What you’ll need
- Flashlight (if it’s dark)
- Dry hands and dry floor around the panel
Step-by-step
Locate your electrical panel
Common spots: basement, garage, hallway, or utility closet. Open the door carefully.
Identify the tripped breaker
- Look for a switch that is in the middle position or slightly off from the others. - Some breakers will show a small red or orange indicator.
Turn off affected devices
- Unplug or switch off lights and devices on the circuit that lost power. - This reduces the load when you reset the breaker.
Reset the breaker correctly
- With one firm motion, push the tripped breaker fully to the OFF position. - Then push it back to the ON position until it clicks.
Test the circuit
- Plug in or turn on one device at a time. - If the breaker trips again immediately, something on that circuit may be overloading it or shorting out.
Reduce load and test again
- Unplug high-draw appliances (space heaters, microwaves, hair dryers) and try resetting once more. - If it still trips, stop troubleshooting and leave it OFF.
Safety rules:
- Never touch the main service lugs or any exposed wires.
- Never reset a breaker repeatedly—this is a sign of a deeper problem.
- You see burn marks, smell burning, or hear crackling from the panel.
- The same breaker trips frequently even with low load.
- Any signs of heat, melting, or buzzing at outlets or switches.
When to call a pro immediately:
Conclusion
You don’t need to be “handy” to solve everyday home problems—you just need clear steps, a bit of caution, and the right expectations. Start with low-risk repairs like a running toilet or slow drain, then build up to tasks like patching drywall or dealing with a dripping faucet. The more you understand how your home works, the less you’ll rely on emergency calls—and the more confident you’ll feel tackling the next issue that pops up.
Share this guide with someone who keeps texting you, “Is this a big problem?” The answer, most of the time: you can handle it.
Sources
- [U.S. Environmental Protection Agency – Fix a Leak](https://www.epa.gov/watersense/fix-leak-week) - Covers the impact of household leaks and basic guidance on finding and fixing common water leaks
- [Energy.gov – Electrical Safety 101](https://www.energy.gov/energysaver/electrical-safety-101) - Government guidance on safe practices around home electrical systems and breaker panels
- [Family Handyman – How to Fix a Leaky Faucet](https://www.familyhandyman.com/project/how-to-fix-a-leaky-faucet/) - Detailed visual walkthroughs of common faucet repairs and parts replacement
- [The Spruce – How to Fix a Running Toilet](https://www.thespruce.com/how-to-fix-a-running-toilet-2718712) - Step-by-step instructions with photos for repairing typical toilet tank issues
- [Home Depot – How to Patch and Repair Drywall](https://www.homedepot.com/c/ah/how-to-patch-drywall/9ba683603be9fa5395fab9053b3e6b6) - Practical guide with illustrations on patching small to medium drywall holes
Key Takeaway
The most important thing to remember from this article is that this information can change how you think about Household Repairs.


