Everyday home issues can snowball into expensive repairs if you ignore them. A small drip becomes water damage, a loose hinge becomes a broken cabinet, and a flickering light can signal a safety problem. This guide walks you through five common household problems with clear, do‑this‑then‑that steps so you can stabilize the situation, fix it properly, and know when it’s time to call a pro.
1. Stop a Dripping Faucet (Without Replacing the Whole Thing)
A dripping faucet wastes water and money, but most leaks come from worn internal parts you can replace in under an hour.
Step 1: Identify Your Faucet Type
Look at the handle setup:
- Single handle (turns left/right for hot/cold) – often a cartridge faucet
- Two handles (separate hot and cold):
- Older models may be compression (you feel resistance as you tighten)
- Newer ones are usually cartridge or ceramic disc
Check the brand name on the faucet body if visible—this helps when buying replacement parts.
Step 2: Shut Off Water and Prepare
- Turn off the hot and cold shutoff valves under the sink (clockwise).
- Turn the faucet on to release pressure.
- Plug the sink drain so you don’t lose small screws.
- Gather tools: adjustable wrench, screwdriver, utility knife, replacement cartridge or washers/O‑rings (take a photo of your faucet before you go to the store).
Step 3: Disassemble the Handle
- Pry off the decorative cap (if present) with a small flat screwdriver.
- Remove the screw under the cap and lift off the handle.
- Unscrew the retaining nut or clip holding the cartridge or stem.
- Gently pull the cartridge/stem straight up and out (note the orientation).
Tip: Take photos at each step so you can reassemble confidently.
Step 4: Replace the Wear Parts
- Cartridge faucet:
- Bring the cartridge to a hardware store and get the exact match.
- Insert the new cartridge in the same position as the old one.
- Compression faucet:
- Unscrew the rubber washer at the base of the stem and replace it.
- Replace any cracked or dried O‑rings on the stem.
Lightly coat O‑rings with plumber’s silicone grease if you have it.
Step 5: Reassemble and Test
- Reinstall the stem or cartridge and secure the retaining nut/clip.
- Reattach the handle and decorative cap.
- Slowly turn water back on at the shutoff valves.
- Turn the faucet on and off a few times and check for drips and leaks under the sink.
Call a pro if: the shutoff valves won’t close, pipes are corroded, or you see water seeping from the faucet base after reassembly.
2. Quiet a Running Toilet and Cut Water Waste
A toilet that keeps running after you flush is usually caused by a worn flapper, misadjusted fill level, or a faulty fill valve. These fixes are straightforward and can dramatically reduce water use.
Step 1: Take Off the Tank Lid and Observe
- Flush the toilet with the lid off.
Watch what happens after the flush:
- Does water keep trickling into the bowl? - Is water flowing into the overflow tube (vertical open pipe)? - Does the fill valve hiss or sputter continuously?
This tells you whether the problem is mainly the flapper (seal) or fill valve (water control).
Step 2: Check and Replace the Flapper
- Turn off the water supply at the valve behind or beside the toilet.
- Flush to drain most of the water from the tank.
- Unhook the flapper from the overflow tube and disconnect the chain from the handle lever.
- Inspect it: if it’s warped, cracked, or stiff, replace it.
Installation:
- Clip the new flapper onto the overflow tube.
- Attach the chain so there’s a slight slack—too tight and it’ll leak, too loose and it won’t flush fully.
- Turn water back on and test.
Step 3: Adjust the Water Level
- Look for the water line mark inside the tank (often near the overflow tube).
Adjust float type:
- Float cup on a vertical rod: squeeze the clip and slide the float up or down. - Float ball on a long rod: gently bend the rod downward to lower the water level or upward to raise it.
Aim for water about 1 inch below the top of the overflow tube.
Step 4: Replace the Fill Valve (If Needed)
If the toilet still runs or the fill valve never fully shuts off:
- Turn off water and flush to empty the tank.
- Place a towel under the tank.
- Under the tank, unscrew the water supply line from the fill valve bottom (have a small bucket ready).
- Inside the tank, unscrew the nut holding the fill valve and lift the old valve out.
- Install the new universal fill valve following the included directions (usually insert, adjust height, tighten nut, reconnect water line).
Step 5: Final Test and Leak Check
- Turn water back on and let the tank fill.
- Listen for continued hissing or running.
- Put a few drops of food coloring into the tank and wait 10–15 minutes without flushing.
- If color appears in the bowl, the flapper still isn’t sealing properly—re‑seat or re‑adjust the chain.
Call a pro if the tank or bowl is cracked, the shutoff valve leaks, or you see water on the floor that’s not from connections you disturbed.
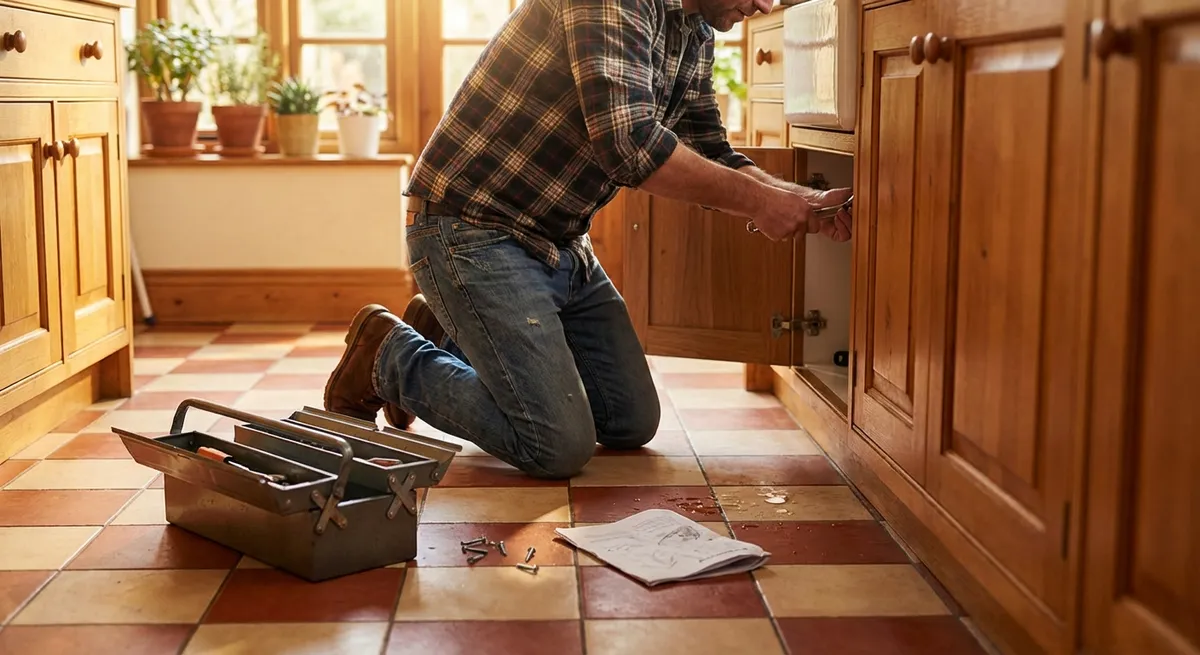
3. Fix a Door That Won’t Close or Keeps Swinging Open
Doors that stick, scrape, or swing by themselves are more than annoyances. They can damage frames and hardware over time. Most issues come from loose hinges, sagging, or minor alignment problems.
Step 1: Diagnose the Problem
Close the door slowly and watch:
- Does it rub at the top, middle, or bottom?
- Is the gap even around the door?
- Does it latch properly or does the latch miss the strike plate?
Knowing where it binds tells you what to adjust.
Step 2: Tighten Hinge Screws
- Open the door fully.
- Use a screwdriver to tighten all hinge screws on the door and frame.
- Focus on the top hinge—loose screws here cause most sagging.
If a screw just spins and won’t tighten:
- Remove it and insert a wooden toothpick or matchstick coated with wood glue into the hole, then reinsert the screw.
- For badly stripped holes, step up to a slightly longer screw that bites into the framing behind the jamb.
Step 3: Adjust Hinge Position (If Still Misaligned)
If the door continues to rub at the top on the latch side:
- To pull the latch side up slightly:
- Loosen the bottom hinge screws slightly and insert a slim piece of cardboard or thin shim behind the hinge plate on the door frame.
- Retighten screws.
If the gap is too tight near the hinge side:
- Slightly loosen hinge screws and nudge the door and hinge toward the room, then retighten.
Check the swing and closure after each small adjustment.
Step 4: Realign the Strike Plate
If the latch doesn’t engage cleanly:
- Close the door until the latch just touches the strike plate.
- Mark where the latch hits.
If it’s too high or low:
- Remove the strike plate screws. - Chisel a small amount of wood from the jamb where the plate needs to move. - Reposition the strike plate and reattach.
For minor misalignment, sometimes widening the strike plate opening with a metal file is enough.
Step 5: Control a Door That Swings on Its Own
If the door slowly swings open or closed by itself:
- Remove the hinge pin from the top hinge using a nail and hammer.
- Place the pin on a hard surface and tap the center lightly with the hammer to create a very slight bend.
- Reinsert the pin and test the door.
- Repeat with a tiny bit more bend if needed until the door stays put.
Call a pro if the frame is cracked, the wall is clearly out of plumb, or the door is significantly warped.
4. Restore Power to a Dead Outlet Safely
A suddenly dead outlet can be a simple tripped breaker or a warning sign of a larger electrical issue. These steps focus on low‑risk checks you can do safely. If anything looks burned or damaged, stop and contact an electrician.
Step 1: Confirm the Problem Is the Outlet
- Plug a known‑working device (like a lamp or phone charger) into the outlet.
- Test the same device in another outlet that you know works.
- If multiple outlets are out in the same area, suspect a tripped breaker or GFCI.
Step 2: Check the Circuit Breaker Panel
- Locate your electrical panel (basement, garage, closet, or hallway).
- Look for a breaker that is in a middle position or slightly off compared to the others.
To reset:
- Firmly switch the breaker to the OFF position. - Then switch it back to ON.
Go back and test the outlet again.
Step 3: Reset GFCI Outlets
In kitchens, bathrooms, garages, basements, and outdoor areas, GFCI outlets protect against shock.
- Look for any outlet nearby (or even on a different wall) with TEST and RESET buttons.
- Press RESET firmly until it clicks.
- Retest the dead outlet—sometimes one GFCI protects several outlets down the line.
If the GFCI will not reset or trips immediately with nothing plugged in, stop here and contact an electrician.
Step 4: Inspect the Outlet (Without Opening It)
Before you consider anything beyond breaker/GFCI resets, visually inspect:
- Look for scorch marks, melted plastic, or a burning smell.
- Check for warmth by lightly placing the back of your fingers near (not on) the outlet cover.
If you see or smell anything abnormal:
- Turn off the breaker to that circuit.
- Do not use the outlet.
- Call a licensed electrician.
Step 5: Know Your Limits
DIY electrical work inside the box (rewiring, replacing outlets) carries risk and may require permits depending on your area. Safe rule of thumb:
- Okay for DIY: Resetting breakers, GFCIs, replacing cover plates.
- Electrician recommended: Replacing outlets, dealing with repeated tripping, or anything involving damaged wiring.
Call a pro immediately if a breaker keeps tripping, outlets feel hot, you smell burning, or lights flicker when devices are used.
5. Clear a Slow Drain Without Harsh Chemicals
Slow drains in sinks or tubs usually come from hair, soap scum, and grease buildup. You don’t need a harsh chemical cleaner—mechanical methods work better and are safer for pipes.
Step 1: Try a Simple Boiling Water Flush (Kitchen Sinks Only)
For greasy kitchen drains:
- Boil a full kettle or large pot of water.
- Slowly pour it down the drain in 2–3 stages, allowing it to work for 10–15 seconds between pours.
Skip this step for toilets and porcelain fixtures that may crack with sudden heat.
Step 2: Clean Visible Gunk From the Stopper
Bathroom sink:
- Under the sink, locate the small horizontal rod connected to the drainpipe—that’s the stopper linkage.
- Loosen the retaining nut and pull the rod out.
- Remove the stopper from the sink drain from above.
- Clean hair and buildup from the stopper and drain opening.
Reinsert the stopper and rod, tighten the retaining nut, and test the drain.
Bathtub:
- For a lift‑and‑turn stopper, unscrew the top knob and remove the stopper body to clean.
- For a trip‑lever style, remove the faceplate screws, gently pull out the linkage, and clean hair caught in the drain opening.
Step 3: Use a Drain Snake or Zip Strip
- Insert a plastic drain cleaning strip or small hand snake into the drain opening.
- Push down until you feel resistance, then pull back slowly to bring up hair and debris.
- Wipe off the gunk into a trash bag (not the sink).
- Repeat until you no longer pull up debris.
Avoid metal snakes on delicate sink drains unless you’re comfortable working with them; they can scratch or damage fixtures if misused.
Step 4: Try a Plunger (Sink or Tub)
- Block any overflow hole with a wet rag (this is crucial for good suction).
- Fill the sink or tub with enough water to cover the plunger cup.
- Place the plunger over the drain and plunge firmly up and down 10–20 times.
- Lift the plunger and see if water drains faster. Repeat as needed.
Use separate plungers for toilets and sinks/tubs for hygiene.
Step 5: Clean the P‑Trap (If Still Slow)
Under sinks, the U‑shaped pipe (P‑trap) often collects buildup.
- Place a bucket under the trap.
- Unscrew the slip nuts at each end of the trap (by hand or with channel‑lock pliers).
- Remove the trap and empty its contents into the bucket.
- Clean the inside with an old toothbrush or bottle brush.
- Reassemble, hand‑tighten the nuts, and run water while checking for leaks.
Call a pro if multiple drains in the house are slow at once, you see sewage backing up, or the clog keeps returning quickly.
Conclusion
Most everyday home problems can be stabilized and fixed with basic tools, a little patience, and a clear sequence of steps. Stopping small water leaks, calming a running toilet, realigning a stubborn door, safely checking a dead outlet, and clearing slow drains all reduce stress—and prevent bigger, more expensive issues later.
Use these guides as your baseline, work methodically, and don’t push past your comfort or safety limits. When something looks burned, cracked, or structurally damaged, that’s your signal: stop, shut things down if needed, and bring in a professional. The goal isn’t to become a full‑time repair tech—it’s to keep your home safe, functional, and under control.
Sources
- [U.S. Environmental Protection Agency – Fix a Leak](https://www.epa.gov/watersense/fix-leak-week) - Explains the impact of common household leaks and why fixing dripping faucets and running toilets matters
- [Massachusetts Government Plumbing Guidance](https://www.mass.gov/service-details/common-plumbing-repairs) - State guidance on common plumbing repairs and when to hire a licensed plumber
- [Family Handyman – How to Fix a Leaking Faucet](https://www.familyhandyman.com/project/how-to-fix-a-leaking-faucet/) - Practical visual guide to identifying faucet types and replacing cartridges and washers
- [National Fire Protection Association – Electrical Safety in the Home](https://www.nfpa.org/Public-Education/Fire-causes-and-risks/Top-fire-causes/Electrical) - Safety information about home electrical issues and warning signs you should not ignore
- [University of Missouri Extension – Home Drain Maintenance](https://extension.missouri.edu/publications/g1914) - Guidance on safe, effective methods for clearing and preventing household drain clogs
Key Takeaway
The most important thing to remember from this article is that this information can change how you think about Household Repairs.


