When something breaks at home, most people jump straight to panic, replacement, or calling a pro. But a lot of “oh no” moments can be turned around in minutes with the right steps. This guide walks you through five practical, quick fixes you can handle yourself—no advanced tools, no guesswork, just clear instructions you can follow right now.
1. Revive a Slow or “Frozen” Wi‑Fi Connection
When your internet crawls or stops, it’s usually a local problem you can fix in a few minutes.
Step 1 – Confirm it’s not the website.
Try loading two or three different sites (for example, a news site and your email). If one site fails but others work, the site is likely down.
Step 2 – Restart your devices in order.
- Turn off Wi‑Fi on your phone/laptop.
- Unplug your modem and router (or combo unit).
- Wait 30 seconds.
- Plug the modem back in; wait for all lights to stabilize.
- Plug the router back in; wait 1–2 minutes.
- Turn Wi‑Fi back on and reconnect.
Step 3 – Move or reduce interference.
- Place the router in an open, central spot (not in a cabinet, not behind the TV).
- Keep it away from microwaves, cordless phones, and thick walls where possible.
- If you’re far from the router, move closer and test again.
Step 4 – Flush device network issues.
- On phones and laptops, “Forget” the Wi‑Fi network, then reconnect and re‑enter the password.
- Restart the device after reconnecting if speeds still seem off.
Step 5 – Check for congestion.
- Pause or stop big downloads, game updates, or streaming on other devices.
- If your internet improves, set large downloads to run overnight.
If these steps help for a while but problems consistently return, it’s time to log into your router, update firmware, or talk to your ISP about a better plan or upgraded hardware.
2. Stop a Running Toilet That Won’t Quit
A running toilet wastes water and spikes your bill, but the cause is usually simple and fixable without a plumber.
Step 1 – Remove the tank lid and observe.
Flush the toilet and watch what happens inside the tank. Focus on three parts: the flapper, the fill valve, and the float.
Step 2 – Check the flapper (rubber seal at the bottom).
- If water keeps trickling into the bowl, gently press the flapper down.
- If the sound stops, the flapper isn’t sealing properly.
- Make sure the chain isn’t too tight or too loose:
- If it’s too tight, the flapper can’t fully close. Leave a bit of slack.
- If it’s tangled, untangle it and reattach so it hangs straight.
Step 3 – Clean or replace the flapper.
- Turn off water at the shutoff valve (behind or below the toilet).
- Flush to empty most of the tank.
- Wipe grime or mineral buildup off the flapper and its seat with a cloth.
- If the flapper is cracked, warped, or brittle, replace it (they’re cheap and widely available).
Step 4 – Adjust the water level.
- The water line inside the tank should be at or just below the marked fill line.
- If it’s too high, water may run into the overflow tube:
- For a float arm: gently bend the metal arm downward.
- For a float cup: turn the adjustment screw or slide the clip to lower the float.
Step 5 – Test and listen.
- Turn the water back on, let the tank fill, then flush.
- If the toilet fills, stops, and stays quiet for several minutes, you’ve fixed it.
- If it still runs, the fill valve itself may be failing and need replacement, but you’ve already ruled out the easiest fixes.
3. Fix a Door That Won’t Latch or Won’t Stay Closed
A door that won’t catch is annoying and can be a safety issue. Often the door just shifted slightly and needs a simple adjustment.
Step 1 – Identify the problem.
- Close the door slowly and watch:
- Does the latch (the metal tongue) miss the strike plate hole?
- Does it hit above or below the strike plate opening?
- Does the latch not pop out fully?
Step 2 – Tighten hinge screws.
- Open the door fully.
- Using a screwdriver, tighten all hinge screws on the door and door frame.
- If a screw just spins, the hole may be stripped:
- Remove the screw.
- Push in a few wooden toothpicks coated with wood glue, snap them flush, and reinsert the screw.
- Test the door again—this alone often fixes misalignment.
Step 3 – Adjust the strike plate position slightly.
- If the latch hits a bit too high or too low:
- Mark where the latch is hitting with a pencil.
- Loosen the strike plate screws slightly.
- Shift the plate a millimeter or two up, down, in, or out so the latch lines up.
- Retighten and test.
Step 4 – File the strike plate opening (micro‑adjust).
- If the latch almost catches but rubs:
- Remove the strike plate.
- Use a metal file to gently widen or lower the opening where it rubs.
- Reinstall and test.
Step 5 – Lubricate the latch.
- Spray a dry lubricant or silicone spray onto the latch (avoid thick grease).
- Work the doorknob and latch several times.
- If the latch is still sticky or doesn’t spring out, the lockset may need replacement, but you’ve eliminated low‑effort fixes first.
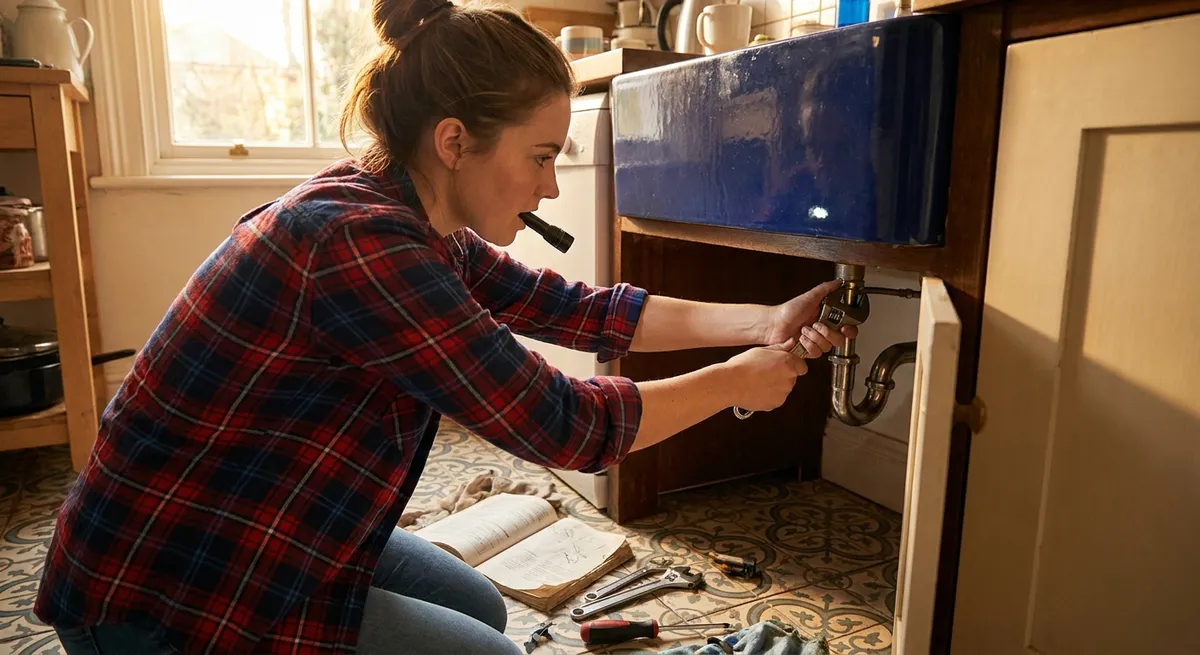
4. Clear a Slow Draining Bathroom Sink Without Harsh Chemicals
A sluggish sink is usually hair, soap scum, and gunk just below the drain. You can often clear it in minutes with basic tools.
Step 1 – Remove standing water.
Use a cup or small container to bail out excess water into a bucket or toilet so you can see and work.
Step 2 – Clean the stopper.
- If your sink has a pop‑up stopper:
- Look under the sink at the back of the drainpipe.
- Locate the horizontal pivot rod connected to the stopper.
- Unscrew the retaining nut carefully (have a small container ready for drips).
- Pull out the rod; then lift the stopper out from the top.
- Clean off hair and gunk with paper towels or a brush.
- Rinse the stopper and reinstall it by reversing the steps.
Step 3 – Use a simple drain tool.
- Insert a plastic drain snake or hair removal tool into the drain.
- Push down gently, then pull up to grab hair and debris.
- Repeat several times until you’re no longer pulling up clumps.
Step 4 – Flush with hot water.
- Run very hot tap water (not boiling if you have PVC pipes) for 1–2 minutes.
- This helps rinse out loosened buildup.
Step 5 – Try a plunger if needed.
- Block the overflow hole with a damp cloth.
- Fill the sink with a few inches of water.
- Place a small plunger over the drain and plunge firmly 10–15 times.
- Remove the plunger and see if the water drains faster.
If the sink is still slow after these steps, the clog may be farther down the line, which might require removing the P‑trap or calling a plumber—but you’ve ruled out the easiest, safest options first.
5. Quiet a Noisy, Squeaking Ceiling Fan
A squeaky fan is more than annoying—it can signal loose parts. Most noise issues are simple to correct.
Step 1 – Turn off power and let the fan stop completely.
Switch it off at the wall and, for extra safety, switch off the breaker before working near the ceiling.
Step 2 – Tighten all visible screws.
- Use a screwdriver to tighten:
- Screws at the fan base where it meets the mounting bracket.
- Screws on each blade arm where it attaches to the motor housing.
- Screws where each blade attaches to its arm.
- Even small looseness can cause loud wobble and squeak.
Step 3 – Clean the blades thoroughly.
- Dust buildup makes blades unbalanced.
- Wipe the top and bottom of each blade with a damp cloth and mild soap if needed.
- Dry completely so moisture doesn’t warp the blades.
Step 4 – Check for blade warping or damage.
- Stand back and sight along each blade’s edge.
- If one blade is noticeably bent or drooping, it can cause wobble and noise.
- Gently tighten connections for that blade; if it’s cracked or warped, replacement blades may be required.
Step 5 – Lubricate moving parts (if fan design allows).
- Some fans have an oil or lubrication port near the motor.
- If present, add a few drops of light machine oil as directed in the fan’s manual.
- If there’s no port, don’t drill or force oil in—just ensure everything is tight and balanced.
Turn power back on and test at low speed first. If the noise is improved or gone, increase to higher speeds. If you still hear grinding or a burning smell, stop using the fan and consult a professional or consider replacement.
Conclusion
Most everyday breakdowns don’t require panic, a new purchase, or an immediate service call. With a methodical approach and a few minutes of focused work, you can restore your Wi‑Fi, stop a wasteful toilet, fix a stubborn door, clear a sluggish sink, and quiet a noisy ceiling fan. The key is simple: observe carefully, start with the least invasive step, and work forward. Over time, these quick wins add up to real savings—and a home that feels under control instead of constantly on the verge of failing.
Sources
- [Federal Communications Commission – Consumer Broadband Guide](https://www.fcc.gov/consumers/guides/consumer-guide-broadband-service) – Explains home internet basics, troubleshooting, and performance factors
- [U.S. Environmental Protection Agency – WaterSense: Fix a Leak](https://www.epa.gov/watersense/fix-leak-week) – Details how leaks like running toilets waste water and how to spot them
- [Family Handyman – How to Fix a Toilet That Keeps Running](https://www.familyhandyman.com/project/how-to-fix-a-running-toilet/) – Step‑by‑step visuals for common toilet repair tasks
- [The Spruce – How to Fix a Slow Draining Bathroom Sink](https://www.thespruce.com/fix-slow-draining-bathroom-sink-2718778) – Practical guidance on clearing sink clogs without harsh chemicals
- [Energy.gov – Ceiling Fans and Energy Savings](https://www.energy.gov/energysaver/ceiling-fans) – Official information on safe fan use, efficiency, and considerations for operation
Key Takeaway
The most important thing to remember from this article is that this information can change how you think about Quick Fixes.


