Life breaks in small, annoying ways long before anything truly “fails.” A dripping tap, a wobbly chair, a slow Wi‑Fi signal—none of them feel urgent, but together they drain your time, money, and energy. This Quick Fix Toolkit walks you through five practical, step‑by‑step repairs you can do in under an hour each, often with tools you already have. Save the big jobs for the pros; this guide is all about smart, fast wins you can handle today.
1. Silencing a Dripping Faucet (Without Calling a Plumber)
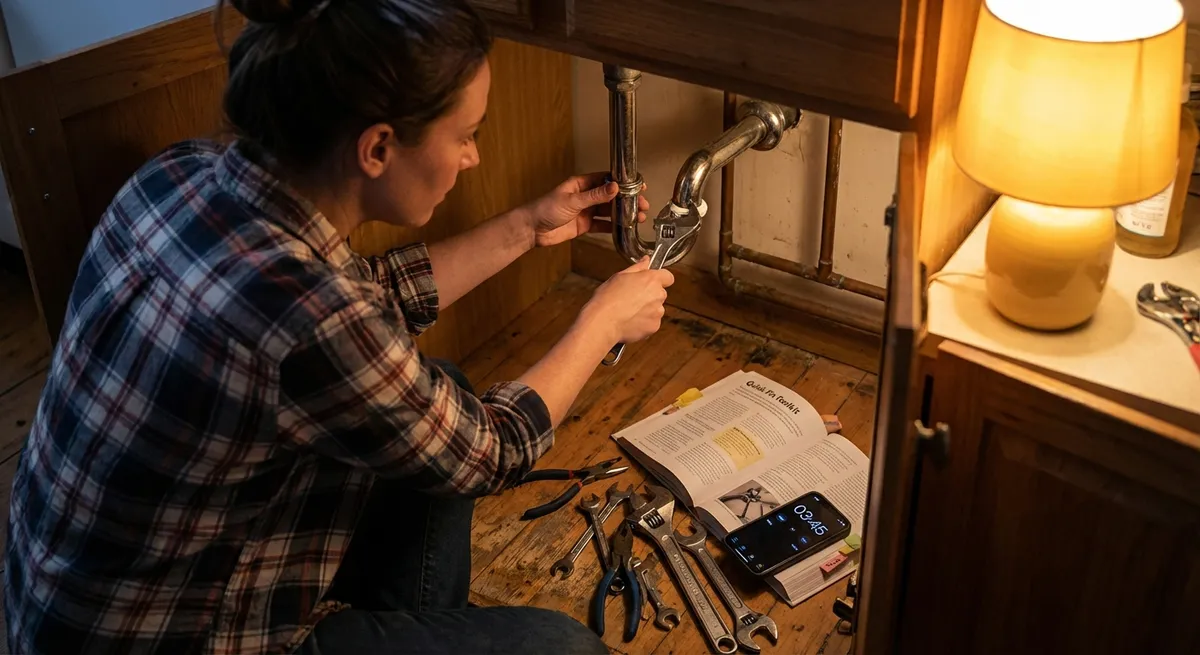
A dripping faucet can waste gallons of water a day and quietly bump up your bill. The good news: many leaks come from a worn washer or cartridge that you can replace yourself.
What you’ll need
- Adjustable wrench or combination wrench set
- Flathead and Phillips screwdriver
- Replacement washer or cartridge (take a photo of your faucet brand/model or remove the old part to match at the store)
- Small towel and bowl
Step‑by‑step
Shut off the water
Look under the sink for the shutoff valves. Turn both hot and cold knobs clockwise until they stop. Open the faucet to confirm the water is off and to relieve pressure.
Plug the drain
Use the sink stopper or a rag so small screws or parts don’t disappear down the drain.
Remove the handle
- Many handles have a decorative cap—gently pry it off with a flathead screwdriver. - Unscrew the handle screw underneath and lift the handle off.
Access the valve
- Use the wrench to loosen the packing nut or retaining nut. - Lift out the stem (for compression faucets) or cartridge (for cartridge faucets). Take note of the orientation—snap a photo if needed.
Replace the worn parts
- For compression faucets: Swap the rubber washer at the bottom of the stem and the O‑rings on the stem body. - For cartridge faucets: Replace the entire cartridge with a matching one.
Reassemble carefully
Reverse the steps: insert the stem/cartridge, tighten the nut snugly (don’t overtighten), reinstall the handle and decorative cap.
Turn water back on and test
Open the shutoff valves slowly, then test the faucet. If it still drips, tighten the handle slightly or double‑check that the new part is seated correctly.
2. Reviving a Slow or “Dead” Wi‑Fi Connection
Before you blame your internet provider or buy a new router, a few quick checks and tweaks can often restore usable speed—especially in apartments or crowded neighborhoods.
What you’ll need
- Your Wi‑Fi router and modem
- A phone or laptop
- Access to your router’s admin page (printed on the router label or manual)
Step‑by‑step
Power‑cycle the basics
- Unplug both modem and router. - Wait 30 seconds. - Plug the modem in first, wait until all lights stabilize. - Then plug in the router and wait 1–2 minutes. This clears minor glitches and is often enough to restore speed.
Check where the router lives
- Move it to a central, open area if possible—off the floor, away from thick walls, metal objects, and microwaves. - Avoid hiding it in cabinets or behind a TV.
Switch to a less crowded Wi‑Fi channel
- Log into your router’s admin page (URL and login often printed on the back). - Under “Wireless” or “Wi‑Fi settings,” find the channel selection. - For 2.4 GHz, try channel 1, 6, or 11; for 5 GHz, pick “Auto” or a different channel than the default. - Save and reboot the router if needed.
- Separate 2.4 GHz and 5 GHz networks
- If your router allows, give different names (SSIDs) to the 2.4 and 5 GHz bands.
- Use 5 GHz for nearby devices (faster) and 2.4 GHz for far‑away rooms (better range).
Test the speed close to the router
- Use an online speed test while standing near the router. - If speeds are good here but bad far away, consider a Wi‑Fi extender or mesh system as a longer‑term upgrade.
Still bad? Bypass Wi‑Fi briefly
- Plug a laptop directly into the modem with an Ethernet cable. - If speeds are still poor, the problem is likely your internet service or modem, not your Wi‑Fi. Contact your provider with these test results.
3. Stopping a Squeaky Door in Under 5 Minutes
A squeaky door is annoying but almost always easy to fix. You don’t need to remove the whole door or replace hinges—just add the right lubrication and a bit of movement.
What you’ll need
- WD‑40, silicone spray, or a light household oil
- Rag or paper towel
- Optional: Small flathead screwdriver or hammer
Step‑by‑step
Identify the source of the squeak
Slowly open/close the door and listen. Most squeaks come from the hinge pins.
Try the simple approach first
- Spray a very small amount of lubricant directly onto the hinge joints (top, middle, bottom). - Open and close the door repeatedly to work it in. - Wipe excess to avoid drips or stains.
If the squeak persists, treat the hinge pin
- Use a flathead screwdriver under the hinge pin head and gently tap the handle with a hammer to lift the pin slightly. - Pull the pin out (do one hinge at a time so the door stays in place). - Coat the pin lightly with lubricant or a thin layer of petroleum jelly. - Reinsert the pin and tap it fully back into place.
Check for loose screws
- Tighten any loose hinge screws with a screwdriver. - If a screw spins without tightening, insert a wooden toothpick or matchstick dipped in glue into the hole, snap off the excess, and then reinstall the screw to give it more grip.
Test and clean up
Open and close the door several times. Wipe away any drips, especially on painted or wooden surfaces.
4. Fixing a Wobbly Chair or Table So It Actually Stays Solid
That wobbly chair you keep “meaning to fix” is easier to stabilize than you think—and fixing it now can keep it from breaking completely later.
What you’ll need
- Screwdriver and/or Allen (hex) keys
- Wood glue (for wooden furniture)
- Small clamps or a heavy stack of books
- Damp cloth
Step‑by‑step
Flip it over and inspect
Place the chair or table upside down on a flat surface. Gently push on each leg and joint; look for movement where parts meet.
Tighten all fasteners first
- Tighten screws, bolts, and nuts around wobbly areas. - If your chair uses Allen bolts, use the correct hex key and snug them up—not too hard, or you can strip them.
Reinforce loose wooden joints
- If a wooden joint moves even after tightening, gently pull it apart if possible. - Clean out dust or old glue with a dry brush or cloth. - Apply wood glue inside the joint, then press pieces together firmly.
Clamp and let it cure
- Use clamps to hold glued joints tightly in place. No clamps? Use belts, rope, or place the furniture so body weight or heavy books hold the joint together. - Wipe away any squeezed‑out glue with a damp cloth. - Let it dry as long as the glue recommends—usually at least 30–60 minutes for handling, longer for full strength.
Check and level the legs
- Once dry, flip the furniture upright and test on a flat floor. - If it still rocks slightly, add felt pads under the shortest leg or use adjustable leg glides if compatible.
5. Clearing a Slow‑Draining Sink Without Harsh Chemicals
A sink that takes forever to drain rarely needs aggressive drain cleaner. Hair, soap scum, and food particles are usually the culprits—and they’re often within reach.
What you’ll need
- Rubber gloves
- Small bucket or bowl
- Old toothbrush or small brush
- Plunger (cup style for sinks)
- Optional: Plastic drain snake or zip‑it tool
- Baking soda and vinegar (optional natural cleaner)
Step‑by‑step
Remove and clean the stopper or strainer
- For bathroom sinks, lift out the stopper or, if it’s fixed, loosen the rod nut under the sink to remove it. - For kitchen sinks, pull out the strainer basket. - Clean off hair, debris, and gunk with an old toothbrush over a bucket.
Try a simple plunger first
- Fill the sink with enough water to cover the plunger cup. - Block any overflow holes with a damp cloth to improve suction. - Place the plunger over the drain, push down firmly, and plunge 15–20 times. - Lift quickly and see if the water drains faster.
Use a plastic drain snake for hair clogs
- Insert the snake into the drain until you feel resistance. - Wiggle and pull it out to grab hair and buildup. - Repeat until it comes out relatively clean.
Check the P‑trap if the clog persists
- Place a bucket under the curved “P‑trap” pipe under the sink. - Unscrew the slip nuts by hand or with pliers and remove the trap. - Dump contents into the bucket and clean the pipe with water and a brush. - Reassemble, ensuring the washers are seated properly.
Optional: Natural cleaning rinse
- Pour about ½ cup of baking soda into the drain, followed by ½–1 cup of white vinegar. - Let it fizz for 10–15 minutes, then flush with hot water. - This helps clear soap scum and lingering odors.
Test and maintain
Run water for several minutes. If drainage is much better, keep it that way by occasionally cleaning the stopper and using a hair catcher or sink strainer.
Conclusion
Quick fixes aren’t about becoming a full‑time DIY expert—they’re about taking back control from small problems that nag at you every day. When you know how to stop a leak, tame your Wi‑Fi, quiet a door, stabilize a chair, and clear a slow drain, you avoid bigger repairs, stretch the life of what you already own, and reduce waste. Start with the issue that’s bothering you most right now, follow the steps, and build confidence one small repair at a time. Your home—and your budget—will feel the difference.
Sources
- [U.S. Environmental Protection Agency – Fix a Leak](https://www.epa.gov/watersense/fix-leak-week) - Details how small leaks (like dripping faucets) waste water and basic guidance on addressing them
- [International Association of Certified Home Inspectors – How to Fix a Leaking Faucet](https://www.nachi.org/leaky-faucet.htm) - Explains common faucet types and leak repair basics
- [Federal Communications Commission – Wi-Fi Home Networking](https://www.fcc.gov/consumers/guides/wireless-home-networking) - Covers Wi‑Fi placement, interference, and optimization tips
- [Lowe’s – How to Fix a Wobbly Chair](https://www.lowes.com/n/how-to/fix-wobbly-chair) - Step‑by‑step guidance on tightening and gluing loose furniture joints
- [University of Georgia Extension – Clogged Drains](https://extension.uga.edu/publications/detail.html?number=C1069) - Practical advice for clearing clogged drains and when to call a professional
Key Takeaway
The most important thing to remember from this article is that this information can change how you think about Quick Fixes.


