Everyday problems around the house tend to pile up: a clogged sink, a wobbly chair, a Wi‑Fi signal that keeps dropping. None of them feel big enough to call a pro, but together they’re annoying enough to wreck your day. This guide walks you through five clear, step‑by‑step fixes you can handle with basic tools and a bit of patience—no specialized skills required.
1. Unclog a Slow Sink Without Harsh Chemicals
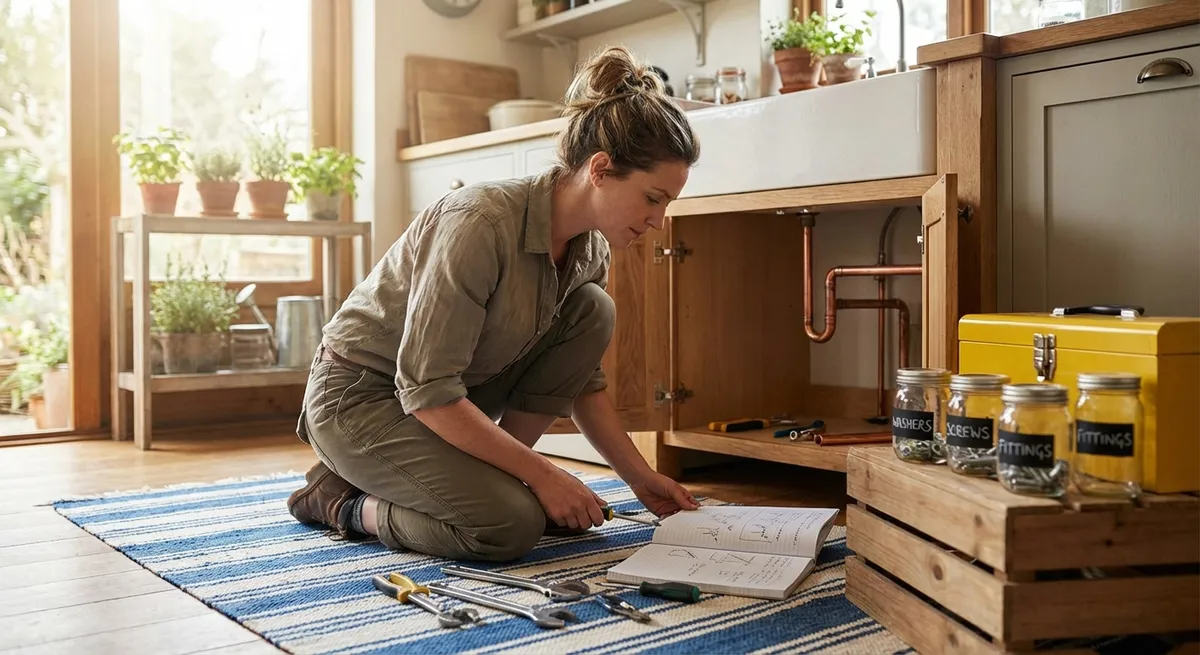
A sink that drains slowly usually has a partial clog made of hair, soap scum, or grease. You don’t need expensive drain cleaners to clear it—just simple tools and a step‑by‑step approach.
Step‑by‑step:
Clear the area and protect your space
Remove items from under the sink, lay down an old towel to catch drips, and have a small bucket or bowl ready.
Run hot water first
Let hot tap water run for 1–2 minutes. Sometimes this alone loosens light grease buildup.
Try a plunger (the right way)
- Use a cup plunger (flat bottom), not a toilet plunger. - Fill the sink with enough water to cover the plunger cup. - Seal the overflow hole with a damp cloth (if present). - Plunge firmly 10–15 times, keeping the seal tight. - Test the drain. If it improves but isn’t perfect, repeat once more.
Use a baking soda and vinegar flush
- Pour about ½ cup baking soda into the drain. - Follow with 1 cup white vinegar. - Let it fizz for 10–15 minutes. - Flush with a full kettle or large pot of hot (not boiling on porcelain) water.
Clean the P‑trap if it’s still slow
- Turn off the faucet; place a bucket under the U‑shaped pipe. - Unscrew the slip nuts by hand or with adjustable pliers. - Remove the P‑trap and clear out any gunk inside. - Reinstall the trap, making sure the washers sit correctly. - Run water and check for leaks; hand‑tighten the nuts a bit more if needed.
When to stop and call a pro:
If multiple drains in your home are slow or backing up at once, you may have a main line issue. That’s a job for a licensed plumber.
2. Quiet a Squeaky Door in Under 10 Minutes
A squeaky door is usually caused by friction and minor corrosion on the hinge pins. Fixing it is quick and requires only basic supplies.
Step‑by‑step:
Identify the squeaky hinge
Open and close the door slowly to pinpoint which hinge (or hinges) are making noise.
Start with a quick clean
- Wipe each hinge with a dry cloth to remove dust. - Use a toothbrush or small brush to dislodge debris in tight spaces.
Apply the right lubricant
- Ideal: silicone spray, lithium grease, or a dedicated door hinge lubricant. - Acceptable in a pinch: a tiny amount of petroleum jelly or cooking oil (short term only). - Avoid heavy use of WD‑40 as a long‑term solution; it can attract dust.
Lubricate without removing the pin (fast method)
- Place a towel under the door to catch drips. - Spray or dab a small amount of lubricant where the hinge pin meets the hinge. - Open and close the door 10–15 times to work it in. Wipe any excess.
For persistent squeaks: remove and treat the hinge pin
- Support the door with a wedge or thick book. - Use a flathead screwdriver and hammer to gently tap the hinge pin up from the bottom. - Wipe the pin clean, then coat lightly with grease or lubricant. - Reinsert, tap down gently, then open/close the door several times.
Check alignment
If the door rubs against the frame, tighten hinge screws. If screws spin without gripping, use wooden toothpicks dipped in wood glue to fill the hole, then reinsert the screw.
3. Restore Wi‑Fi When Your Internet Keeps Dropping
Intermittent Wi‑Fi is usually caused by a combination of signal issues, overloaded hardware, or minor configuration problems. Work through these steps in order and test after each one.
Step‑by‑step:
Power‑cycle your modem and router
- Unplug the modem and router. - Wait 30–60 seconds. - Plug the modem back in; wait until all lights stabilize. - Plug the router back in; wait 2–3 minutes, then test Wi‑Fi.
Check where your router lives
- Place it in a central, elevated location, away from thick walls, metal objects, and microwaves. - Avoid placing it inside cabinets or behind large TVs.
Reduce interference
- If you have a dual‑band router, connect closer devices (phones, laptops near the router) to the 5 GHz network for speed. - Use 2.4 GHz for distant rooms where range matters more than speed. - Temporarily turn off nearby devices that use wireless signals (baby monitors, older cordless phones) to see if performance improves.
Update firmware and device software
- Log in to your router’s admin page (check the sticker on the router for the address and default credentials). - Look for a “Firmware Update” or “Advanced” → “Update” section. - Install any available updates and reboot. - Also update Wi‑Fi drivers on your laptop/PC via the device manager or manufacturer support page.
Change your Wi‑Fi channel (for crowded networks)
- Use your router admin page to switch to a less congested channel on the 2.4 GHz band (1, 6, or 11 are common options). - Save and reboot. - Retest your connection for a few hours.
Bypass Wi‑Fi to test your internet line
- Connect a laptop directly to the router with an Ethernet cable. - If wired speeds are also poor or dropping, contact your internet service provider; the issue may be outside your home.
4. Fix a Wobbly Chair or Table So It Feels Solid Again
A wobbly chair or table is usually caused by loose screws, dried glue, or worn joints. You can often restore stability with simple tools.
Step‑by‑step:
Identify what’s actually moving
- Place the furniture on a flat surface. - Press gently on each corner and observe where the movement comes from: a loose leg, a joint, or a single screw.
Tighten all existing hardware first
- Use the correct screwdriver or hex key. - Tighten screws and bolts gradually, alternating between them to avoid twisting the frame.
Fix loose screw holes in wood
If a screw spins freely instead of tightening: - Remove the screw. - Insert 2–4 wooden toothpicks dipped in wood glue into the hole. - Snap off the excess flush with the surface. - Allow glue to set until tacky (15–30 minutes), then reinstall the screw. - Let fully cure per glue instructions before heavy use.
Reinforce loose wood joints
- Gently pull apart joints that are clearly separated (if possible). - Apply wood glue inside the joint using a small brush or toothpick. - Press the pieces together firmly. - Clamp with a strap, bar clamp, or even tight rope with wedges if you don’t have clamps. - Wipe excess glue with a damp cloth and let cure as directed (often 24 hours).
Add felt pads for minor unevenness
- If the furniture is structurally sound but still rocks slightly, attach self‑adhesive felt pads to the bottom of the shortest leg(s). - Stack pads if needed until the wobble disappears.
Recheck after curing
Once glue is fully cured, test the piece again with normal use. Don’t rush this step; using it too soon can weaken the repair.
5. Stop a Running Toilet and Save Water
A toilet that runs constantly wastes water and money. In most cases, the problem is inside the tank and can be fixed without special tools.
Step‑by‑step:
Remove the tank lid and observe
- Carefully lift the lid and set it somewhere safe. - Flush once and watch what happens inside: where is water going, and what doesn’t reset properly?
Check the flapper first
- The flapper is the rubber piece at the bottom of the tank. - If it’s warped, cracked, or doesn’t sit flat on the valve seat, water will leak into the bowl. - Turn off the water supply (valve behind the toilet). - Unhook the chain and side tabs, remove the flapper, and inspect. - Replace with a matching model from a hardware store if damaged; they’re inexpensive and usually clip right on.
Adjust the chain length
- If the chain is too tight, the flapper can’t seal; if too loose, it may tangle. - Aim for a little slack—about ½ inch—when the flapper is closed. - Reattach the chain to a different link if needed.
Set the correct water level
- The water should usually sit about 1 inch below the top of the overflow tube (check any marks in the tank). - For float‑cup fill valves: pinch the metal spring clip or turn the adjustment screw to raise or lower the float. - For old‑style float balls: gently bend the float arm down to lower the level or up to raise it.
Inspect the fill valve
- Turn the water back on and let the tank fill. - If water keeps flowing into the overflow tube, the fill valve may be worn. - Many fill valves can be replaced as a complete unit with basic tools and clear instructions on the package.
Test for silent leaks
- Put a few drops of food coloring into the tank (not the bowl). - Wait 15–20 minutes without flushing. - If colored water appears in the bowl, you still have a leak—usually the flapper or valve seat needs further attention or replacement.
Conclusion
Quick fixes don’t have to be intimidating, and they don’t require a truck full of tools. By working through simple, structured steps, you can clear a slow drain, silence noisy doors, stabilize wobbly furniture, calm a misbehaving Wi‑Fi network, and stop a running toilet—all in an afternoon. The more of these small repairs you tackle, the more confident you’ll feel the next time something at home starts acting up.
Sources
- [U.S. Environmental Protection Agency – WaterSense: Fix a Leak](https://www.epa.gov/watersense/fix-leak-week) - Explains how leaking toilets and fixtures waste water and how to identify common leaks
- [Family Handyman – How to Fix a Running Toilet](https://www.familyhandyman.com/project/how-to-fix-a-running-toilet/) - Step‑by‑step guidance on flappers, fill valves, and water level adjustments
- [Consumer Reports – How to Speed Up Your WiFi](https://www.consumerreports.org/electronics-computers/routers/how-to-speed-up-your-wifi-a6325788374/) - Practical tips on router placement, interference, and network settings
- [Popular Mechanics – How to Unclog a Sink](https://www.popularmechanics.com/home/interior-projects/how-to/a7866/4-ways-to-unclog-a-drain/) - Overview of mechanical and home‑remedy methods for clearing drains
- [This Old House – How to Fix a Wobbly Chair](https://www.thisoldhouse.com/furniture/21017638/how-to-fix-a-wobbly-chair) - Demonstrates reinforcing joints and tightening loose furniture components
Key Takeaway
The most important thing to remember from this article is that this information can change how you think about Quick Fixes.


