Most everyday problems at home don’t need a technician, a landlord visit, or a panic call to your most “handy” friend. With a bit of guidance and a calm, systematic approach, you can solve a surprising number of issues yourself—and avoid wasting time and money.
This guide walks you through five practical, step‑by‑step DIY solutions for common problems: a slow laptop, a toilet that won’t stop running, a dead outlet, a weak‑flushing dishwasher, and a wobbly chair or table. Each section is designed so you can follow along in real time.
1. Slow Laptop That Won’t Cooperate
A sluggish laptop is often a software and maintenance issue, not a death sentence for your device. Try this sequence before you consider replacing it.
Step‑by‑step fix
Restart properly (not just closing the lid)
- Save your work. - On Windows: Click Start → Power → Restart. - On macOS: Apple menu → Restart. This clears stuck processes and memory leaks.
Check what’s slowing it down (Task Manager/Activity Monitor)
- Windows: Press Ctrl + Shift + Esc → Task Manager → “Processes.” - Mac: Open Spotlight (Cmd + Space) → search “Activity Monitor.” - Sort by CPU or Memory. - If one program is using a huge percentage, close it normally. If it’s frozen, select it and choose “End task” (Windows) or “Force Quit” (Mac).
Free up storage space
- Aim to keep at least 15–20% of your drive free. - Delete large files you don’t need (Downloads, old videos, installers). - Uninstall apps you never use: - Windows: Settings → Apps → Installed apps → Uninstall. - Mac: Applications folder → drag unused apps to Trash → Empty Trash.
Disable unnecessary startup programs
- Windows: - Press Ctrl + Shift + Esc → Startup tab. - Disable anything you don’t need launching with Windows (like music players, chat apps, game launchers). - Mac: - System Settings → General → Login Items. - Remove apps you don’t need at startup.
Run system updates
- Windows: Settings → Windows Update → Check for updates. - Mac: System Settings → General → Software Update. Updates fix performance bugs, driver issues, and security holes.
Scan for malware
- Run a full scan with built‑in tools: - Windows Security (Windows) or a trusted antivirus. - Remove any threats found, then restart.
Consider a simple hardware upgrade
- If your laptop still feels slow and it’s a few years old, adding more RAM or upgrading to an SSD (solid-state drive) can transform performance. - Check your model on the manufacturer’s site to see what’s upgradeable.
2. Toilet That Keeps Running After You Flush
A constantly running toilet wastes water and money. In most cases, the fix is inside the tank and doesn’t require special tools.
Step‑by‑step fix
Remove the tank lid and observe
- Flush once and watch what happens inside. - Identify the main parts: - Flapper: Rubber piece at the bottom that lifts when you flush. - Chain: Connects flush handle to flapper. - Fill valve & float: Controls how much water enters the tank.
Check the flapper first (most common cause)
- After the tank refills, see if water keeps trickling into the bowl. - Gently press down on the flapper. - If the running noise stops, the flapper likely isn’t sealing properly.
Adjust or replace the flapper
- Turn off the water supply (valve on the wall behind the toilet; turn clockwise). - Flush to empty most of the water from the tank. - Inspect the flapper: - If it’s warped, stiff, or deteriorating, replace it. - Detach the old flapper from the overflow tube and unhook the chain. - Install the new flapper according to the package instructions. - Reattach the chain so there’s a slight slack—not too tight, not too loose.
Adjust the fill level
- If water is going into the overflow tube, the tank is overfilling. - For a float arm: bend the metal arm slightly downward. - For a float cup: there’s usually a screw or clip to slide the float down. - The water line should be about 1 inch below the top of the overflow tube.
Turn water back on and test
- Slowly open the shut‑off valve. - Let the tank fill and listen. - Flush a few times to confirm the running has stopped and the level is correct.
If it still runs
- Double‑check chain length (too tight can hold the flapper open). - Make sure nothing is blocking the flapper from closing fully. - If the fill valve is old and noisy, consider a full “toilet repair kit” that replaces all internals in one go.
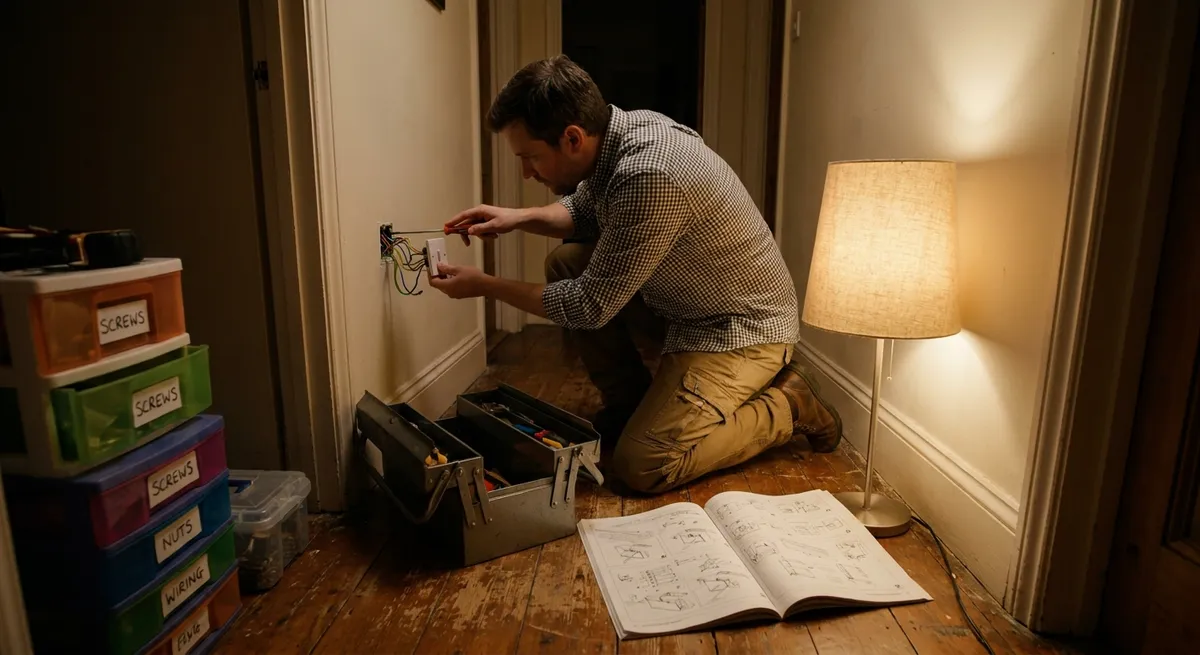
3. Electrical Outlet That Suddenly Stopped Working
A dead outlet doesn’t automatically mean major electrical work. Often, it’s a tripped breaker or GFCI outlet that needs a reset. Always put safety first.
Step‑by‑step fix
Test with a different device
- Plug in something simple you know works (like a lamp or phone charger). - If it still doesn’t work, the outlet is likely the issue—not your device.
Check for GFCI outlets to reset
- Look for outlets with “TEST” and “RESET” buttons (commonly in kitchens, bathrooms, garages, basements). - Press the RESET button firmly until it clicks. - Test your dead outlet again; several outlets may be protected by one GFCI.
Inspect your breaker panel
- Find your home’s electrical panel (often in a basement, hallway, or utility area). - Look for a breaker that’s between ON and OFF or marked as “tripped.” - Reset it: push fully to OFF, then back to ON. - Check if your outlet is now working.
Look and listen for warning signs (stop if you see these)
- Burn marks or discoloration on the outlet cover. - Cracking, buzzing, or a burning smell. - Outlet feels hot to the touch. If any of these show up, stop and call a licensed electrician. This can indicate a serious fault.
Check for a loose plug fit
- If plugs fall out easily, the internal contacts may be worn. - Turn off power to that circuit at the breaker. - Remove the wall plate and gently pull the outlet out (without touching bare wires). - If you’re not comfortable replacing an outlet, this is the point to call a pro. Replacement itself is inexpensive and straightforward for an electrician.
When to stop DIY and get help
- Breaker keeps tripping immediately after reset. - Multiple outlets or lights go out at once without a clear breaker issue. - Any signs of burning or melted plastic. Electrical safety isn’t negotiable; when in doubt, bring in a professional.
4. Dishwasher That Doesn’t Clean Well Anymore
If your dishwasher is leaving food, film, or grit on dishes, it’s often a maintenance issue. A basic clean‑out and some adjustments usually restore performance.
Step‑by‑step fix
Clean the filter (often the main culprit)
- Open the dishwasher and remove the bottom rack. - Locate the filter at the bottom—usually a round or cylindrical piece. - Twist and lift it out (check your manual if unsure). - Rinse under warm water, using a soft brush to remove debris. - Clean the area where the filter sits, then reinstall.
Inspect and clear spray arms
- Remove the lower spray arm (usually pulls or snaps off). - Use a toothpick or thin wire to clear any clogged holes. - Rinse under running water. - Do the same for the upper spray arm if removable. - Reinstall both securely.
Run a cleaning cycle
- Check that the dishwasher is empty. - Place a dishwasher‑safe cup with white vinegar on the top rack. - Run a hot water cycle. - After that, sprinkle a cup of baking soda on the bottom and run a short, hot cycle for odor and stain removal.
Check loading habits
- Don’t block spray arms from spinning. - Place large items at the sides and back, not right in front of the detergent dispenser. - Face dirty surfaces inward, toward the spray arms. - Avoid nesting bowls and spoons so water can reach all surfaces.
Use the right detergent and settings
- Use high‑quality dishwasher detergent (pods or powder; avoid regular dish soap). - Select a cycle appropriate for the level of soil—intensive/heavy for very dirty loads. - If you have hard water, consider a rinse aid or a model‑compatible water softener.
Check water temperature
- Run your kitchen sink hot tap for a minute before starting the dishwasher. - Water should be around 120°F (49°C) for best cleaning. - If it’s much cooler, you may need to adjust your water heater setting (following safety guidelines, especially if there are children in the home).
5. Wobbly Chair or Table You Keep Ignoring
A wobbly piece of furniture feels minor—until a drink spills or a chair gives way. This is a quick, satisfying repair that usually requires only basic tools.
Step‑by‑step fix
Identify the problem area
- Place the furniture on a flat surface (floor, not carpet if possible). - Gently rock it and note which leg(s) lift or move more than the others. - Mark the troublesome legs with a bit of masking tape if needed.
Tighten screws and bolts first
- Flip the furniture carefully (lay a blanket down to protect surfaces). - Use a screwdriver or Allen key to tighten all visible screws and bolts, not just on the loose leg. - Tighten gradually to avoid stripping or overtightening.
Reinforce loose joints
- If the wood joints wiggle even after tightening, apply wood glue: - Loosen the joint slightly if possible. - Apply wood glue into the joint. - Clamp or press the joint together firmly and wipe away excess glue. - Allow glue to cure fully (check glue instructions, usually several hours).
Level uneven legs
- Put the furniture back upright on a flat surface. - If one leg is still shorter, use one of these options: - Self‑adhesive furniture pads: Stick to the bottom of the short leg until stable. - Wood shims: For heavy furniture on wood floors; trim to size and glue in place. - Check stability after each adjustment.
Inspect for cracks or structural damage
- If a leg is cracked or the wood is splitting, repairs might be temporary. - For minor cracks, wood glue and a clamp may be enough. - For deep cracks in weight‑bearing areas, consider replacing the leg or consulting a furniture repair shop—especially for valuable or antique pieces.
Prevent future wobble
- Don’t drag furniture across floors; lift when possible. - Check screws once or twice a year and retighten as needed. - Use felt pads under legs to reduce stress and protect flooring.
Conclusion
You don’t need a workshop full of tools or years of experience to solve everyday problems at home. By approaching each issue methodically—observe, diagnose, then apply a focused fix—you can restore performance to your laptop, stop a wasteful toilet, revive a dead outlet safely, get your dishwasher cleaning properly again, and stabilize shaky furniture.
Start with one problem you’re dealing with today, follow the steps carefully, and build your confidence from there. The more you handle yourself, the less you’ll panic the next time something stops working—and the more time and money you’ll save.
Sources
- [Microsoft Support: Tips to Improve PC Performance in Windows](https://support.microsoft.com/en-us/windows/tips-to-improve-pc-performance-in-windows-10-5efbfe73-0122-7822-6f9a-dab2e23c09b0) - Official guidance from Microsoft on speeding up a slow Windows computer
- [Apple Support: If Your Mac Runs Slowly](https://support.apple.com/en-us/HT204054) - Apple’s recommendations for diagnosing and improving Mac performance
- [U.S. Environmental Protection Agency (EPA): Fixing Leaks](https://www.epa.gov/watersense/fix-leak-week) - Details on how toilet leaks waste water and why fixing them matters
- [U.S. Consumer Product Safety Commission: Home Electrical Safety Checklist](https://www.cpsc.gov/safety-education/safety-guides/home-electricity/home-electrical-safety-checklist) - Safety best practices for working around home electrical systems
- [Energy Star: Dishwashers – Frequently Asked Questions](https://www.energystar.gov/products/appliances/dishwashers/faq) - Expert information on proper dishwasher use, cleaning, and efficiency
Key Takeaway
The most important thing to remember from this article is that this information can change how you think about DIY Solutions.


