When something breaks at home, most people either ignore it or immediately think, “I need to call someone.” You often don’t. With a few basic tools and a clear process, you can safely handle many common issues yourself—and prevent them from getting worse or more expensive. This guide walks you through five everyday household problems with practical, step‑by‑step fixes you can start today.
1. Dripping Faucet That Won’t Stop Wasting Water
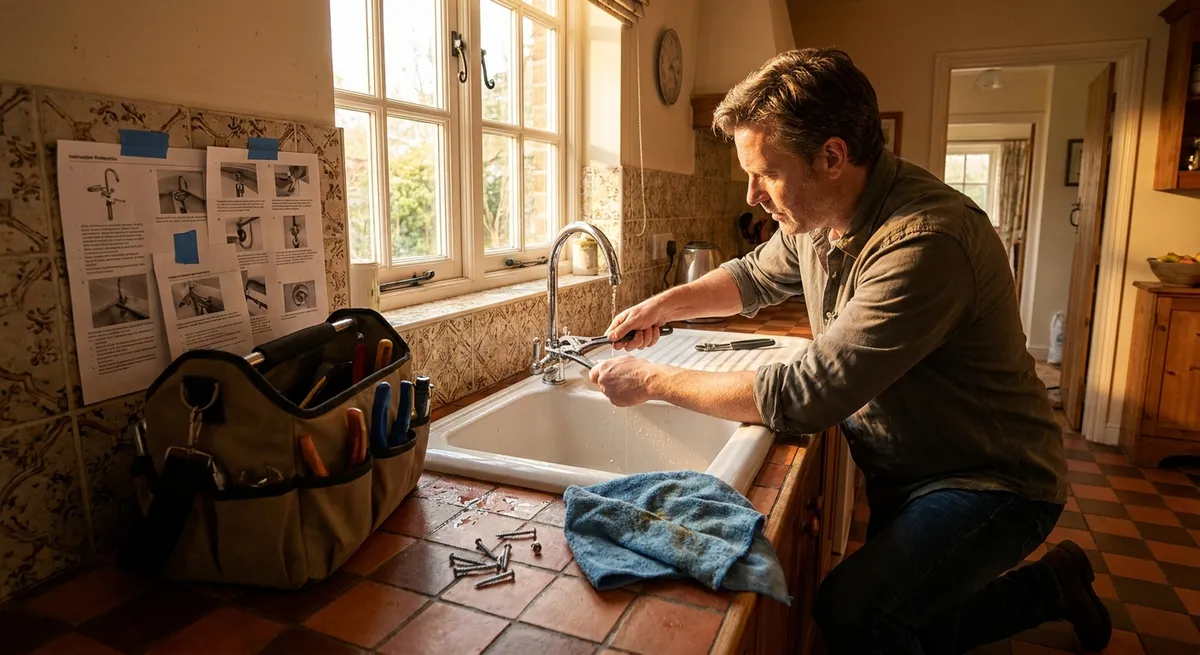
A dripping faucet can waste gallons of water a day and slowly increase your utility bill. The good news: most drips come from a worn internal part you can replace in under an hour.
What You’ll Need
- Adjustable wrench or basin wrench
- Screwdriver (Phillips and flathead)
- Replacement parts (cartridge, O-rings, or washers—match to your faucet brand/model)
- Plumber’s grease (optional but helpful)
- Towel or rag
Step-by-Step Fix
- Shut off the water supply.
Look under the sink for two small valves (hot and cold). Turn both clockwise until they stop. Open the faucet to release any remaining water.
- Plug the drain.
Use a sink stopper or a rag so small screws or parts don’t fall down the drain.
- Remove the handle.
Look for a decorative cap or visible screw on the handle. Pry off the cap with a flathead screwdriver if needed, then unscrew and pull the handle off.
- Identify your faucet type.
- Cartridge faucet (common in modern sinks)
- Compression faucet (older style with separate hot/cold that turn multiple times)
- Ball or ceramic disk (single lever designs)
- Take out the internal part.
Use a wrench to loosen the retaining nut or ring. Carefully pull out the cartridge, stem, or ball assembly. Note the orientation or take a photo so you can reassemble it correctly.
- Inspect and replace worn pieces.
Look for cracked O-rings, flattened washers, or corroded parts. Replace with matching components. A hardware store can help match parts if you bring the old ones.
- Apply plumber’s grease.
Lightly coat new O-rings or moving parts so they seat smoothly and last longer.
- Reassemble and test.
Put everything back in the reverse order. Turn the shut-off valves back on slowly, then test the faucet. If the drip is gone, you’re done. If not, re-check that parts are seated correctly and fully tightened (but not over-tightened).
2. Running Toilet That Won’t Stop Filling
A constantly running toilet wastes water and can be distracting. Most of the time, the problem is inside the tank and requires no special tools.
What You’ll Need
- Adjustable wrench (sometimes not needed)
- Replacement flapper or fill valve (if necessary)
- Towel or sponge
Step-by-Step Fix
- Remove the tank lid carefully.
Place it on a towel somewhere safe. Tank lids are heavy and can crack easily.
- Do a quick visual check.
- Is the flapper (rubber piece at the bottom) not sealing properly?
- Is the chain too tight or tangled?
- Is water flowing into the overflow tube at the center?
- Test the flapper seal.
Push down gently on the flapper. If the running stops, the flapper is likely worn or not aligned.
- Adjust or replace the flapper.
- Shorten or lengthen the chain so the flapper can fully close but still lift easily when you flush.
- If the flapper is warped or degraded, shut off water at the valve behind the toilet, flush to empty the tank, then unhook and replace the flapper with a matching model.
- Check the water level.
There’s usually a marking or line inside the tank. If the water level is too high and spills into the overflow tube, the fill valve needs adjustment.
- Adjust the fill valve.
- Newer valves often have a float with a screw or slide adjustment. Turn the screw or slide the clip to lower the float.
- Older ballcock types use a metal rod with a ball float—bend the rod slightly downward so the valve shuts off at a lower water level.
- Turn water back on and test.
Flush several times. The toilet should fill, then stop. Listen for any ongoing trickle—if it persists, recheck the flapper seal and float height.
3. Door That Sticks, Squeaks, or Won’t Close Properly
A sticking or squeaky door is more than an annoyance—it can damage the frame over time. Often the cause is loose hinges, misalignment, or humidity-related swelling.
What You’ll Need
- Phillips screwdriver
- Hammer and small nail (or nail set)
- Lubricant (silicone spray or petroleum jelly)
- Sandpaper (optional, medium and fine grit)
Step-by-Step Fix
- Identify where it’s sticking.
Close the door slowly and watch where it rubs: top, side, or bottom. Note whether it’s dragging on the floor or hitting the frame.
- Tighten hinge screws.
- Open the door and use a screwdriver to tighten all hinge screws on the door and the frame.
- If screws spin without tightening, the hole may be stripped.
- Repair stripped screw holes.
Remove the loose screw. Insert wooden toothpicks or a small wood dowel coated with wood glue into the hole, let it set briefly, then re-drive the screw. This gives it something solid to grip.
- Check door alignment.
After tightening, close the door again. If it’s still hitting the frame at the top latch side, the top hinge may be sagging.
- Lift the door slightly.
For minor sagging, you can:
- Add a long screw (3" wood screw) through the top hinge into the wall stud to pull the door back into alignment.
- Tighten all top hinge screws firmly.
- Deal with squeaks.
- Pull out one hinge pin at a time by tapping it upward with a small nail and hammer.
- Wipe pin clean, apply a small amount of lubricant, and reinsert.
- Open and close the door several times to work it in.
- Sand minor rubbing points (if needed).
If the door still rubs lightly, mark the contact area with pencil, remove the door from the hinges, and sand the edge in that area. Start with medium grit, finish with fine. Rehang and test.
4. Outlet That Feels Loose When You Plug Something In
A loose outlet can damage plugs, wiggle out of the wall, or even present a fire risk if wiring is stressed. As long as you’re comfortable turning off power and following safety steps, you can stabilize it yourself.
> If you are uneasy working with anything electrical, stop here and call a licensed electrician.
What You’ll Need
- Flathead and Phillips screwdrivers
- Non-contact voltage tester
- Outlet spacers or small washers (if needed)
Step-by-Step Fix
- Turn off power at the breaker.
Find the correct breaker for that room or outlet and switch it off. Don’t rely on just flipping a nearby light switch.
- Test for power.
Plug in a lamp or use a non-contact voltage tester to confirm the outlet is dead. Only proceed when you’re sure power is off.
- Remove the cover plate.
Unscrew the center screw and take off the faceplate.
- Check mounting screws.
You’ll see two screws holding the outlet (receptacle) to the metal box—top and bottom. Tighten them gently. This alone can fix wobble in many cases.
- Use spacers if the box is recessed.
If the electrical box sits too far back in the wall and the outlet still moves:
- Add outlet spacers or small washers on the mounting screws between the outlet “ears” and the box.
- Start with thin spacers, test fit, and adjust until the outlet sits firmly level with the wall.
- Reinstall cover plate.
Screw it back on without over-tightening (which can crack the plate). Check for movement—everything should feel solid.
- Restore power and test.
Turn the breaker back on and plug in a device to test. The outlet should be firm, not shifting as you insert or remove plugs.
5. Small Wall Holes from Nails, Screws, or Anchors
Tiny holes and small gouges in drywall or plaster make a room look rough, but they’re very easy to repair. With basic materials, you can make them almost invisible before repainting.
What You’ll Need
- Spackle or lightweight joint compound
- Putty knife (2"–4" wide)
- Fine-grit sandpaper or sanding sponge
- Damp cloth or sponge
- Primer and matching paint (for best results)
Step-by-Step Fix
- Clean the area.
Remove loose debris or flaking paint from around the hole. Wipe lightly with a damp cloth and let it dry.
- Fill the hole.
- For nail or screw holes: use a fingertip or small putty knife to press spackle into the hole.
- For slightly larger holes (up to a nickel in size): apply spackle with the putty knife, pressing firmly to fill the cavity.
- Smooth the surface.
Hold the putty knife at a slight angle and scrape off excess compound so it’s flush or just slightly raised above the wall surface. Feather the edges so there’s no sharp ridge.
- Let it dry completely.
Drying times vary, but most lightweight spackles dry within 30–60 minutes for small repairs. Check instructions on the container.
- Sand lightly.
Use fine-grit sandpaper or a sanding sponge to smooth the patch. Blend it into the surrounding wall surface without over-sanding.
- Wipe away dust.
Use a dry or slightly damp cloth to remove sanding dust. This helps paint adhere properly.
- Prime and paint.
- Apply a small amount of primer over the patch if possible—this helps prevent flashing (a different sheen) under paint.
- Once dry, paint the area with matching wall paint, feathering the edges to blend. Two light coats usually give the best finish.
Conclusion
Small problems become big expenses when they’re ignored. With simple tools and a methodical approach, you can stop leaks, silence running toilets, stabilize loose outlets, and smooth out doors and walls before they cause more damage. The key is safety first (especially around electricity and water), working step by step, and knowing when a job is within your comfort zone. Handle the straightforward fixes yourself, and you’ll reserve professional help—and higher bills—for the truly complex issues.
Sources
- [U.S. Environmental Protection Agency – Fix a Leak](https://www.epa.gov/watersense/fix-leak-week) – Information on how small leaks (like dripping faucets and running toilets) waste water and why fixing them matters
- [Kohler – How to Fix a Leaky Faucet](https://support.kohler.com/hc/en-us/articles/360004212234-How-to-Fix-a-Leaky-Faucet) – Manufacturer guide with diagrams for common faucet types and cartridge replacement
- [U.S. Department of Energy – Water Heating & Saving Hot Water](https://www.energy.gov/energysaver/save-water) – Background on how water use and leaks affect home energy and water bills
- [National Fire Protection Association – Electrical Safety in the Home](https://www.nfpa.org/education-and-research/home-fire-safety/electrical) – Safety guidelines related to electrical systems and outlets
- [Lowe’s – How to Patch and Repair Drywall](https://www.lowes.com/n/how-to/patch-and-repair-drywall) – Step-by-step repair techniques for small to medium wall damage
Key Takeaway
The most important thing to remember from this article is that this information can change how you think about Household Repairs.


