Most everyday problems around the house don’t need a contractor, a new gadget, or a weekend lost to YouTube videos. With a few basic tools and clear steps, you can handle a lot of common issues yourself—safely and without guesswork.
Below are five practical, step‑by‑step fixes you can rely on. Each one is designed so you can follow along even if you don’t consider yourself “handy.”
1. Quiet a Squeaky Door Hinge
A squeaky door is annoying, but it’s also one of the easiest problems to fix yourself.
What you’ll need
- Old towel or rag
- Paper towel or small brush
- Lubricant: silicone spray, white lithium grease, or petroleum jelly
- Optional: flathead screwdriver, hammer
Steps
Protect the floor
Lay an old towel under the hinge to catch drips and dirt.
Try lubricating in place first
- Open and close the door to expose the hinge joints. - Spray a small amount of silicone lubricant directly onto the hinge pins and moving parts. - Wipe off excess with a paper towel. - Open and close the door 10–15 times to work the lubricant in. - If the noise stops, you’re done.
If it still squeaks, remove the hinge pin
- Close the door. - Place a flathead screwdriver at the bottom of the hinge pin and tap it upward gently with a hammer. - Pull the pin out with your fingers or pliers.
Clean the hinge pin
- Wipe off old dirt and rust with a rag. - If it’s very dirty, use a bit of dish soap and water, then dry completely.
Lubricate and reinstall
- Coat the pin lightly with silicone lubricant, grease, or petroleum jelly. - Insert the pin back into the hinge from the top. - Tap it down gently with the hammer until it’s fully seated.
Test and adjust
- Open and close the door several times. - If it still squeaks slightly, add a tiny bit more lubricant at the top of the hinge and work the door again.
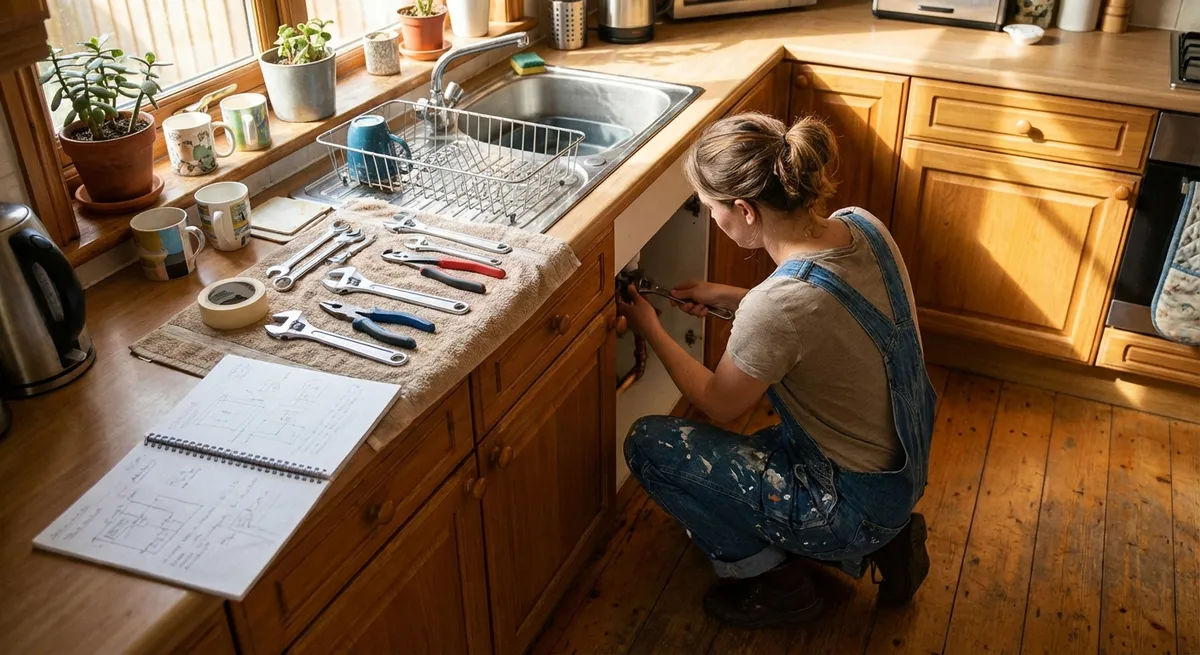
2. Fix a Slow or Clogged Bathroom Sink Drain
A slowly draining sink usually means hair, soap scum, or buildup in the drain—not a plumbing catastrophe.
What you’ll need
- Rubber gloves
- Small bucket or bowl
- Old toothbrush or small cleaning brush
- Zip-It style plastic drain tool (or similar hair clog remover)
- Baking soda and white vinegar
- Hot (not boiling) water
Steps
Clear out the sink area
Remove items from under the sink and around the basin so you have room to work.
Try a simple mechanical clean first
- Put on gloves. - Push a plastic drain tool down into the drain as far as it will go. - Wiggle it around, then pull it out slowly. - Remove any hair and debris from the tool and repeat 2–3 times.
Clean the stopper (if present)
- Look under the sink for the horizontal rod that connects to the drain. - Unscrew the nut holding the rod in place (usually by hand). - Pull out the rod and then lift the stopper out from the top of the sink. - Scrub the stopper with an old toothbrush and soap. - Reinsert the stopper and reconnect the rod and nut snugly.
Use a baking soda and vinegar flush
- Pour about ½ cup of baking soda into the drain. - Follow with ½ to 1 cup of white vinegar. - Let it fizz for 10–15 minutes. This helps break down soap and mild buildup.
Rinse with hot water
- Run hot tap water for 1–2 minutes to flush everything through. - Check how quickly the water drains.
When to stop and call a pro
- If water is still standing and draining extremely slowly after these steps. - If you see leaks under the sink when running water. In those cases, shut off the water valves under the sink and contact a licensed plumber.
3. Reset a Tripped Circuit Breaker Safely
Losing power in part of your home can look serious, but often it’s just a tripped breaker.
What you’ll need
- Flashlight (if the area is dark)
- Dry hands and dry floor (for safety)
Steps
Identify the affected area
- Note which outlets, lights, or appliances lost power. - Unplug or switch off larger appliances on that circuit (microwave, space heater, etc.) to prevent an immediate re-trip.
Go to your electrical panel
- This is usually in a basement, garage, hallway, or utility closet. - Open the panel door carefully.
Find the tripped breaker
- Look for a breaker switch that is neither fully in the ON nor fully in the OFF position. - It may be slightly out of line with the others, or the indicator window may show a different color (often orange or red).
Reset the breaker properly
- Using one hand (keep the other away from the panel), push the tripped breaker firmly to the OFF position. - Then push it back to the ON position until it clicks.
Test the circuit
- Go back to the affected area. - Turn lights back on and plug appliances in one at a time. - Avoid running several high‑wattage items (space heaters, hair dryers, microwaves) on the same circuit.
If the breaker trips again quickly
- Unplug everything on that circuit. - Try resetting once more. - If it trips again with nothing plugged in, or if you smell burning or see scorch marks at the panel or outlets: - Leave the breaker OFF. - Do not attempt more resets. - Call a licensed electrician immediately.
4. Seal a Drafty Window to Cut Energy Loss
Drafty windows waste energy and make rooms uncomfortable. You can often improve them without replacing the whole window.
What you’ll need
- Utility knife or scissors
- Self-adhesive foam weatherstripping
- Rope caulk or removable caulk (for gaps around frames)
- Window insulation film kit (optional for very drafty windows)
- Tape measure
- Clean cloth
Steps
Find where the draft is coming from
- On a windy or cold day, run your hand slowly around the edges of the closed window. - Note where you feel cold air leaking in—usually at the sides, top, or meeting rail.
Clean the surfaces
- Wipe the window frame surfaces where you’ll apply weatherstripping with a damp cloth. - Let them dry completely so the adhesive sticks properly.
Apply foam weatherstripping
- Measure the length of the frame edges where you felt drafts. - Cut foam weatherstripping to size. - Peel off the backing and press it firmly along the frame where the window sash meets the frame when closed. - Close the window to check for a good seal; adjust if it’s too tight or too loose.
Seal small gaps with rope caulk
- For tiny gaps around the frame or between trim and wall, press rope caulk into the cracks. - Smooth it with your fingers to create a continuous seal. - This type is usually removable in warmer months.
Use window film for extra insulation (optional)
- For very drafty or single‑pane windows, use a window insulation film kit. - Follow the package instructions: apply double‑sided tape to the frame, attach the film, then use a hair dryer to shrink it tight. - This creates an insulating air gap and reduces drafts significantly.
Recheck for drafts
- Run your hand around the window edges again. - Adjust or add more caulk/stripping where you still feel air movement.
5. Stop a Running Toilet That Won’t Shut Off
A constantly running toilet wastes a lot of water and money, but the fix is often simple and doesn’t require removing the entire toilet.
What you’ll need
- Adjustable wrench (optional)
- Towel
- Replacement flapper (if the existing one is worn)
- Small sponge or rag
Steps
Remove the tank lid carefully
- Lift the lid straight up with both hands and set it on a towel to avoid cracks.
Identify the main parts
Inside the tank you’ll see: - The fill valve (tall assembly on one side with a float). - The flapper (rubber piece at the bottom connected to the handle by a chain). - The overflow tube (vertical tube in the center).
Check the flapper first
- Gently press down on the flapper while the toilet is running. - If the water noise stops, the flapper is likely not sealing properly and may need cleaning or replacement.
Clean or replace the flapper
- Turn off the water supply valve behind or below the toilet by turning it clockwise. - Flush the toilet to empty most of the water from the tank. - Unclip the flapper from the posts on the overflow tube and detach the chain. - Inspect it. If it’s warped, cracked, or stiff, replace it with a similar model. - If it looks usable, clean the sealing surface and the valve seat with a sponge. - Install the new or cleaned flapper and reconnect the chain with just a little slack.
Adjust the water level
- Turn the water supply back on. - Let the tank refill. - The water level should sit about 1 inch below the top of the overflow tube. - If it’s too high, adjust the float according to the type of fill valve (turn the adjustment screw or slide the clip on the rod) to lower the water level.
Test the fix
- Flush the toilet several times. - Confirm that: - The flapper closes smoothly. - The water stops running after the tank fills. - If it still runs, double‑check the chain isn’t too tight and that the flapper matches your toilet model.
Conclusion
Most “annoying but not urgent” problems around the house fall into the same category: they look bigger than they are. With a clear process, a few basic tools, and an understanding of when to stop and call a pro, you can handle a surprising amount on your own.
Use these fixes as a starting point. Save them, share them, and build your own personal repair playbook over time. The next time something squeaks, drips, runs, or rattles, you’ll know you don’t have to wait for help—you can start solving it right away.
Sources
- [U.S. Department of Energy – Air Sealing Your Home](https://www.energy.gov/energysaver/air-sealing-your-home) – Guidance on identifying and sealing drafts around windows and doors.
- [Energy Star – Windows, Doors, and Skylights](https://www.energystar.gov/products/building_products/residential_windows_doors_and_skylights) – Official information on improving window efficiency and reducing energy loss.
- [EPA WaterSense – Fix a Leak](https://www.epa.gov/watersense/fix-leak-week) – Explains the impact of running toilets and other leaks, with basic repair tips.
- [Family Handyman – How to Fix Squeaky Doors](https://www.familyhandyman.com/project/how-to-fix-squeaky-doors/) – Practical techniques and tool suggestions for quieting door hinges.
- [U.S. Consumer Product Safety Commission – Circuit Breakers and Fuses](https://www.cpsc.gov/s3fs-public/5033.pdf) – Safety information on household electrical panels and overcurrent protection devices.
Key Takeaway
The most important thing to remember from this article is that this information can change how you think about DIY Solutions.


