Household problems tend to show up when you’re the busiest: a dripping faucet during a work call, a clogged sink before guests arrive, or a door that suddenly won’t shut right. Instead of waiting days (and paying a premium) for a pro, there are plenty of safe, realistic repairs you can handle yourself with basic tools and a calm, methodical approach.
This guide walks you through five everyday issues, with clear steps you can actually follow—even if you don’t consider yourself “handy.”
1. Stop a Dripping Faucet (Without Replacing the Whole Thing)
A slow drip wastes water, adds to your bill, and is surprisingly annoying. In many kitchen and bathroom faucets, the culprit is a worn cartridge or washer. You don’t need to replace the entire fixture—just the part that seals the water.
What you’ll need
- Adjustable wrench or wrench set
- Phillips and flathead screwdrivers
- Replacement cartridge or washer (matched to your faucet model)
- Plumber’s grease (optional but helpful)
- Towel or rag
Step‑by‑step
- Turn off the water supply.
Look under the sink for two shutoff valves (hot and cold). Turn them clockwise until tight. Open the faucet to release pressure and confirm the water is off.
- Plug the drain.
Use the sink stopper or a rag. Small screws and parts like to roll straight into the drain.
- Remove the faucet handle.
- Look for a small decorative cap (often with H/C or the brand logo).
- Pry it off gently with a flathead screwdriver.
- Remove the screw underneath and lift off the handle.
- Expose and remove the cartridge or stem.
- You may see a decorative collar or retaining nut—unscrew it with a wrench.
- Gently pull out the cartridge (single‑handle) or stem (two‑handle). Note the orientation; take a quick photo for reference.
- Inspect and replace the worn parts.
- Look for cracked rubber seals, worn O‑rings, or corrosion.
- Replace with identical parts. If you’re unsure, bring the old cartridge/stem to a hardware store and match it.
- Lubricate and reassemble.
- Apply a thin layer of plumber’s grease to O‑rings and seals (if recommended for your faucet type).
- Reinsert the cartridge/stem in the same orientation.
- Tighten the retaining nut, reinstall the handle, and snap the decorative cap back on.
- Turn water back on slowly and test.
Open the shutoff valves gradually to avoid pressure shock. Turn the faucet on and off a few times, then check for drips after a few minutes.
If the drip persists, the valve seat in the faucet body may be damaged. At that point, replacing the faucet or calling a plumber is usually the most practical option.
2. Clear a Slow or Clogged Sink Without Harsh Chemicals
A slow-draining sink or tub is usually caused by hair, soap scum, grease, or food debris—not a broken pipe. You can often clear it without resorting to caustic drain cleaners that can damage older plumbing.
What you’ll need
- Plunger (cup-style for sinks, flange-style for toilets)
- Bucket
- Old toothbrush or small nylon brush
- Drain snake or plastic drain cleaning tool
- Rubber gloves
- Baking soda and vinegar (optional helper)
Step‑by‑step
- Remove and clean the stopper or strainer.
- In bathroom sinks, loosen the small nut on the back of the drain pipe under the sink to release the stopper rod, then pull the stopper out.
- In kitchens, lift out any strainers or baskets.
- Scrub hair and gunk off with a brush. Rinse thoroughly.
- Try hot water first (for grease-based clogs).
Boil a kettle or pot of water (for metal pipes). Carefully pour in stages down the drain, waiting 10–15 seconds between pours.
Skip boiling water for PVC pipes if you’re unsure of the temperature tolerance—use very hot tap water instead.
- Use a plunger correctly.
- Block the overflow opening (in sinks or tubs) with a wet cloth to improve suction.
- Add enough water to cover the plunger cup.
- Place the plunger directly over the drain, press down to seal, and plunge firmly 10–15 times.
- Lift quickly and see if water drains better. Repeat a couple of cycles.
- Snake the drain.
- Insert a plastic drain tool or a small manual snake into the drain opening.
- Push gently until you hit resistance, then twist and pull back to grab hair and debris.
- Repeat until you’re pulling out minimal gunk.
- Flush with baking soda and vinegar (optional).
- Pour about ½ cup baking soda into the drain.
- Follow with ½–1 cup white vinegar. Let it fizz for 10–15 minutes.
- Rinse with very hot water.
- Reassemble and test.
Reinstall the stopper or strainer, run water for 1–2 minutes, and confirm it drains freely.
If multiple drains in your home are slow or backing up, the blockage may be in the main line—time to call a professional rather than forcing the issue.
3. Quiet a Squeaky Door and Fix Poor Latching
Squeaks and doors that won’t fully latch are more than an annoyance; they can signal misalignment that gets worse over time. Usually, you can restore smooth operation in under an hour with minor adjustments.
What you’ll need
- Lubricant (silicone spray or white lithium grease; avoid cooking oils)
- Phillips screwdriver
- Level (optional but helpful)
- Wood toothpicks or wooden matchsticks
- Utility knife or chisel (for latch plate adjustment, if needed)
Step‑by‑step for squeaks
- Identify the squeaky hinge.
Open and close the door slowly and listen. It’s often just one hinge.
- Support the door slightly.
Place a wedge or folded cardboard under the door edge to remove some weight from the hinges.
- Remove the hinge pin.
- With the door closed, tap the bottom of the hinge pin upward with a screwdriver and hammer (if needed).
- Pull the pin out, keeping track of which hinge it came from.
- Clean and lubricate.
- Wipe the pin with a rag to remove dirt and rust.
- Apply a thin coat of lubricant along the pin. Avoid soaking the hinge to prevent drips on the door or trim.
- Reinstall the pin and test.
Tap it back in place and open/close the door several times to work the lubricant in. Repeat for other noisy hinges.
Fixing a door that doesn’t latch properly
- Check hinge screws.
- Open the door and tighten all hinge screws on the door and frame. Loose hinges cause sagging.
- If a screw spins without tightening, remove it and fill the hole with wood glue and toothpicks or matchsticks. Let dry, then reinsert the screw.
- Test the latch alignment.
- Close the door slowly and watch where the latch hits the strike plate.
- If it hits above or below the hole, you’ll need to adjust.
- Adjust the strike plate (minor misalignment).
- Slightly loosen the screws holding the strike plate.
- Tap the plate gently up/down or sideways with a screwdriver handle to improve alignment.
- Retighten and test.
- Enlarge the strike plate opening (if needed).
- If the latch barely misses, you can carefully file or chisel a bit of wood from the inside of the strike opening.
- Remove small amounts, test often. Don’t overcut.
Once the latch engages smoothly without forcing the door, you’re done.
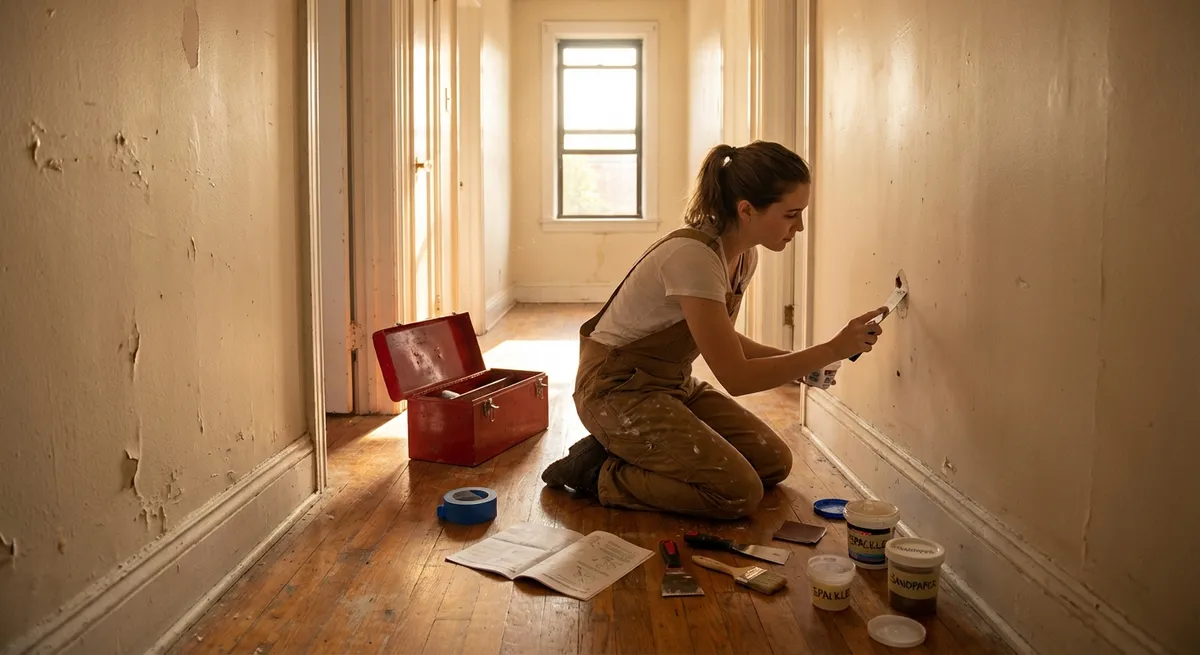
4. Patch a Small Hole in Drywall for a Clean Finish
Door handles, furniture corners, or a misplaced anchor can leave ugly holes in walls. Small holes (about nail to golf-ball size) are easy to repair so they blend with the rest of the wall once painted.
What you’ll need
- Pre-mixed joint compound or lightweight spackle
- Putty knife (2–4 inch)
- Sanding sponge or fine sandpaper (120–220 grit)
- Self-adhesive mesh patch (for larger holes, about 1–3 inches)
- Damp cloth or sponge
- Primer and touch-up paint
Step‑by‑step for nail/screw holes and small dents
- Clean the area.
Wipe away dust. If the hole is ragged, lightly scrape around it with the putty knife.
- Fill the hole.
- Scoop a small amount of spackle or joint compound onto the putty knife.
- Press it into the hole and smooth the surface flat or slightly raised.
- Let it dry completely.
Follow the product label—small fills can dry in 30–60 minutes, but deeper spots may need more time.
- Sand smooth.
- Lightly sand until the patch is level with the wall and edges feather in.
- Wipe off dust with a damp cloth.
- Prime and paint.
- Apply primer over the patch, especially if you’re covering a darker mark or using flat/matte paint.
- Once dry, paint the area. For best blending, feather the paint out beyond the patch rather than stopping at a hard edge.
Step‑by‑step for slightly larger holes (up to a few inches)
- Apply a mesh patch.
- Center the self-adhesive mesh patch over the hole and press firmly.
- Cover with joint compound.
- Spread compound over the patch, extending 1–2 inches past the edges.
- Smooth as evenly as possible.
- Layer and sand.
- Let the first coat dry, then sand lightly.
- Add a second thin coat to smooth imperfections. Let dry and sand again.
- Prime and paint as above.
Avoid applying a thick, single layer of compound—it will crack and take much longer to dry. Multiple thin coats give a more professional finish.
5. Reset a Tripped Breaker and Restore Power Safely
Losing power to an outlet or room can be alarming, but often the cause is a tripped circuit breaker, especially after plugging in a high-draw appliance. Knowing how to safely check and reset a breaker saves time and helps you understand your home’s limits.
What you’ll need
- Flashlight
- Non-contact voltage tester (recommended)
Step‑by‑step
- Unplug or turn off suspect devices.
If power went out when you turned on a specific appliance (space heater, hair dryer, microwave), unplug it first. This reduces the chance of immediately tripping the breaker again.
- Locate the electrical panel.
Often in a basement, garage, utility room, or closet. Use a flashlight if the area is dim.
- Open the panel and identify the tripped breaker.
- Look for a switch that’s neither fully “ON” nor fully “OFF” or one with an orange/red indicator.
- Some breakers will be slightly out of line with the others.
- Switch fully OFF, then ON.
- Firmly push the tripped breaker to the OFF position first.
- Then push it back to ON. It should click into place.
- Test the power.
- Return to the affected outlet or room.
- Use a non-contact voltage tester to confirm power is back, or plug in a low-draw device like a lamp.
- Avoid overloading that circuit again.
- Don’t run multiple high-power devices (space heater, toaster, hair dryer, vacuum) on the same circuit simultaneously.
- If the breaker keeps tripping with normal use, stop resetting it repeatedly and contact a licensed electrician—there may be a wiring issue or a failing breaker.
Never bypass a breaker, use oversized fuses, or tape a breaker in the ON position. The breaker is a safety device designed to trip before wires overheat.
Conclusion
Most everyday household annoyances—dripping faucets, slow drains, squeaky doors, wall damage, or minor power outages—don’t require immediate professional intervention. With a few basic tools, a methodical mindset, and clear steps, you can handle a surprising amount of this work yourself.
Start with one problem, follow the process slowly, and pay attention to safety (especially around plumbing shutoff valves and electrical panels). As you build confidence, you’ll save money, reduce stress, and keep your home running smoothly without waiting for help to arrive.
Sources
- [U.S. Environmental Protection Agency – Fix a Leak](https://www.epa.gov/watersense/fix-leak-week) - Explains the impact of household leaks and basic approaches to finding and fixing them
- [Family Handyman – How to Fix a Leaky Faucet](https://www.familyhandyman.com/project/how-to-repair-a-compression-faucet/) - Detailed walkthroughs for different faucet types and leak causes
- [This Old House – Clearing a Clogged Drain](https://www.thisoldhouse.com/plumbing/21015007/how-to-clear-any-clogged-drain) - Practical methods for clearing drains without damaging pipes
- [US Consumer Product Safety Commission – Home Electrical Safety Checklist](https://www.cpsc.gov/safety-education/safety-guides/electrical-safety/home-electrical-safety-checklist) - Guidance on safe use of circuits, outlets, and breakers
- [Lowe’s – How to Repair Drywall](https://www.lowes.com/n/how-to/repair-drywall) - Visual and step-by-step instructions for patching different sizes of drywall damage
Key Takeaway
The most important thing to remember from this article is that this information can change how you think about Household Repairs.


