Minor problems at home have a habit of showing up at the worst possible time—right before guests arrive, during a work call, or when you’re trying to relax. The good news: you can solve many of these issues quickly with basic tools and a clear plan. This guide walks you through five practical DIY fixes that most people can handle safely and confidently.
Each solution includes simple steps, what you’ll need, and how to know when it’s time to call a pro instead of pushing further.
1. Quiet a Running Toilet That Won’t Stop Filling
A constantly running toilet wastes water and money, but it’s usually fixable in minutes.
What you’ll need
- Adjustable wrench (optional)
- Replacement flapper or fill valve (if needed)
- Towel or sponge
Step‑by‑step
Lift the tank lid and look inside
Place it gently on a stable surface. Identify three main parts: the flapper (rubber piece at the bottom), chain attached to the flush lever, and fill valve (vertical assembly that controls incoming water).
Check the flapper seal
Flush once and watch: does the flapper close fully and sit flat? If it looks warped, cracked, or doesn’t seal tightly, it’s likely the problem.
Adjust or untangle the chain
If the chain is too tight, the flapper can’t close; too loose, it can get trapped underneath. There should be a little slack—about 1–2 chain links—when the flapper is fully closed. Re-hook the chain to get the right length.
Test the toilet
Flush again and listen. If the water stops refilling within 30–60 seconds and you don’t hear a slow trickle, you’ve fixed it.
Replace the flapper if needed
Turn off the water supply valve (usually behind the toilet). Flush to empty the tank. Unhook the old flapper from the overflow tube, attach the new one (match style/size), reconnect the chain, and turn the water back on.
If it’s still running, inspect the fill valve
If water continues to flow into the overflow tube or the valve never shuts off, the fill valve may need replacing. Most modern fill valves come with simple instructions and only require an adjustable wrench.
When to call a pro
If you see cracks in the tank, persistent leaking at the base of the toilet, or you’re uncomfortable replacing the fill valve, contact a licensed plumber.
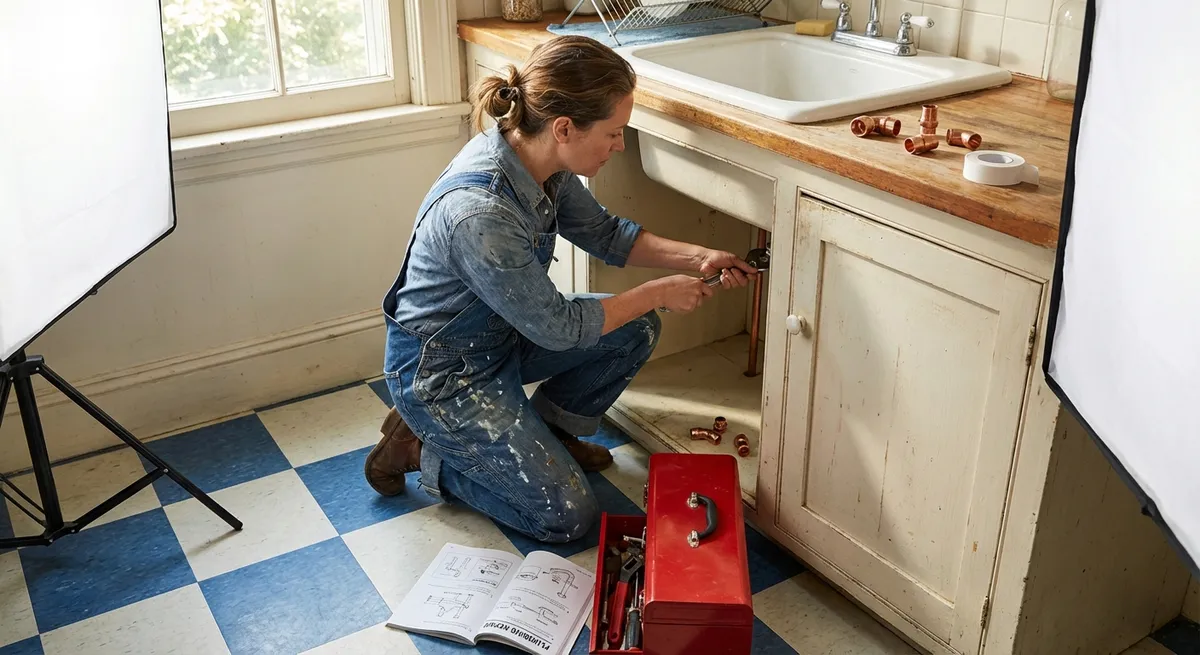
2. Restore a Slow or Clogged Sink Without Harsh Chemicals
A sink that drains slowly doesn’t always need a plumber—or a bottle of strong drain cleaner. In many cases, buildup in the trap or stopper is the real culprit.
What you’ll need
- Bucket or bowl
- Old toothbrush or small cleaning brush
- Rubber gloves
- Plunger (cup-style for sinks)
- Adjustable wrench (optional)
Step‑by‑step
Clear the area under the sink
Remove stored items so you can reach the pipes comfortably. Place a bucket under the U-shaped pipe (the P‑trap).
Try hot water first
Run very hot (not boiling) tap water for 1–2 minutes. Sometimes this is enough to move light buildup and improve flow.
Use a plunger (for sinks without garbage disposals)
Plug any overflow holes with a damp cloth. Fill the sink with enough water to cover the plunger cup. Give 10–15 firm plunges, then quickly pull up and check drainage.
Clean the stopper (bathroom sinks)
- Remove the stopper by lifting it out or, if it’s fixed, by loosening the pivot rod nut underneath the sink. - Pull the stopper up and out—hair and gunk usually accumulate here. - Clean with an old toothbrush and rinse thoroughly. Reassemble and test.
Clean the P‑trap if still slow
- Turn off the faucet and place a bucket under the trap. - Loosen the slip nuts on both sides of the trap by hand or with an adjustable wrench. - Remove the trap and dump contents into the bucket. - Clean the inside with a brush and rinse. - Reinstall the trap, hand‑tighten the nuts, and run water to check for leaks.
Check your work
Run water for at least a minute. If it drains freely and nothing drips under the sink, you’re done.
When to call a pro
If multiple fixtures are draining slowly, you hear gurgling from other drains, or you see sewage backup, you may have a main line issue that needs a professional.
3. Fix a Door That Won’t Latch or Keeps Swinging Open
A door that doesn’t stay shut or rubs the frame is annoying, but adjusting it is often simple and tool‑light.
What you’ll need
- Phillips screwdriver
- Wood toothpicks or wooden matchsticks
- Utility knife (optional)
- Hammer and small chisel (optional)
Step‑by‑step
Check the hinges first
Open the door halfway. Grab the doorknob and gently lift. If you feel movement at the hinges, the screws are likely loose.
Tighten hinge screws
With a screwdriver, tighten all hinge screws on both the door and the frame. Often, this alone will realign the door so it latches properly.
Reinforce stripped screw holes
If a hinge screw spins without tightening, the screw hole is probably stripped. - Remove the screw. - Insert wood toothpicks or matchsticks dipped in wood glue into the hole. - Break them off flush with the surface. - Reinsert and tighten the screw. The added wood gives the threads something to grip.
Check latch alignment
Close the door slowly. Watch where the latch meets the strike plate (the metal plate in the frame). If it hits too high or too low, you’ll see rub marks.
Adjust the strike plate (small change)
Slight misalignment can be fixed by loosening the strike plate screws and shifting it slightly up, down, or inward. Retighten screws and test the latch.
Enlarge or move the strike plate opening (larger adjustment)
If alignment is off by several millimeters: - Mark where the latch meets the plate. - Remove the strike plate. - Carefully chisel or file the opening and/or recess to match the new position. - Reinstall the plate and test.
Stop a door from swinging open by itself
If your door swings, the frame is slightly out of plumb. A quick fix: - Remove the top hinge pin. - Lay it on a hard surface and tap the center with a hammer to create a slight bend. - Reinsert the pin. The added friction helps the door stay put.
When to call a pro
If the frame itself is badly warped, you see cracks in the wall near the frame, or the door is heavily binding and won’t close even after adjustments, you may need a carpenter or door specialist.
4. Bring a Dead Power Outlet Back Safely (Or Know When Not To)
A “dead” outlet doesn’t always mean bad wiring. Often, the fix is as simple as resetting a GFCI outlet or breaker. Safety is critical here—if anything feels uncertain, stop and call an electrician.
What you’ll need
- Non‑contact voltage tester (recommended)
- Flashlight
- Access to your electrical panel
Step‑by‑step
Test with another device first
Plug in a different device you know works (like a lamp). This rules out a bad cord or device.
Locate and reset GFCI outlets
In kitchens, bathrooms, garages, basements, and outdoor areas, check nearby GFCI outlets (the ones with TEST and RESET buttons). - Press the RESET button firmly. - Test the original outlet again. One tripped GFCI can control several downstream outlets.
Check the breaker panel
- Open the panel and look for any breakers that are not fully in the ON position. A tripped breaker often sits between ON and OFF. - Flip the suspect breaker fully to OFF, then back to ON. - Test the outlet again.
Use a non‑contact voltage tester (for extra safety)
- Hold the tester near the outlet slots. - If the tester doesn’t detect voltage, the outlet is still dead and the issue may be wiring‑related. - If the tester shows live power but the outlet doesn’t work, the receptacle itself may be faulty.
Visually inspect (without disassembling if unsure)
Check for burning smell, discoloration, or heat on the outlet cover. If you notice any of these, don’t use that outlet.
What you should NOT do as DIY
- Do not work on outlets or wiring without turning off the breaker and verifying with a tester.
- Do not replace outlets if you’re unfamiliar with basic wiring, grounding, or local code requirements.
When to call a pro
If a breaker trips repeatedly, outlets are warm or discolored, lights flicker, or any burning smell is present, stop troubleshooting and schedule a licensed electrician.
5. Seal a Drafty Window to Cut Energy Loss
Drafty windows make your home uncomfortable and your energy bill higher. Fortunately, you can often improve comfort with simple, reversible fixes.
What you’ll need
- Weatherstripping tape or foam
- Caulk (latex or silicone, depending on location)
- Caulk gun (if using standard tubes)
- Utility knife or scissors
- Rag and mild cleaner
Step‑by‑step
Identify where the draft is coming from
On a windy day (or with a fan blowing from outside), hold your hand, a lit incense stick, or a thin strip of tissue near the window edges. Movement indicates air leakage.
Clean the surfaces
Wipe down window sashes, frames, and surrounding trim. Caulk and weatherstripping adhere better to clean, dry surfaces.
Seal gaps around the frame with caulk
For cracks between the window frame and wall/trim: - Cut the caulk tube tip at a 45° angle. - Apply a steady bead along the gap. - Smooth with a damp finger or caulk tool. - Wipe excess with a rag. Use exterior‑rated caulk outdoors and paintable interior caulk indoors as needed.
Add weatherstripping to moving parts
For air leaks between sash and frame: - Measure the length of the sides/top where the sash meets the frame. - Cut weatherstripping to size. - Peel and stick along clean, dry surfaces where the sash compresses when closed. Make sure the window can still open and close safely after installation.
Consider temporary film for very leaky windows
Window insulation film kits add a plastic barrier over the entire window: - Apply double‑sided tape to the frame. - Attach the plastic film. - Use a hair dryer to shrink the film taut. This is removable and good for renters or seasonal use.
Recheck for drafts
After sealing, repeat the tissue or incense test. Minor movement may be normal in very old windows, but you should feel noticeably less airflow.
When to call a pro
If there’s visible rot, water damage, or condensation between double‑pane glass, or the window is difficult to open/close, a window specialist can assess whether repair or replacement is more cost‑effective.
Conclusion
Most everyday home problems don’t require urgent service calls or specialized tools. With a bit of patience and clear steps, you can:
- Stop a toilet from wasting water
- Clear a slow sink safely
- Get a stubborn door working again
- Restore power to an outlet when it’s a simple trip or reset
- Cut drafts and improve comfort around windows
The key is knowing the difference between a safe DIY job and a situation that demands a professional. Start with low‑risk fixes, work methodically, and don’t hesitate to stop if something looks unsafe or unfamiliar. Small repairs done today prevent bigger headaches—and bigger bills—tomorrow.
Sources
- [U.S. Environmental Protection Agency – WaterSense: Fix a Leak](https://www.epa.gov/watersense/fix-leak-week) – Guidance on common household leaks, including running toilets and water‑saving tips
- [USA.gov – Home Repairs](https://www.usa.gov/home-repairs) – General information on home repair topics and when to seek professional help
- [Energy.gov – Air Sealing Your Home](https://www.energy.gov/energysaver/air-sealing-your-home) – Detailed advice on sealing drafts around windows, doors, and other openings
- [University of Illinois Extension – Drain Maintenance and Care](https://web.extension.illinois.edu/plumbing/drain.cfm) – Educational overview of drain function and safe maintenance practices
- [U.S. Consumer Product Safety Commission – Home Electrical Safety Checklist](https://www.cpsc.gov/s3fs-public/513.pdf) – Safety guidelines for outlets, breakers, and household electrical systems
Key Takeaway
The most important thing to remember from this article is that this information can change how you think about DIY Solutions.


