Things break at home when you’re busy, tired, or already stressed. The goal isn’t to become a professional handyman—it’s to handle the most common problems quickly, safely, and without making them worse. This guide walks you through five household fixes with clear steps, what you actually need, and when you should stop and call a pro.
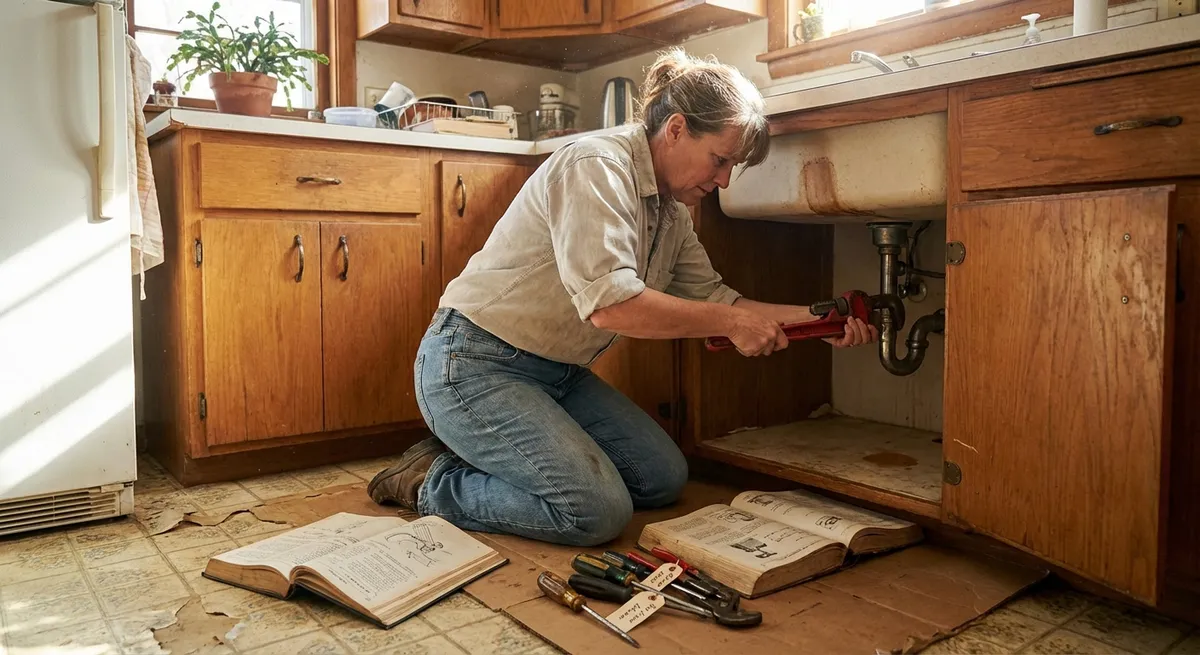
Stop a Leaky Faucet Before It Wastes More Money
A dripping faucet can waste gallons of water and quietly add dollars to your bill. Most basic leaks come from worn-out washers or cartridges—not a full plumbing disaster.
What You’ll Need
- Adjustable wrench or basin wrench
- Screwdriver (Phillips and flathead)
- Replacement washer or cartridge (match your faucet brand/model if possible)
- Plumber’s tape (Teflon tape)
- Small bowl or towel (to catch small parts)
Step-by-Step: Basic Compression or Cartridge Faucet
Shut off the water
Look under the sink for two small shutoff valves (hot/cold). Turn them clockwise to close. If you don’t have valves, shut off the main water supply to the house.
Plug the drain
Use the sink stopper or a rag. This stops screws or tiny parts from falling into the drain.
Remove the faucet handle
- Look for a small decorative cap (often marked hot/cold). - Pry it off with a flathead screwdriver. - Remove the screw underneath and lift off the handle.
Expose the cartridge or stem
Under the handle, you’ll see a nut holding the cartridge or stem in place. Use your wrench to loosen and remove it. Gently pull out the cartridge/stem.
Inspect and replace the worn parts
- For compression faucets: replace the rubber washer or O-ring at the bottom of the stem. - For cartridge faucets: replace the entire cartridge with a matching one.
Reassemble with plumber’s tape
Wrap plumber’s tape around threaded sections (1–2 turns) to improve the seal. Reinstall the cartridge/stem, tighten the nut snugly (not overly tight), then reinstall the handle and cap.
Turn water back on and test
Slowly open the shutoff valves. Turn the faucet on and off a few times and check for drips at the spout and around the handle.
When to Call a Pro
- Water shutoff valves won’t turn or are leaking
- The faucet body is cracked or corroded
- You turn the water back on and see leaks under the sink
Quiet a Running Toilet and Stop the Constant Refill
A toilet that never stops running is usually a simple internal parts issue, not a full replacement job. Fixing it can save a lot of water.
What You’ll Need
- Universal toilet repair kit (fill valve, flapper, and hardware)
- Adjustable wrench
- Towel or sponge
- Bucket (optional)
Step-by-Step: Fix a Typical Running Toilet
Remove the tank lid and observe
Flush once and watch what happens inside: - Is water continually flowing into the bowl? - Is the water level too high and spilling into the overflow tube? - Is the flapper not sealing properly?
Shut off the water supply
Turn the valve behind or beside the toilet clockwise until it stops. Flush once to empty most of the tank. Use a sponge or towel to soak up remaining water if needed.
Check the flapper first (most common issue)
- Unhook the rubber flapper from the overflow tube. - Disconnect the chain from the flush handle arm. - Inspect for warping, cracking, or slime buildup. - Install the new flapper from your kit and adjust the chain so it has slight slack (not tight, not dragging).
Adjust the water level
- For float-cup fill valves: squeeze the clip on the side of the float and slide it down to lower the water level. - For float-ball types: gently bend the arm downward. Aim for a water level about 1 inch below the top of the overflow tube.
Replace the fill valve if it’s not shutting off
- Disconnect the water supply line under the tank using a wrench. - Inside the tank, unscrew the nut holding the fill valve. - Remove the old valve and install the new one per the kit instructions (usually height-adjustable). - Reattach the water line and tighten.
Turn water back on and test
Slowly open the shutoff valve. Let the tank fill. Watch and listen: the water should stop, with no trickle into the bowl. Flush several times to confirm.
When to Call a Pro
- Cracks visible in the tank or bowl
- Water leaking onto the floor from where the toilet meets the floor
- The shutoff valve is frozen or leaking
Reset a Tripped Breaker Safely When Power Suddenly Stops
If a section of your home loses power but other parts are fine, a circuit breaker may have tripped. Resetting it properly is important for safety and to avoid repeated trips.
What You’ll Need
- Flashlight (if the area is dark)
- Dry hands and dry shoes
- Labeling tape/marker (optional but helpful)
Step-by-Step: Safely Reset a Breaker
Find your electrical panel
Common locations: garage, basement, hallway, or utility room. Open the door carefully.
Identify the tripped breaker
- Look for a switch that’s not fully ON or OFF—often slightly in the middle. - Some panels show an orange/red indicator on tripped breakers.
Unplug or switch off devices on that circuit
Before resetting, unplug high-draw items like space heaters, hair dryers, or power strips in the affected area. This reduces the chance of an immediate re-trip.
Reset the breaker correctly
- Push the tripped breaker firmly to the OFF position first. - Then push it firmly back to the ON position until it clicks.
Restore power and test
Go back to the room and test outlets/lights. Plug devices in one at a time. If the breaker trips immediately when you plug a specific item in, that device may be faulty or drawing too much power.
Label the circuit if it’s not already
While you know which area was affected, label that breaker (e.g., “Living Room Outlets” or “Bedroom 2”).
When to Call an Electrician Immediately
- Breaker keeps tripping with nothing plugged in
- You see or smell burning around the panel or outlets
- The breaker feels hot to the touch
- You see scorch marks, buzzing, or loose breakers
Do not open or work inside the panel beyond flipping breakers. Anything more complex is a professional job.
Patch a Small Wall Hole So It Actually Disappears
Door handles, moving furniture, or wall anchors can leave ugly holes. Small drywall repairs are very manageable if you prep correctly and don’t rush the finishing.
What You’ll Need
- Spackle or joint compound
- Putty knife (2–4 inches)
- Sanding sponge or fine-grit sandpaper (120–220 grit)
- Damp cloth
- Primer and matching paint
- Self-adhesive patch (for larger holes, 1–4 inches)
Step-by-Step: Nail Holes and Minor Dents
Clean the area
Wipe away dust or loose paint with a damp cloth. Let dry.
Apply spackle
Use the putty knife to press spackle into the hole. Overfill slightly, then smooth it flush with the wall in a few firm strokes.
Let it dry completely
Follow the product instructions—usually 1–2 hours for small repairs. Don’t rush to sand wet spackle.
Sand smooth
Lightly sand the area until it’s level with the wall. Run your fingers over it—if you can feel an edge, sand a bit more.
Prime and paint
Apply a small amount of primer over the patch, let it dry, then paint. Feather the edges so it blends into the existing paint.
Step-by-Step: Bigger Holes (About 1–4 Inches)
Attach a self-adhesive patch
Center the mesh patch over the hole and press firmly.
Apply joint compound in thin layers
Spread compound over the patch, extending 1–2 inches beyond the edges. Let dry fully.
Sand and apply a second coat
Sand lightly, then add another thinner coat to feather the edges. Let it dry and sand again until smooth.
Prime and paint
Always prime patched areas; otherwise, you may see a dull spot where the patch is.
When to Call a Pro
- Large holes where studs or insulation are exposed
- Cracks that keep reopening or appear in patterns (could signal structural issues)
- Water-damaged drywall that’s soft, stained, or moldy
Fix a Door That Won’t Close Right (No More Slamming or Sticking)
A door that sticks, won’t latch, or swings by itself is usually fixable with adjustments to hinges or the frame—no replacement required.
What You’ll Need
- Screwdriver or drill
- Wood toothpicks or small wood shims
- Wood glue (optional but helpful)
- Utility knife
- Sandpaper or plane (for tight doors)
- Pencil
Step-by-Step: Loose or Sagging Door
Check the hinges first
Open the door halfway. Gently lift up on the handle—if it moves up and down, the hinges may be loose.
Tighten hinge screws
Use a screwdriver or drill to snug all hinge screws on both the door and the frame.
Fix stripped screw holes
- Remove the loose screw. - Fill the hole with wood toothpicks dipped in wood glue. - Break them off flush with the surface. - Reinsert the screw into the now-tightened hole once the glue sets slightly.
Adjust the top hinge for sagging doors
If the door is rubbing at the bottom latch side, slightly tighten the top hinge screws on the frame side first. Sometimes pulling the top of the door inward a bit fixes the alignment.
Check and mark where it sticks
Close the door slowly and note where it rubs. Use a pencil to mark those areas on the edge or jamb.
Lightly shave or sand tight spots
- For minor rubbing: sand the painted edge where it touches. - For more serious binding: carefully plane or sand a small amount of wood from the door edge. Work slowly and test often.
Adjust the strike plate if latch won’t catch
If the latch is missing the hole: - Loosen the strike plate screws and shift it slightly up/down as needed. - Tighten screws and test. If you need more movement, you may need to slightly enlarge the mortise or pilot holes.
When to Call a Pro
- Exterior doors that won’t close or lock securely
- Door frames visibly separating from the wall
- Cracks around the frame or in nearby walls
Conclusion
You don’t need a truck full of tools to handle everyday home problems—just a calm plan, a few basic supplies, and a clear sense of when to stop. Fixing a leaky faucet, quieting a toilet, resetting a breaker, patching a wall, or rehanging a stubborn door are all realistic DIY wins that save money and frustration.
Tackle one repair at a time, keep safety first (especially with electricity and water), and document what you do so you can repeat it next time. And when a job feels unsafe, unfamiliar, or bigger than expected, calling a professional isn’t failure—it’s smart risk management for your home.
Sources
- [U.S. Environmental Protection Agency – Fixing Leaks at Home](https://www.epa.gov/watersense/fix-leak-week) - Explains how common household leaks (like faucets and toilets) waste water and offers basic guidance on finding and fixing them
- [Kohler – How to Fix a Leaky Faucet](https://support.kohler.com/hc/en-us/articles/360001911513-How-to-Fix-a-Leaky-Faucet) - Manufacturer instructions and diagrams for common faucet types and leak points
- [Energy.gov – Home Electrical System Basics](https://www.energy.gov/energysaver/home-electrical-systems) - Overview of residential electrical panels, circuits, and safety considerations
- [Family Handyman – How to Fix a Running Toilet](https://www.familyhandyman.com/project/how-to-fix-a-running-toilet) - Step-by-step visual guide for diagnosing and repairing typical toilet tank issues
- [Lowe’s – How to Repair Drywall](https://www.lowes.com/n/how-to/repair-drywall) - Practical instructions for patching small to medium wall holes with recommended tools and materials
Key Takeaway
The most important thing to remember from this article is that this information can change how you think about Household Repairs.


