Small problems at home rarely stay small. A dripping tap, a loose cabinet door, or a wobbly chair can quickly turn into major annoyances—or bigger repair bills—if you ignore them. The good news: many of these issues are simple to fix with basic tools and a methodical approach.
This guide walks you through five common household problems with clear, step‑by‑step instructions so you can get them under control today—without guessing or overcomplicating things.
1. Stop a Dripping Faucet (Compression or Cartridge Type)
A dripping faucet wastes water and money, and the fix is usually a worn‑out washer or cartridge.
What you’ll need
- Adjustable wrench or basin wrench
- Phillips and flathead screwdrivers
- Replacement washer or cartridge (take the old one to the hardware store to match)
- Plumber’s tape (Teflon tape)
- Small towel
Steps
Shut off the water supply
Find the shutoff valves under the sink and turn them clockwise. If there aren’t any, shut off the main water supply for the house.
Plug the drain
Use the sink stopper or a rag so you don’t lose screws or small parts down the drain.
Remove the handle
- Pry off any decorative cap with a flathead screwdriver. - Unscrew the handle screw. - Pull the handle straight up to remove it. Wiggle gently if it’s stuck.
Identify the faucet type
- Compression faucet: Has separate hot and cold handles that you turn multiple times to open/close. Usually uses rubber washers. - Cartridge faucet: Often a single lever or quarter‑turn handles. Uses a cartridge.
For compression faucets: replace the washer and O‑ring
- Use the wrench to remove the packing nut and stem. - At the bottom of the stem, remove the rubber washer (often held by a small screw). - Replace with a matching new washer. - Inspect and replace any O‑rings (rubber rings) on the stem. - Wrap plumber’s tape on threads if needed and reassemble.
For cartridge faucets: replace the cartridge
- Remove any retaining clip or nut holding the cartridge (use pliers if necessary). - Pull the cartridge straight up. Note its orientation. - Insert the new cartridge the same way the old one was oriented. - Reinstall clip/nut and reassemble the handle.
Turn the water back on slowly
Open the shutoff valves and test the faucet. A brief sputter is normal as air clears; persistent dripping means you may need to reseat or re‑tighten components.
2. Fix a Running Toilet That Won’t Stop Filling
A constantly running toilet is usually caused by a bad flapper, misadjusted float, or worn fill valve.
What you’ll need
- Replacement flapper (universal type fits most toilets)
- Adjustable wrench (if you replace the fill valve)
- Towel or sponge
Steps
Remove the tank lid and observe
Flush the toilet and watch what happens inside the tank: - Water rises above the overflow tube top? Float is set too high. - Water leaks from tank to bowl constantly? Flapper likely isn’t sealing.
Check the flapper first
- Push down gently on the flapper with a stick or your hand (water is clean inside the tank). - If the running sound stops, the flapper is the problem.
Replace the flapper
- Turn off the water supply to the toilet (valve behind the toilet). - Flush to empty most of the water from the tank. - Unhook the old flapper from the overflow tube and disconnect the chain from the flush lever. - Attach the new flapper to the overflow tube and connect the chain. - Adjust chain so there’s a bit of slack—flapper should fully close but lift easily when you press the handle.
Adjust the float to stop overfilling
- Float arm type: Gently bend the metal arm downward so the float shuts off water about 1 inch below the top of the overflow tube. - Float cup type: Squeeze the clip on the side of the float and slide it down the fill valve shaft.
Test and fine‑tune
Turn water back on, let the tank fill, and listen. - If water still runs into the overflow tube, lower the float more. - If the toilet is weak when flushing, you may have set the water level too low—raise it slightly.
Replace the fill valve (if needed)
If water continues running or the valve hisses constantly, the fill valve may be worn: - Turn off water, flush tank dry as much as possible. - Disconnect the water supply line under the tank. - Unscrew the plastic nut holding the fill valve and lift the valve out. - Install a new valve following the package instructions, set the height, reconnect supply, and test.
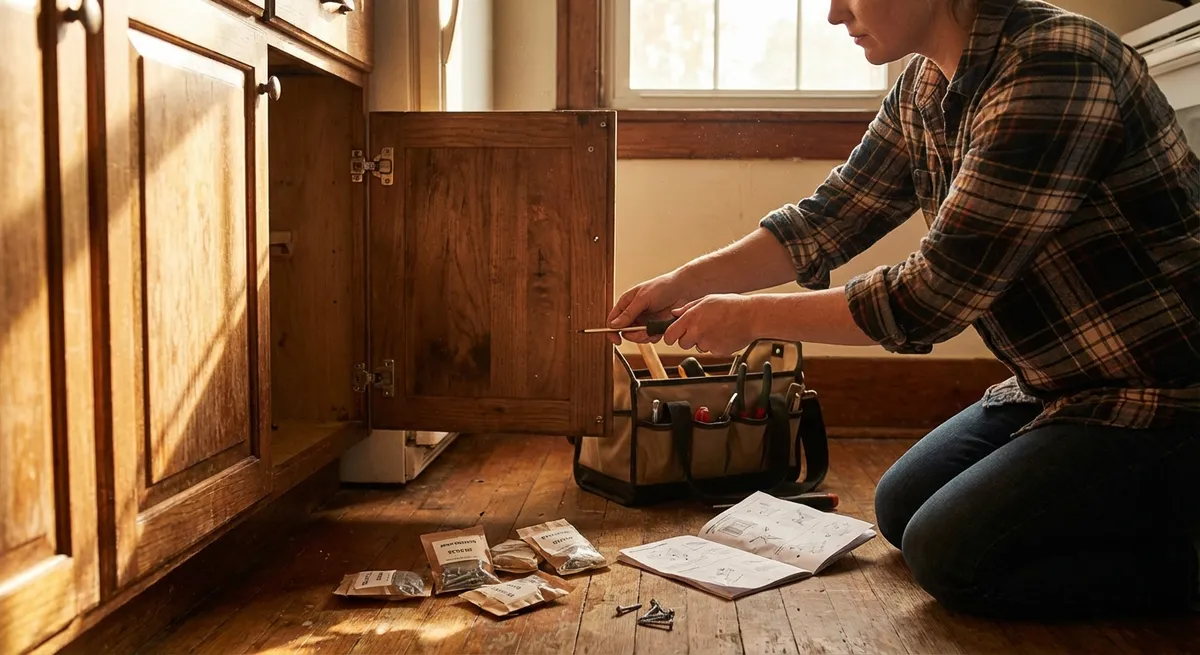
3. Re‑Secure a Loose Cabinet Door
Loose or sagging cabinet doors are usually caused by hinge screws that have stripped the wood or hinges that are misaligned.
What you’ll need
- Phillips screwdriver
- Toothpicks or wooden matchsticks
- Wood glue
- Utility knife (optional)
- Small clamp (optional but helpful)
Steps
Tighten all hinge screws first
- Open the cabinet door. - Tighten the screws on both the door side and cabinet frame side. - Check if the door still sags, rubs, or won’t close properly.
Fix screws that won’t tighten (stripped holes)
If a screw just spins without grabbing: - Remove the screw. - Fill the hole with wood glue and push in several wooden toothpicks or matchsticks (without the heads). - Snap or cut them flush with the surface. - Let the glue sit for at least 15–30 minutes (longer is better). - Reinsert and tighten the screw into the newly filled hole.
Adjust European (concealed) hinges
If you have hidden hinges inside the cabinet: - Identify the adjustment screws: - One usually moves the door left/right. - One moves it in/out. - Some have a vertical adjustment at the mounting plate. - Turn the screws a quarter‑turn at a time and watch how the door moves. - Your goal: even gap around the door and smooth closing without rubbing.
Check for frame damage
If the cabinet frame wood is cracked or broken where the hinge sits: - Remove the hinge. - Apply wood glue into the crack and clamp if possible. - Once dry, reinstall the hinge using the toothpick method if needed.
Final test
Open and close the door several times. Make minor adjustments until the door closes smoothly and sits level with the others.
4. Quiet a Squeaky Door Hinge
A squeaky door is not a structural problem, but it’s irritating and easy to fix in minutes.
What you’ll need
- Lubricant: silicone spray, white lithium grease, or petroleum jelly
- Hammer and nail or small screwdriver (to lift hinge pin)
- Rag or paper towel
Steps
Identify the squeaky hinge
Open and close the door slowly and listen. Usually, one hinge is louder than the others.
Try quick lubrication first
- Place a rag under the hinge to catch drips. - Spray a small amount of silicone spray directly onto the hinge while moving the door back and forth. - If the squeak goes away, wipe excess lubricant and you’re done.
Remove the hinge pin for a thorough fix (if squeak persists)
- Close the door. - Place a nail or small screwdriver at the bottom of the hinge pin and gently tap upward with a hammer until the pin lifts enough to pull out by hand. - Support the door if you remove more than one pin at a time (usually do one hinge at a time to avoid misalignment).
Clean and lubricate the pin
- Wipe off any rust or old grime. - Apply a thin coat of lubricant or petroleum jelly along the pin. - Work a bit into the hinge barrel as well.
Reinstall the pin and test
- Slide the pin back into place and tap it gently down with the hammer. - Open and close the door several times to distribute the lubricant. - Wipe any drips from the hinge and surrounding surfaces.
Avoid the wrong products
General penetrating oils can work but don’t last long and can attract dust. Silicone or lithium lubricants are better for long‑term quiet operation.
5. Restore Power to a Dead Outlet (Safely)
A “dead” outlet can be caused by a tripped breaker, a GFCI outlet upstream, or a loose connection. You can safely troubleshoot the common causes before calling an electrician.
What you’ll need
- Small lamp or plug‑in tester
- Access to your electrical panel
- Flathead and Phillips screwdrivers
- Non‑contact voltage tester (strongly recommended)
> If you’re uncomfortable working around electricity, stop after checking breakers and GFCI outlets and call a professional.
Steps
Verify the outlet is actually dead
- Plug in a lamp or device you know works. - If nothing happens, test another nearby outlet with the same device to confirm the device works.
Check the breaker panel
- Find your home’s electrical panel. - Look for a breaker that is in the middle position or slightly off compared to others—it may have tripped. - Turn the suspect breaker fully OFF, then back ON. - Test the outlet again.
Look for a tripped GFCI outlet
In kitchens, bathrooms, garages, and outdoor areas, outlets may be protected by a single GFCI (the outlet with “Test” and “Reset” buttons). - Find any GFCI outlets on the same circuit (often in the same room or nearby). - Press the RESET button firmly. - Test your dead outlet again. One GFCI can control multiple outlets.
Inspect the outlet cover
If the breaker and GFCI are fine but the outlet is still dead: - Turn the breaker for that circuit OFF. Label it if you can. - Use a non‑contact voltage tester on the outlet to confirm there is no power (tester should NOT light or beep). - Remove the outlet cover with a screwdriver.
Check for loose wires (visual only if you’re unsure)
- With power OFF and verified, gently pull the outlet forward. - Look for any wires that have slipped out of back‑stab connectors or screws that have come loose. - If you’re comfortable: - Tighten loose terminal screws (hot/black, neutral/white, ground/green or bare). - Avoid moving or re‑arranging wires unless you know how the circuit is supposed to be wired.
Reassemble and restore power
- Carefully push the outlet back into the box, replace the cover plate, and tighten screws. - Turn the breaker back ON and test the outlet again. - If the outlet is still dead or you see signs of burning, charring, or melting, stop and call a licensed electrician.
Conclusion
You don’t need to be a professional to handle the most common household issues. With basic tools and a clear method, you can:
- Stop wasted water from faucets and toilets
- Keep cabinets and doors working smoothly
- Troubleshoot simple electrical problems safely
Tackle one problem at a time, work methodically, and stop if something feels beyond your comfort zone. The more you handle these small repairs now, the fewer emergencies—and repair bills—you’ll face later.
Sources
- [U.S. Environmental Protection Agency – Fix a Leak](https://www.epa.gov/watersense/fix-leak-week) - Details on water waste from leaks and why fixing drips and running toilets matters
- [The Family Handyman – How to Fix a Leaky Faucet](https://www.familyhandyman.com/project/how-to-fix-a-leaky-faucet/) - Step‑by‑step examples and diagrams for different faucet types
- [Lowe’s – How to Fix a Running Toilet](https://www.lowes.com/n/how-to/fix-running-toilet) - Visual guide to flappers, fill valves, and toilet adjustments
- [U.S. Consumer Product Safety Commission – Electrical Receptacle Safety](https://www.cpsc.gov/safety-education/safety-guides/home/electrical-outlet-safety) - Safety information for working around outlets and circuits
- [Bob Vila – How to Fix a Squeaky Door](https://www.bobvila.com/articles/how-to-fix-a-squeaky-door/) - Additional lubrication tips and hinge recommendations
Key Takeaway
The most important thing to remember from this article is that this information can change how you think about Household Repairs.


