Unexpected problems around the house don’t always need a pro and a big invoice. With a basic toolkit and a clear plan, you can handle many fixes safely on your own. This guide walks you through five practical household repairs, step by step, so you can restore function, prevent bigger damage, and feel more in control of your space.
Stop a Dripping Faucet (Without Replacing the Whole Thing)
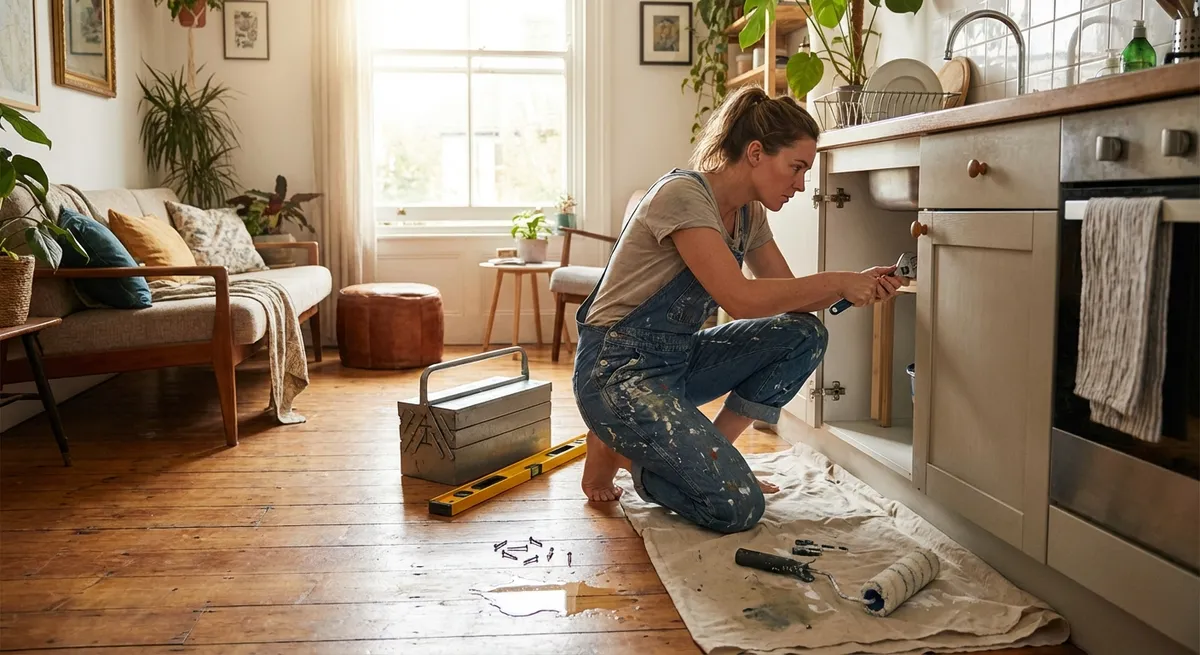
A dripping faucet wastes water and quietly raises your utility bill. In many cases, the fix is simply replacing a worn internal part.
What you’ll need:
Adjustable wrench, screwdriver, replacement cartridge or washers/O-rings (matched to your faucet model), plumber’s grease, towel or rag.
Steps:
Shut off the water supply
Look under the sink for the hot and cold shutoff valves. Turn both clockwise until they stop. Open the faucet to relieve pressure and confirm the water is off.
Plug the drain
Use the sink stopper or a rag so small screws or parts don’t disappear down the drain.
Remove the handle
- Pry off the decorative cap (if present) with a small flat screwdriver. - Unscrew the handle screw and pull the handle off. - Set parts in order beside you so reassembly is easier.
Identify your faucet type and remove inner parts
- Cartridge faucet: Remove the retaining nut/clip with a wrench or pliers, then pull the cartridge straight up. - Compression faucet: Unscrew the packing nut and pull out the stem. - Ball or ceramic disc faucet: Remove any screws and lift out the assembly per the manufacturer’s diagram (look this up by brand/model).
Inspect and replace worn components
- Look for cracked, flattened, or brittle rubber washers and O-rings. - Replace with new parts that match size and type. - For cartridges, swap the old cartridge with a matching new one—take the old part to the store if you’re not sure.
Lubricate seals and reassemble
- Apply a thin layer of plumber’s grease to O-rings and rubber parts. - Reassemble in reverse order, hand-tightening first, then snug with a wrench—do not overtighten.
Turn water back on and test
Slowly open the shutoff valves, then run the faucet. Check for drips at the spout and around the base. If it still drips, double-check that: - You installed the correct part. - The cartridge or washers are seated properly. - Nuts are snug but not overtight.
Silence a Running Toilet and Lower Your Water Bill
A constantly running toilet is more than annoying; it can waste hundreds of gallons per day. Most of the time, the issue is in the tank and can be fixed without special tools.
What you’ll need:
Adjustable wrench (optional), replacement flapper or fill valve (if needed), towel.
Steps:
Remove the tank lid and observe
Flush the toilet and watch what happens inside: - Does water keep flowing into the bowl? - Is water flowing into the overflow tube in the center? - Does the flapper fail to seal completely?
Check the flapper first
- Turn off water at the shutoff valve (behind or beside the toilet). - Flush to drain most water from the tank. - Inspect the rubber flapper: if it’s warped, cracked, slimy, or not sitting flat on the valve seat, replace it.
Replace the flapper (common fix)
- Unhook the chain from the flush handle arm. - Detach the flapper from the overflow tube arms. - Attach the new flapper to the arms and reconnect the chain, leaving a small amount of slack so it seals fully when down. - Turn water back on and test. Adjust chain length if the flapper doesn’t close properly.
Adjust or replace the fill valve if water is too high
If water level is above the “water line” mark or spilling into the overflow tube: - Adjust: - For float-cup valves, pinch the metal clip and slide the float down the rod. - For float-ball valves, gently bend the float arm downward to lower the water level. - Replace (if adjustment doesn’t work or valve is old): - Turn water off, flush, then unscrew the water supply line from the tank bottom. - Remove the locknut under the tank and lift out the old fill valve. - Install the new valve following the included diagram, set the height correctly, and reconnect the line.
Final test
Turn water back on gradually. Let the tank fill and listen: - The toilet should fill, stop, and stay quiet. - No water should flow into the overflow tube between flushes. - If you still hear occasional refilling, recheck flapper seal and water level.
Fix a Loose Door That Won’t Latch Properly
Doors that don’t latch or rub the frame are more than a nuisance; left alone, they can damage hinges and hardware. Often, you can correct the alignment with a few careful adjustments.
What you’ll need:
Screwdriver, wood toothpicks or wooden matchsticks, wood glue (optional), hammer, chisel (optional), pencil.
Steps:
Identify the problem
Gently close the door and watch: - Is it rubbing at the top, middle, or bottom? - Does the latch miss the strike plate hole? - Does the door sag and hit the frame at the top corner?
Tighten hinge screws
- Open the door fully. - Tighten all hinge screws on both the door and the frame. - If screws spin without tightening, the holes are stripped.
Repair stripped screw holes
- Remove the loose screw. - Fill the hole with wood toothpicks or matchsticks coated in a bit of wood glue. - Tap them in gently, break off flush with the surface. - Once dry (or after a few minutes for a quick fix), drive the screw back in. This gives the screw new wood to grip.
Raise a sagging door by adjusting hinges
If the door sags and hits the frame at the top on the latch side: - Slightly loosen the screws on the top hinge on the frame side. - Gently push or lift the door so it aligns better with the strike plate. - Retighten the screws in this improved position. Sometimes simply tightening the top hinge (after repairing holes) is enough to lift the door.
Adjust the strike plate if the latch misses
If the latch hits above or below the strike plate opening: - Mark where the latch hits using a pencil or lipstick on the latch. - To move the plate slightly: - Loosen its screws, shift it up/down or in/out as needed, and retighten. - For larger adjustments: - Remove the strike plate, carefully chisel a new recess in the frame to reposition it, and fill the old screw holes with toothpicks and glue before re-screwing.
Test repeatedly
Open and close the door several times: - It should latch smoothly without force. - If it still sticks slightly, make small, controlled adjustments rather than big changes all at once.
Restore Power to a Dead Outlet Safely
A dead outlet doesn’t always mean major electrical trouble. Often, it’s a tripped breaker, a tripped GFCI (ground fault circuit interrupter), or a worn receptacle. Basic checks can restore power without opening any walls.
Important safety note: If you smell burning, see scorch marks, or feel heat at the outlet, stop and call a licensed electrician.
What you’ll need:
Small lamp or device for testing, access to your electrical panel, non-contact voltage tester (recommended), screwdriver (if replacing outlet), replacement outlet (if needed).
Steps:
Confirm the outlet is truly dead
- Plug in a device you know works (like a lamp). - Test both the top and bottom sockets. - If both fail, proceed; if only one fails, the outlet is likely worn and needs replacement.
Check nearby GFCI outlets
In kitchens, bathrooms, garages, and outdoors, outlets may be protected by a GFCI on the same circuit. - Look for outlets with “TEST” and “RESET” buttons. - Press “RESET” firmly. - Retest your dead outlet. - Check all GFCIs in the area, including upstream locations (like a bathroom GFCI protecting a nearby hallway outlet).
Reset the circuit breaker
- Go to your electrical panel. - Look for any breaker that is in the middle position or slightly off from the others—it may not always be clearly marked as “tripped.” - Turn the suspect breaker fully OFF, then firmly back ON. - Return to the outlet and test again.
Use a non-contact voltage tester (recommended)
- If the outlet is still dead, turn off the breaker for that circuit. - Use the tester to confirm no voltage is present at the outlet before touching it. - Remove the cover plate and gently pull the outlet forward (without disconnecting wires yet) to visually inspect: - Loose wires? - Burn marks or melted plastic? If you see damage, stop and call an electrician.
Replace a worn outlet (if comfortable doing so)
- With the breaker OFF and voltage tester confirming no power: - Note wire positions (take a photo). - Loosen terminal screws and remove wires. - Connect wires to the new outlet: hot (usually black) to brass screws, neutral (white) to silver screws, ground (bare/green) to green screw. - Tighten screws securely, tuck wires back carefully, and reinstall the outlet and cover plate. - Turn the breaker back on and test.
Know when to call a professional
If multiple outlets in different rooms are dead, breakers keep tripping, or you see/smell any signs of overheating, get a licensed electrician involved. That points to a larger wiring or load problem.
Patch a Small Hole in Drywall for a Clean Finish
Small holes from door handles, screws, or accidents can make a room look neglected. Patching drywall is straightforward if you follow the right sequence.
What you’ll need:
Spackling compound or joint compound, putty knife, sandpaper (120–220 grit), damp sponge, primer and touch-up paint, self-adhesive patch (for larger holes up to a few inches).
Steps:
Prep the damaged area
- Use the putty knife to scrape away loose paint or crumbly drywall around the hole. - Wipe with a damp sponge to remove dust. Let dry.
Fix nail and screw holes (small damage)
- For small holes (up to a nail size): - Press spackle into the hole with the putty knife. - Scrape the surface smooth, removing excess. - Let it dry as directed on the container. - Lightly sand until flush with the wall surface.
Patch medium holes (up to about 2–3 inches)
- Apply a self-adhesive mesh patch over the hole, centering it. - Using joint compound, spread a thin layer over the patch, feathering the edges outward. - Let dry completely. - Apply a second thin coat, extending a bit farther out. Allow to dry again.
Sand for a smooth finish
- Lightly sand the patched area with fine-grit sandpaper (use a sanding sponge if you want more control). - Run your hand over the patch; it should feel level with the surrounding wall. - Wipe away dust with a damp sponge and let it dry.
Prime before painting
- Apply a primer over the patched area; this prevents “flashing” (where the patch shows through as a different sheen). - Once primer is dry, paint the area with matching wall paint, feathering the edges into the existing paint.
Blend the repair
- For best results, repaint the entire section of wall between two corners or architectural breaks. - If that’s not possible, use a small roller instead of a brush to mimic the original wall texture.
Conclusion
Most everyday household problems don’t require an emergency call or an expert toolkit—just a clear process, basic tools, and a bit of patience. By tackling a dripping faucet, a running toilet, a misaligned door, a dead outlet (when it’s safe to do so), and small drywall damage, you’re not only saving money but also preventing minor issues from turning into major repairs. Start with the simplest fix on your list, follow each step carefully, and build your confidence one successful repair at a time.
Sources
- [U.S. Environmental Protection Agency – Fix a Leak](https://www.epa.gov/watersense/fix-leak-week) - Details how household leaks (including faucets and toilets) waste water and why repairing them matters
- [Energy.gov – Electrical Safety in the Home](https://www.energy.gov/ceser/activities/electricity-resilience/electricity-basics/electrical-safety-home) - Government guidance on safe practices for working around home electrical systems
- [Family Handyman – How to Fix Leaky Faucets](https://www.familyhandyman.com/project/how-to-fix-a-leaky-faucet/) - Step-by-step visuals and part identification for different faucet types
- [This Old House – How to Fix a Running Toilet](https://www.thisoldhouse.com/plumbing/21015127/how-to-fix-a-running-toilet) - Detailed instructions and diagrams for different tank components
- [Lowe’s – How to Repair Drywall](https://www.lowes.com/n/how-to/repair-drywall) - Practical guide on patching small to medium drywall holes and finishing them cleanly
Key Takeaway
The most important thing to remember from this article is that this information can change how you think about Household Repairs.


