Small problems have a way of showing up at the worst possible time: a leaky faucet before guests arrive, a phone that won’t charge when you need directions, or a door that suddenly won’t close properly. You may not have time (or budget) to call a pro every time something goes wrong. This guide walks you through five quick, practical fixes you can do right now to stabilize the problem, stay safe, and buy time until you’re ready for a permanent repair.
1. Slow Drip Faucet: How to Stop the Constant Dripping (Fast)
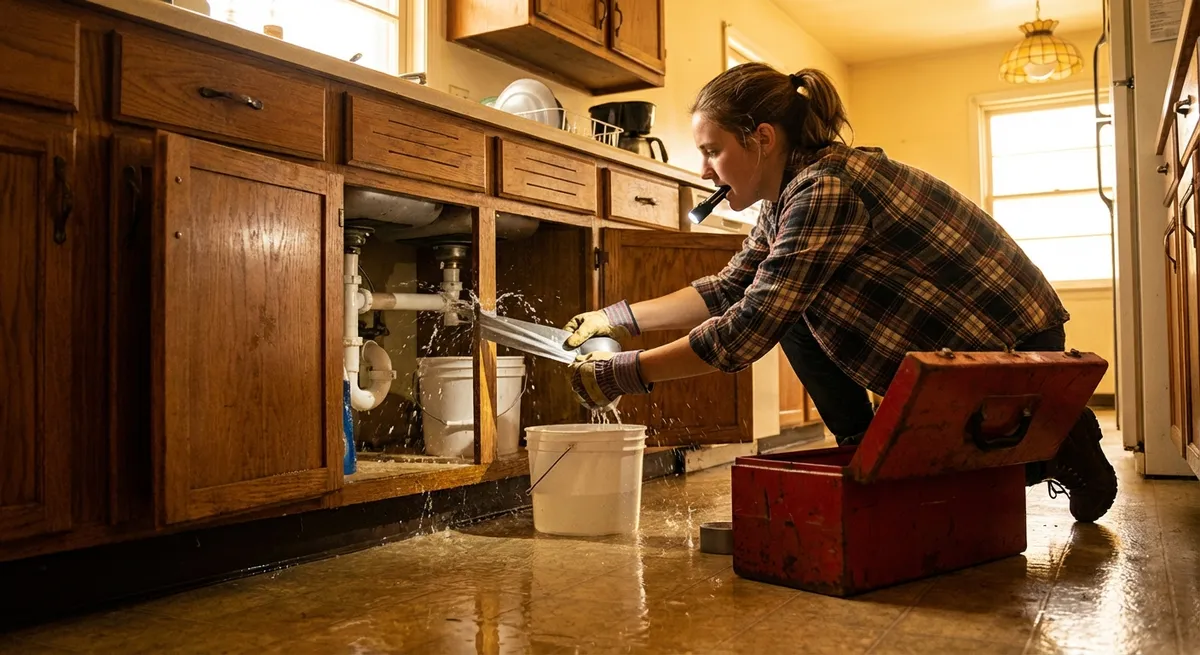
A dripping faucet wastes water and quietly raises your bill, but you don’t always need a full rebuild to calm it down.
Step-by-step quick fix
Shut off the water supply
Look under the sink for the hot and cold shutoff valves. Turn them clockwise until snug. If there are no valves, use the main shutoff for your home.
Plug the drain
Use the sink stopper or a rag so you don’t lose screws or small parts.
Tighten the faucet handle hardware
- Pry off the decorative cap on the handle (if present) with a flat screwdriver or fingernail. - Use a screwdriver or Allen (hex) key to gently tighten the handle screw. - Turn the water back on and test. A loose handle can sometimes cause incomplete shutoff.
Clean the aerator (common cause of weird flow and spray)
- Unscrew the aerator (the small cap at the end of the spout). - Soak it for 10–15 minutes in equal parts white vinegar and warm water. - Scrub gently with an old toothbrush, rinse, and reinstall. This won’t fix all drips, but it often improves flow and reduces “phantom” dripping caused by trapped water.
Stabilize a persistent drip with a temporary trick
If you can’t fully repair the cartridge or washer yet: - Turn the shutoff valves just slightly toward “off” so pressure is reduced but water still flows. - This can slow or stop a minor drip temporarily without cutting water to the sink.
If the drip continues strongly after these steps, the internal cartridge or washer is worn. That’s a longer repair, but the steps above reduce noise, water waste, and annoyance until you can replace parts or call a plumber.
2. Phone Won’t Charge Reliably: Get Your Cable Working Again
Loose or unreliable phone charging is often caused by dirt, pocket lint, or minor cable issues—not instant hardware failure.
Step-by-step quick fix
Rule out the outlet first
- Plug a lamp or other small device into the same outlet or power strip. - If that doesn’t work either, move to a different outlet or reset the breaker.
Inspect and clean the charging port
- Power off your phone. - Use a flashlight to look into the charging port. - Gently insert a wooden or plastic toothpick (never metal) and very lightly scrape out lint or dust. - Tilt the phone so debris falls out, not deeper in. - Finish by blowing short puffs of air (or using a gentle can of compressed air held at an angle).
Check the cable and adapter
- Look for kinks, frayed insulation, or bends near the ends. - Try a different known-good cable and adapter if you have them. - If your phone charges normally with other gear, your original cable or adapter is failing.
Stabilize a loose port
If the cable feels wobbly but still works at certain angles: - Place the phone on a flat, stable surface. - Insert the cable fully, then don’t move it; secure the cable gently with a small strip of painter’s tape to prevent wiggles. - Avoid charging while holding or using the phone to reduce strain.
Reduce battery demand while charging
- Switch to Airplane Mode when charging. - Close unused apps and dim the screen. - This makes the most of an unstable charging situation until you can replace parts.
If nothing helps and other cables don’t work, the charging port or battery may need professional service—but cleaning and testing usually bring many phones back to life.
3. Wobbly Chair or Table: Stabilize It Without a Full Rebuild
A wobbly chair, table, or desk can be unsafe and annoying. You don’t need to rebuild the furniture to make it usable again.
Step-by-step quick fix
Identify where the wobble comes from
- Place the furniture on a flat floor. - Gently rock it and watch which leg lifts or shifts. - Mark that leg with a piece of painter’s tape or a sticky note.
Tighten obvious hardware
- Flip the furniture carefully (put a towel down to protect surfaces). - Tighten all accessible screws, bolts, or brackets with the correct tool (screwdriver, Allen key, or wrench). - Don’t overtighten; snug and secure is enough.
Use a simple leg-leveling shim
- For a quick fix, fold a piece of cardboard, a furniture pad, or a cut piece of cork under the short leg. - Adjust thickness until the wobble disappears. - For a cleaner look, use adhesive felt pads trimmed to size under the affected leg.
Reinforce loose joints temporarily
- If you can see movement at a joint (where leg meets seat or tabletop): - Apply a small amount of wood glue or construction adhesive into the joint (if accessible). - Clamp with a belt, heavy book stack, or strap for at least an hour (longer is better). - This isn’t a perfect repair, but it often removes most of the play.
Relocate if necessary
- Sometimes the floor is the problem (tile edges, uneven concrete, old wood floors). - Move the item to a different area and test; often a different spot instantly feels stable.
These steps quickly stabilize the piece so it’s safe to use, even if you plan a proper refastening or leg trimming later.
4. Interior Door Won’t Latch or Close Smoothly: Get It Working Again
Doors that won’t latch, rub the frame, or suddenly start sticking are usually reacting to humidity, minor settling, or loose hardware—not structural disaster.
Step-by-step quick fix
Check and tighten hinge screws
- Open the door fully. - Starting at the top hinge, tighten all screws on the door side and frame side. - Do the same for the middle and bottom hinges. - Often, doors sag slightly over time, and simply snugging screws lifts the door enough to catch the latch again.
Test after tightening
- Close the door slowly to see where it’s rubbing or failing to latch. - Note any marks on the frame or latch plate.
Adjust the strike plate slightly
- If the latch hits too high or low, you may see fresh marks on the metal strike plate. - Loosen the two screws holding the strike plate just a bit. - Nudge the plate up, down, or inward as needed, then retighten while holding it in position. - Test again.
Use a temporary friction fix for slight rubbing
If the door just barely rubs at the top or side: - Identify the tight spot by closing the door on a piece of painter’s tape—where it tears or rubs is your contact point. - Rub a bar of dry soap, candle wax, or a dry lubricant stick along the edge of the door and the frame where they touch. - This decreases friction and often makes the sticking spot far less noticeable.
Use a quick “shim” behind a hinge if sagging persists
- Unscrew one hinge leaf from the frame (usually the top hinge helps the most). - Place a small piece of thin cardboard (like a business card) behind the hinge leaf. - Reattach and tighten screws. - This subtly shifts the door’s angle and can solve latch misalignment without major carpentry.
If the door is badly swollen from humidity and none of these fixes help, you might eventually need to sand or plane the sticking edge—but these quick adjustments often restore normal function in minutes.
5. Weak or Noisy Bathroom Fan: Improve Airflow Without Replacing It
A weak or loud bathroom exhaust fan can’t clear moisture effectively, which leads to fogged mirrors, peeling paint, and even mold. You may not be ready to install a new fan, but you can improve performance quickly.
Step-by-step quick fix
Turn off power for safety
- Switch the fan off at the wall. - For extra safety, switch off the breaker that controls the bathroom circuit.
Remove the fan cover (grille)
- Most covers pull down gently; there are usually two wire spring clips on the sides. - Squeeze the clips together to release them from the housing. - Set the cover aside.
Clean the cover and visible dust
- Wash the cover with warm soapy water, rinse, and dry. - Use a vacuum with a brush attachment to remove dust from the fan blades and surrounding housing. - Avoid bending or forcing the blades.
Clean and align blades for smoother operation
- Use a lightly damp cloth to wipe the blades and nearby surfaces (power off and completely still). - Check that nothing is obstructing the blade movement (wires, insulation, debris). - A cleaner fan usually runs quieter and pulls more air.
Improve immediate ventilation if fan is still weak
- After showers, leave the bathroom door slightly open instead of closed. - Crack any nearby window an inch or two if available. - Use a small portable fan outside the bathroom pointing into the room to push humid air toward the exhaust fan. - These steps help control moisture while you plan a long-term upgrade.
Check the timer or switch if fan won’t run
- If it’s on a timer switch, make sure the timer actually starts and isn’t stuck. - Try a different simple on/off switch if you’re experienced and comfortable with basic electrical work; otherwise, call a qualified electrician.
Deep duct cleaning or fan replacement can come later. A quick cleaning and better airflow habits often restore enough performance to protect your bathroom in the short term.
Conclusion
You don’t need a garage full of tools or a contractor on speed dial to handle everyday problems. By tightening hardware, cleaning key components, and using simple shims, pads, or household items, you can stabilize a surprising number of issues in minutes. These quick saves won’t replace full repairs forever—but they keep your home functional, safe, and less stressful while you decide when and how to invest in more permanent solutions.
Sources
- [U.S. Environmental Protection Agency – WaterSense: Fix a Leak](https://www.epa.gov/watersense/fix-leak-week) - Guidance on the impact of small leaks and basic steps to address them
- [Apple Support – If your iPhone or iPad won’t charge](https://support.apple.com/en-us/HT201569) - Official troubleshooting for cleaning ports and checking chargers
- [Family Handyman – How to Fix a Door That Won’t Latch](https://www.familyhandyman.com/project/how-to-fix-a-door-that-wont-latch/) - Practical guide to adjusting hinges and strike plates
- [Lowe’s – How to Fix Wobbly Furniture](https://www.lowes.com/n/how-to/fix-wobbly-furniture) - Overview of stabilizing loose or uneven furniture
- [U.S. Department of Energy – Bathroom Fans](https://www.energy.gov/energysaver/bathroom-fans) - Information on proper ventilation and bathroom fan performance
Key Takeaway
The most important thing to remember from this article is that this information can change how you think about Quick Fixes.


