Life’s small problems rarely arrive with a warning, and they almost always show up at the worst possible time—right before a meeting, just as guests arrive, or when you’re heading to bed. This guide walks you through five clear, step‑by‑step quick fixes for common issues, so you can get things working again without waiting for help or hunting through long manuals.
1. When Your Wi‑Fi Drops But the Internet Isn’t Really “Down”
A suddenly slow or dead Wi‑Fi connection is one of the most frustrating everyday problems. Before you call your provider, work through these fast checks to get back online.
Step-by-step fix:
- Confirm it’s really Wi‑Fi, not the whole internet.
- Try loading a webpage on your phone using mobile data (turn off Wi‑Fi temporarily).
- If it loads on mobile data but not on Wi‑Fi, the issue is your router or local network—not the wider internet.
- Power-cycle your equipment in the right order.
- Unplug the modem and router (or your single combined gateway).
- Wait at least 30 seconds.
- Plug in the modem first and wait until all lights stabilize (1–2 minutes).
- Then plug in the router and wait another minute.
- Move closer and reduce interference.
- Stand within a few feet of the router and test again.
- Turn off or move devices that can interfere: microwave in use, baby monitors, cordless phones, Bluetooth speakers near the router.
- Forget and reconnect to the network.
- On your device, “Forget” the Wi‑Fi network and reconnect using the password.
- This clears out bad cached settings that sometimes block connectivity.
- Switch bands if available (2.4 GHz vs. 5 GHz).
- If you see two networks (often “MyWiFi” and “MyWiFi‑5G”), try the other one.
- 2.4 GHz reaches farther; 5 GHz is faster but more sensitive to walls and distance.
- Quick router reset (only if you know what you’re doing).
- Log into your router using the address on its label (commonly
192.168.0.1or192.168.1.1). - Use the default login if you’ve never changed it.
- Look for a “Restart” or “Reboot” button in the admin interface instead of using the physical reset hole (which usually wipes settings).
If the connection still fails and your modem lights show no internet signal, it’s likely an outage—call your provider and report the problem.
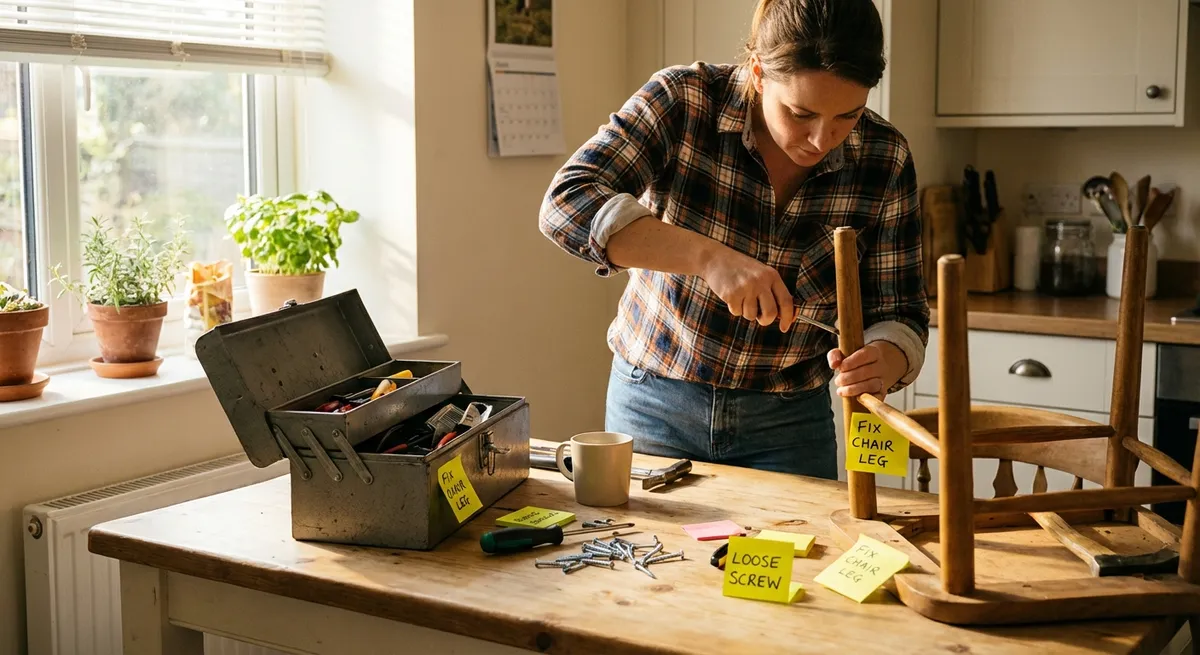
2. When a Door Suddenly Won’t Latch or Close Smoothly
A door that won’t latch or rubs against the frame can usually be fixed in minutes with basic tools. Often, temperature changes or loose screws are to blame rather than a serious structural issue.
Step-by-step fix:
- Identify the problem area.
- Slowly close the door and watch where it sticks: top, middle, or bottom.
- Check if the latch lines up with the strike plate (the metal piece on the frame).
- Tighten all hinge screws first.
- Use a screwdriver (ideally a hand tool, not a drill) to snug each screw on the door side and frame side of every hinge.
- Loose hinges let the door sag and misalign with the frame.
- Test again after tightening.
- Often, tightening alone solves rubbing or latching issues.
- If it’s better but not perfect, pay attention to where it still rubs.
- Adjust the strike plate for latch problems.
- If the latch hits above or below the hole in the strike plate, loosen the strike‑plate screws slightly.
- Shift the plate up or down as needed and retighten.
- For very small misalignments, loosen, adjust, and then test with the door half‑closed before fully tightening.
- Use a simple cardboard shim for sagging doors.
- If the top of the door hits the frame near the handle side, the door is likely sagging.
- Unscrew the top hinge (door side), place a small piece of thin cardboard behind the hinge leaf, then reattach.
- This tiny adjustment tilts the door back into alignment.
- Sand lightly for minor sticking.
- Mark the exact rub point with a pencil.
- Use medium‑grit sandpaper or a sanding block to remove a little material from the edge.
- Sand a bit, close and test, then repeat as needed. Don’t overdo it.
Most door issues resolve with tightening, minor adjustment, and—only if needed—light sanding. If the frame itself is cracked or out of square, that’s when you may need professional help.
3. When a Slow Drain Starts to Back Up
A sink or tub that drains slowly is annoying and can quickly become unsanitary. Before you pour harsh chemicals down the pipes, try this safer, mechanical approach.
Step-by-step fix:
- Clear visible debris first.
- Remove the drain stopper or cover.
- Use a gloved hand or paper towel to pull out hair, food scraps, or other obvious clogs at the surface.
- Use hot water correctly.
- Boil a kettle or pot of water.
- Let it cool slightly (very boiling water can damage some PVC pipes).
- Slowly pour it down the drain in two or three stages, waiting 30 seconds between pours.
- Try a plunger (yes, on sinks too).
- For sinks: block any overflow hole with a wet cloth.
- Add enough water to cover the plunger cup.
- Plunge firmly up and down for about 20 seconds, maintaining the seal.
- Lift the plunger quickly at the end to dislodge the clog.
- Use a simple drain snake or zip tool.
- Insert the plastic or metal snake into the drain, turning it gently.
- When you feel resistance, wiggle and rotate to hook the clog.
- Pull it out slowly; expect hair and gunk—have a trash bag ready.
- Clean the P‑trap (for sinks) if you’re comfortable.
- Place a bucket under the P‑trap (the U‑shaped pipe under the sink).
- Loosen the slip nuts by hand or with adjustable pliers.
- Remove the trap, empty debris into the bucket, and rinse it in another sink or outside.
- Reattach, ensuring the washers sit properly, and hand‑tighten before giving a small extra turn with pliers.
- Check for leaks after reassembly.
- Run water for a minute while feeling around the P‑trap for dampness.
- If it drips, tighten the connections a quarter turn more.
Avoid regular use of chemical drain cleaners; they can damage pipes and create hazards. Mechanical clearing is usually more effective and far safer.
4. When Your Laptop Suddenly Overheats and Sounds Like a Jet
A laptop that gets very hot or runs its fan constantly can slow down, shut off, or even suffer long‑term damage. You can often stabilize it quickly with a few simple checks.
Step-by-step fix:
- Shut down and unplug.
- Save your work immediately.
- Shut down the laptop completely (not just sleep).
- Unplug the charger and let it cool for a few minutes.
- Check the surface and vents.
- Never use a laptop long‑term on soft surfaces (bed, couch, blanket).
- Place it on a hard, flat surface like a table or tray.
- Locate all vents (usually on the sides, back, or bottom) and ensure they are not blocked.
- Clean the vents quickly (no opening required).
- Use a can of compressed air with short bursts, angled at the vents.
- Hold the can upright to avoid spraying propellant.
- Blow air OUT of the vents to push dust away, not deeper inside.
- Do this in a well‑ventilated area; some dust may blow out.
- Reduce immediate heat load with software tweaks.
- Turn the brightness down.
- Close unused browser tabs and background apps.
- On Windows: open Task Manager (Ctrl + Shift + Esc) and end high‑CPU tasks you recognize and don’t need.
- On macOS: open Activity Monitor and quit runaway apps.
- Engage built‑in power and cooling tools.
- On Windows:
- Go to Settings → System → Power & battery → Power mode, choose “Balanced” or “Best power efficiency.”
- On macOS:
- System Settings → Battery → lower the “Low power mode” threshold or enable it when on battery.
- Add a temporary cooling boost.
- Elevate the back edge of the laptop an inch or two using a book or stand so air can flow underneath.
- If available, use a USB cooling pad with fans under the laptop.
If overheating continues despite clear vents and moderate use, the internal cooling system may need professional cleaning or new thermal paste, especially on older laptops.
5. When a Wall Anchor or Screw Pulls Out of Drywall
A towel bar, shelf, or hook pulling out of drywall looks serious, but you can often stabilize it quickly and safely with better anchors and proper installation.
Step-by-step fix:
- Remove the loose hardware and assess the damage.
- Unscrew the fixture completely.
- Check the size of the existing hole and whether there’s crumbling or torn drywall around it.
- Decide if you can reuse the location.
- If the hole is only slightly enlarged and the surrounding drywall is firm, you can usually repair and reuse.
- If the area is heavily damaged, plan to shift the mounting point at least an inch or two to one side or up/down.
- Patch and reinforce slightly enlarged holes.
- Fill the hole with a setting‑type joint compound or pre‑mixed spackle.
- Press it firmly into the hole and scrape flush with a putty knife.
- Let it dry fully (check the product label for drying time).
- For heavier loads, patch first, then plan to install a new, stronger anchor slightly above or below the original spot.
- Choose the right anchor for the job.
- Light loads (small pictures, light hooks): plastic expansion anchors are usually fine.
- Medium loads (towel bars, small shelves): self‑drilling drywall anchors or toggles.
- Heavy loads (large shelves, TVs): ideally secured into wall studs with proper wood screws or heavy‑duty toggles if a stud isn’t available.
- Stud mounting (best option when possible):
- Use a stud finder to locate the stud.
- Drill a small pilot hole and drive the screw directly into the stud through the fixture.
- Drywall anchor mounting:
- For self‑drilling anchors: press the tip into the drywall and screw it in until flush.
- For traditional plastic anchors: pre‑drill a hole the size recommended on the package, tap the anchor in gently with a hammer until flush.
- Reattach the fixture firmly but don’t overtighten.
- Align your fixture with the anchors and insert the screws.
- Tighten until snug—stop once the fixture is secure.
- Overtightening can strip out the anchor or crush the drywall.
Install anchors properly:
For safety, always upgrade to stronger anchors or stud mounting for anything that will support real weight (shelves, heavy mirrors, grab bars).
Conclusion
Quick fixes don’t have to be guesswork. With a simple, step‑by‑step approach, you can restore your Wi‑Fi, smooth a stubborn door, clear a slow drain, cool down an overheating laptop, and rescue loose wall fixtures—all in a matter of minutes. The key is to start with safe, reversible actions, confirm each change, and only escalate if needed. Keep basic tools on hand, follow these steps calmly, and most “uh‑oh” moments at home will turn into manageable, one‑person jobs instead of emergencies.
Sources
- [Federal Communications Commission (FCC) – Internet Connection Tips](https://www.fcc.gov/consumers/guides/home-networking) - Guidance on troubleshooting home networking and Wi‑Fi issues
- [U.S. Environmental Protection Agency – Safer Choice: Household Products](https://www.epa.gov/saferchoice) - Information on safer alternatives to harsh chemical cleaners, relevant for drain maintenance
- [University of Iowa – Computer Care & Maintenance](https://its.uiowa.edu/support/article/100778) - Practical advice on laptop ventilation, cleaning, and overheating prevention
- [U.S. Consumer Product Safety Commission – Anchors and Brackets for Furniture and TVs](https://www.cpsc.gov/Safety-Education/Safety-Education-Centers/Tipover-Information-Center) - Why proper wall anchoring and mounting matters for safety
- [Family Handyman – How to Fix a Sticking Door](https://www.familyhandyman.com/project/how-to-fix-a-sticking-door/) - Step‑by‑step examples of diagnosing and repairing common interior door problems
Key Takeaway
The most important thing to remember from this article is that this information can change how you think about Quick Fixes.


