Small problems at home have a habit of showing up at the worst possible time—right before guests arrive, in the middle of a work call, or when stores are closed. You don’t always need a pro or a toolbox full of gear to stabilize the situation. With a few basic items most people already own, you can keep things working safely until you have time for a permanent repair.
Below are five practical quick fixes with clear, step‑by‑step instructions. They’re designed to be safe, fast, and realistic for non‑experts.
1. Wobbly Chair or Table: Stabilize It in Minutes
A wobbly chair or table isn’t just annoying—it can be a tipping hazard and damage floors. You can stabilize it with simple household items while you plan a more permanent repair.
You’ll need (any of these):
- Folded cardboard (from a box)
- A wine cork or rubber furniture pads
- Scissors or a utility knife
- Tape or wood glue (optional but helpful)
Step‑by‑step:
- Flip and inspect.
Turn the chair/table over carefully. Check which leg or legs are shorter or loose. Gently try to wiggle each leg to find the offender.
- Tighten what you can.
If there are visible screws or bolts, use a screwdriver or wrench to snug them up. Don’t overtighten—just firm and secure.
- Level the legs.
Put the furniture back upright on a hard floor (not carpet). Press down on different corners to confirm which leg is shorter.
- Cut a temporary shim.
Trim a small piece of cardboard or a slice of cork. Start thinner than you think you need—you can always add more.
- Test and adjust.
Slide the shim under the short leg and test for wobble. Add or trim material until the table or chair feels solid.
- Secure the shim.
Once you’re happy with the stability, flip the furniture carefully and tape or glue the shim to the bottom of the short leg so it doesn’t slide out.
- Protect the floor.
If you have them, stick felt or rubber pads under all the legs, including the shimmed one. This evens out small differences and protects your flooring.
This quick fix can last surprisingly long. When you have time, consider a full repair—like regluing loose joints or trimming long legs to match—but this gets you a safe, steady surface today.
2. Stripped Screw That Won’t Budge: Get It Out Safely
A screw head that’s rounded off or “stripped” can stop any repair project in its tracks. Before you reach for extreme methods, try this controlled approach.
You’ll need:
- A rubber band or thin piece of latex glove
- Manual screwdriver (preferably one size larger than you used before)
- Pliers (optional)
- Penetrating oil (like WD‑40) or a drop of household oil (optional)
Step‑by‑step:
- Stop power tools.
If you’ve been using a drill or driver, stop. Power tools can make a slightly damaged screw much worse in seconds.
- Lubricate (if metal).
For metal screws in metal or wood, add a small drop of penetrating oil on the threads near the head. Let it sit 5–10 minutes. Skip this step for electronics or areas where oil could cause damage.
- Add grip with rubber.
Place a wide rubber band or a small piece of latex over the screw head. The soft material fills the stripped grooves and adds friction.
- Use the right driver.
Choose a manual screwdriver that fits as snugly as possible. Sometimes a slightly larger size or a different style (e.g., #2 Phillips instead of #1) will grip better.
- Apply steady, slow pressure.
Press straight down firmly and turn very slowly counterclockwise. Avoid sudden jerks; smooth pressure lets the rubber bite into the metal.
- Try pliers on the head.
If any of the screw head sticks up, grip it firmly with locking pliers or needle‑nose pliers and twist slowly. Rock it back and forth slightly to break it free, then continue unscrewing.
- Mark for later.
Once removed, throw the damaged screw away. Replace it with a new screw of the same length and diameter so you don’t repeat the problem.
This method often saves you from drilling out the screw or damaging the surrounding material—perfect for quick home fixes.
3. Loose Door Handle: Stop the Rattle and Improve Security
A loose interior door handle feels cheap and can eventually fail completely. Fortunately, you can tighten most in a few minutes without special tools.
You’ll need:
- Phillips or flat‑head screwdriver (check the screw type first)
- Toothpick or wooden matchstick (for worn screw holes)
- Small piece of tape (optional)
Step‑by‑step:
- Inspect both sides of the door.
Open the door and look closely at the handle and latch plates. Identify all visible screws: on the handle, the round trim plate, and the metal strike plate on the frame.
- Tighten handle screws.
Hold the handle in its “normal” position to keep it aligned. Use your screwdriver to snug up the screws on the handle and trim plate. Turn each screw a bit at a time so the plate stays centered.
- Check the latch plate.
On the door edge, you’ll see the latch plate around the latch bolt. Tighten its screws so the plate sits flush with the door edge.
- Secure the strike plate.
On the door frame, tighten the screws on the metal strike plate. Loose strike plates can cause misalignment and make doors hard to latch.
- Fix a screw that won’t tighten.
If a screw just spins and never tightens, the wood hole may be worn out:
- Remove the screw.
- Insert a toothpick or wooden matchstick (without the match head) into the hole. Break it off flush.
- Reinsert the screw and tighten gently. The wood filler gives the screw something to bite into.
- Keep screws from backing out.
For a light, temporary solution, you can put a tiny piece of clear tape over the screw head to remind you not to overtighten later. For a more permanent fix, consider thread‑locking compound when you have it on hand.
- Test the latch.
Close and open the door several times. The handle should feel solid, and the latch should engage smoothly without sticking.
This quick fix not only improves the feel of the door but also helps keep rooms secure and doors aligned.
4. Peeling Wallpaper Edge: Reattach It Cleanly
A peeling wallpaper seam or corner makes a whole room look tired, but you don’t need a full re‑papering session to improve it. You can reattach edges cleanly with basic supplies.
You’ll need:
- White school glue or wallpaper seam adhesive (if you have it)
- Small artist brush or cotton swab
- Damp cloth or sponge
- Clean, dry cloth
- A straight object for smoothing (credit card, plastic spatula, or ruler)
Step‑by‑step:
- Gently lift the loose area.
Carefully lift the peeling edge just enough to work underneath it. Don’t pull more than is already detached—you want to minimize tearing.
- Clean out dust.
Use a dry cloth or soft brush to remove dust or debris from the wall and the back of the wallpaper. Adhesive sticks better to clean surfaces.
- Apply adhesive thinly.
Dip a small brush or cotton swab into white glue (dilute slightly with a few drops of water if very thick) or wallpaper adhesive. Apply a thin, even layer to the wall where the paper will lay, not directly on the visible front.
- Press from center outward.
Carefully lay the wallpaper back into place. Starting from the area closest to the firmly attached section, press gently outward toward the edge to push out trapped air and excess glue.
- Smooth the surface.
Use a plastic card or spatula wrapped in a soft cloth to smooth the paper. Work in gentle strokes from the center to the edges to avoid creases or bubbles.
- Wipe away excess.
Immediately use a slightly damp cloth or sponge to remove any glue that squeezes out along the seam. Follow with a dry cloth to avoid water streaks, especially on delicate prints.
- Hold while it sets.
If the area tries to lift, you can tape a clean piece of wax paper over it and press gently with books or a flat board for a couple of hours. Remove everything once the adhesive has dried.
Done carefully, this fast fix is almost invisible and can extend the life of your wallpaper significantly.
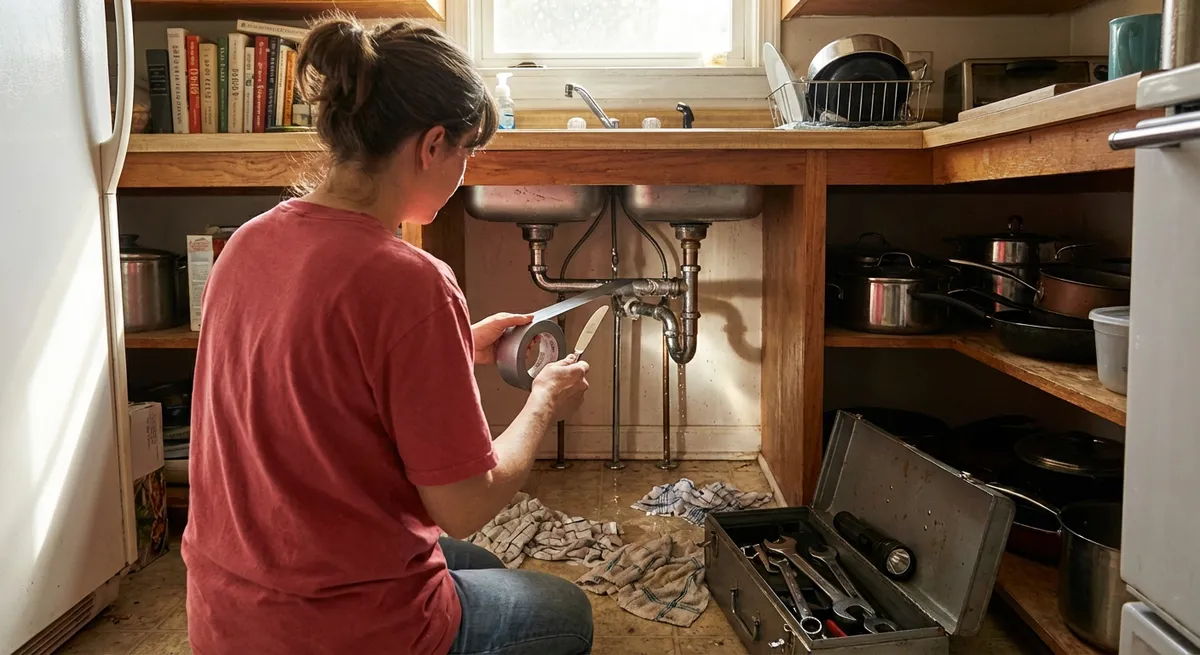
5. Slow or Clogged Bathroom Sink: Clear It Without Harsh Chemicals
A slow‑draining bathroom sink often comes from hair, soap scum, and toothpaste buildup—not a deep pipe problem. You can usually improve or solve it quickly without aggressive drain cleaners.
You’ll need:
- Rubber gloves
- Paper towels or a small trash bag
- A plastic drain snake or a straightened wire hanger (with bent tip)
- Cup or bowl
- Baking soda and white vinegar (optional, for extra cleaning)
- Old toothbrush (optional)
Step‑by‑step:
- Remove standing water.
If the sink is full or nearly full, scoop water into a bucket or bowl and pour it into the toilet or tub so you can work more easily.
- Take out the stopper.
Many bathroom sinks have a lift‑rod stopper:
- Look under the sink and find the horizontal rod going into the drain pipe.
- Loosen the nut holding that rod and slide the rod out.
- Pull the stopper straight out from the sink drain from above.
- Clean the stopper thoroughly.
Use paper towels to remove hair and gunk from the stopper. An old toothbrush and some soap or baking soda paste help scrub it clean.
- Clear the drain opening.
Insert a plastic drain snake or the end of a bent wire hanger into the drain. Push gently, then pull back slowly, catching hair and debris. Repeat several times until you stop pulling out material.
- Flush with hot water.
Run hot tap water (not boiling, especially if you have PVC pipes) for 1–2 minutes to wash away loose residue.
- Optional: Baking soda and vinegar rinse.
- Pour ½ cup baking soda into the drain.
- Follow with ½–1 cup white vinegar.
- Let it fizz for 10–15 minutes.
- Rinse again with hot water for a minute.
- Reassemble the stopper.
Insert the stopper back into the drain from the top. Under the sink, slide the horizontal rod back into the hole in the stopper stem and retighten the nut. Test the up‑and‑down motion of the lift rod to be sure it works smoothly.
If the sink is still completely blocked after this, or you notice strange smells, gurgling, or water backing up into other fixtures, it may be a deeper plumbing issue worth calling a professional about.
Conclusion
Most everyday problems don’t need to derail your plans—or your budget. By learning a few simple, low‑risk quick fixes, you can:
- Stabilize furniture so it’s safe to use
- Remove stubborn screws without damaging your project
- Tighten door hardware for better function and security
- Restore peeling wallpaper edges neatly
- Clear slow bathroom drains without relying on harsh chemicals
These aren’t permanent renovations, but they buy you time, keep your home functional, and build your confidence. The next time something small goes wrong, treat it as an opportunity: one more skill you can master in a few minutes.
Sources
- [Consumer Product Safety Commission – Furniture and TV Tip-Over Information](https://www.cpsc.gov/Safety-Education/Safety-Education-Centers/Tipover-Information-Center) – Background on why stabilizing furniture matters for safety
- [Family Handyman – How to Remove a Stripped Screw](https://www.familyhandyman.com/project/how-to-remove-a-stripped-screw/) – Additional techniques and visuals for dealing with damaged screws
- [Yale University – Fire Code & Door Hardware Basics](https://ehs.yale.edu/sites/default/files/files/means-of-egress-fire-doors-and-hardware.pdf) – General reference on door hardware function and safety considerations
- [University of Minnesota Extension – Home Drain Maintenance](https://extension.umn.edu/nuisance-problems/home-drain-maintenance) – Guidance on maintaining household drains and when to seek professional help
- [This Old House – How to Repair Wallpaper Seams](https://www.thisoldhouse.com/walls/21017689/how-to-repair-wallpaper-seams) – Step-by-step visuals and tips for reattaching loose wallpaper edges
Key Takeaway
The most important thing to remember from this article is that this information can change how you think about Quick Fixes.


