Not every problem needs a pro, a new part, or a trip to the store. With a few basic tools and clear steps, you can solve a surprising number of everyday issues in under an hour. This guide walks through five practical DIY solutions you can handle today, focusing on safety, clarity, and results you can trust.
Fix 1: A Wobbly Chair or Table That Won’t Sit Still
A rocking chair or shaky table is usually caused by uneven legs, loose fasteners, or worn-out glides. You don’t need carpentry skills to stabilize it—just patience and a methodical approach.
Step-by-step:
Identify the problem leg(s)
- Place the chair or table on a flat, hard floor (not carpet). - Gently rock it and see which leg lifts off the ground.
Tighten all screws and bolts
- Flip the furniture upside down on a soft surface (like a blanket). - Use a screwdriver or Allen key to tighten every visible screw or bolt at joints and braces. - Retest on the floor. If it’s still wobbly, move to the next step.
Check for warped or short legs
- Place a small level on the top surface; if it’s level but still wobbles, one leg is likely shorter. - Use a piece of cardboard or folded paper under each leg, one at a time, to find the one that needs extra height.
Add a permanent shim
- Use felt furniture pads, rubber bumpers, or a wooden shim under the short leg. - If using a wooden shim, trim it flush with the leg using a utility knife or small saw. - Secure the shim or pad with wood glue or strong double-sided tape.
Seal and protect (optional)
- If the furniture is used on hard floors, add felt pads to all legs to prevent scratches. - For outdoor furniture, use rubber or plastic caps to keep moisture away from the wood.
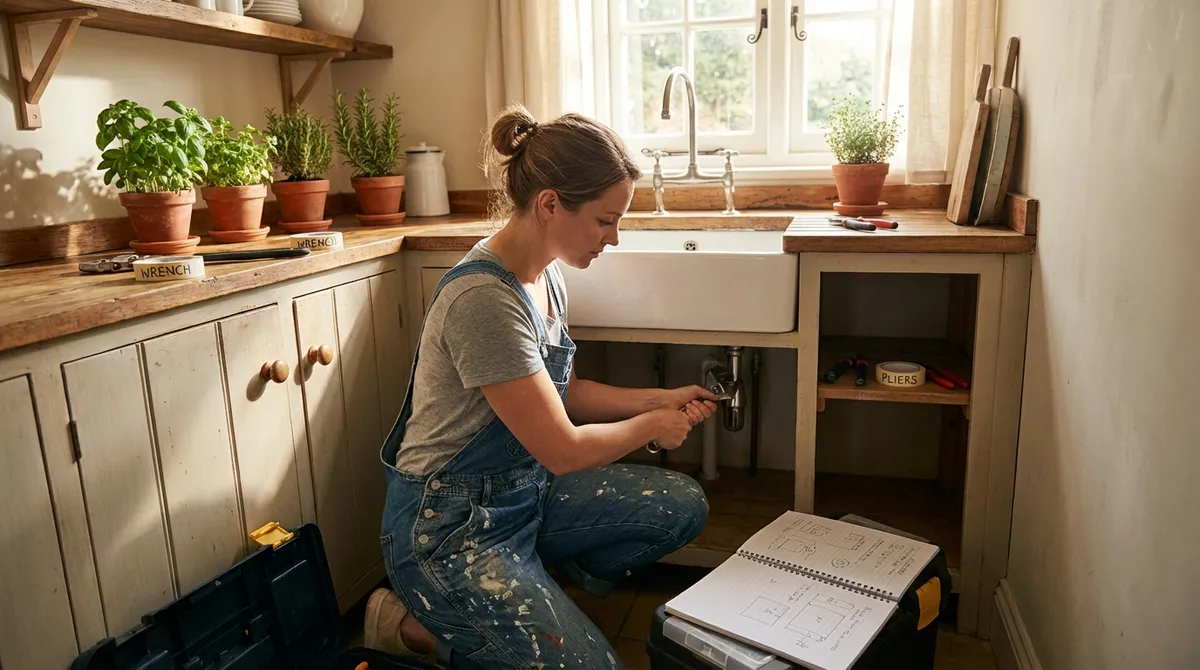
Fix 2: A Slow or Clogged Bathroom Sink Drain
A sluggish sink is often caused by hair, soap scum, and toothpaste buildup right under the drain. You can clear most clogs without harsh chemicals or calling a plumber.
Step-by-step:
Prepare and protect
- Put on rubber gloves. - Place a small bucket or bowl under the P-trap (the curved pipe under the sink) to catch drips. - If you recently used a chemical drain cleaner, skip the disassembly and call a pro—those chemicals can be dangerous.
Clean the stopper first
- Remove the sink stopper by unscrewing or unclipping the linkage under the sink (usually a small rod attached to the drain). - Pull the stopper out from the top; expect hair and gunk. - Clean it thoroughly with hot water and an old toothbrush.
Use a simple drain snake
- Insert a plastic drain snake or zip tool into the drain and pull out hair and debris. - Repeat until you stop pulling out material. - Rinse the area with hot water.
Disassemble and clean the P-trap (if needed)
- Use channel-lock pliers or loosen the slip nuts by hand. - Remove the P-trap carefully and empty it into the bucket. - Scrub out any buildup inside the P-trap and adjacent pipes with a bottle brush. - Reassemble the trap, hand-tighten the nuts, then give a small extra turn with pliers—don’t overtighten.
Flush and test for leaks
- Run hot water for 1–2 minutes. - Check under the sink for drips around the connections. - Reinstall the stopper and confirm the sink drains quickly.
Fix 3: A Door That Won’t Latch or Keeps Swinging Open
If your door doesn’t catch properly or swings by itself, you can usually solve it by adjusting hinges or the strike plate instead of replacing the hardware.
Step-by-step:
Identify the issue
- If the latch doesn’t line up with the strike plate hole: misalignment problem. - If the door swings open or closed on its own: hinge alignment and gravity issue.
Tighten hinge screws
- Open the door and support it slightly (a wedge or folded cardboard under the door helps). - Tighten all hinge screws on the door and the frame. - If screws spin without grabbing, replace them with longer wood screws of the same gauge.
Correct door sag with a quick adjustment
- If the top hinge is loose or the door appears lower on the latch side, remove one screw from the top hinge (frame side). - Replace it with a 2.5–3" wood screw to pull the door frame tighter into the wall, lifting the door slightly. - Test the door: if it now latches properly, you’re done.
Adjust the strike plate (if misalignment remains)
- Close the door gently and see where the latch hits the strike plate (you can color the latch with a dry-erase marker to see the contact point). - If the latch hits above or below the opening by a small amount, loosen the strike plate screws. - Shift the strike plate slightly up, down, in, or out as needed, then retighten screws.
Widen the strike opening (last resort)
- For minor adjustments, you can carefully file the top or bottom of the strike plate opening with a metal file. - Smooth the edges, reinstall if removed, and test the door again.
Fix 4: A Phone That Won’t Charge Reliably
Before you assume your phone or battery is dead, rule out the most common culprit: a dirty or worn charging port and cable.
Step-by-step:
Rule out a bad outlet and adapter
- Plug another device (like a lamp or another charger) into the same outlet to confirm it works. - Try a different wall adapter if you have one, preferably from the original manufacturer or a reputable brand.
Inspect the cable
- Look for fraying, kinks, exposed wires, or bent connectors. - Test the cable with another device. If it fails there too, retire it.
Safely clean the charging port
- Power off your phone completely. - Use a bright light to look inside the port—lint and dust are common. - Use a wooden or plastic toothpick (never metal) to gently loosen debris. - Follow up with a few blasts of compressed air held upright at a slight angle (short, controlled bursts).
Check for snug connection
- Plug the cable in firmly and see if it sits flush and feels secure. - Gently move the connector side to side; if it disconnects easily, the port or cable may be worn.
Use safe charging practices
- Avoid very cheap, uncertified chargers—they can damage batteries or be unsafe. - Don’t bend the cable sharply at the connector; use a relaxed curve. - If the port still feels loose or only charges at certain angles, it’s time for a professional repair.
Fix 5: A Toilet That Won’t Stop Running
A running toilet wastes water and money, but in most cases, the internal parts just need cleaning or adjustment—not replacement.
Step-by-step:
Shut off water and inspect
- Turn the shutoff valve (behind or beside the toilet) clockwise until it stops. - Remove the tank lid and set it safely aside. - Note what you see: a fill valve, a float, a flapper, and a chain.
Check the flapper seal
- Turn the water supply back on briefly and see if water is trickling from the tank to the bowl when it shouldn’t. - Press down gently on the flapper (rubber piece at the bottom). If the running stops, the flapper isn’t sealing properly. - Turn the water off again.
Clean or reseat the flapper
- Drain the tank by flushing and holding the handle down. - Wipe the flapper and the seat it rests on with a sponge or cloth to remove mineral deposits or slime. - Turn the water back on and test. If it still runs, you’ll likely need a new flapper (inexpensive and designed for DIY installation).
Adjust the chain and float
- The chain from the handle to the flapper should have a little slack—not too tight, not so loose it tangles. - If the water level is too high and spilling into the overflow tube, adjust the float: - For a float cup: squeeze the clip on the side and slide it down the rod to lower the water level. - For a float ball: gently bend the metal rod downward to lower the water line.
Final testing
- Turn the water on fully and let the tank fill. - Mark the waterline with a pencil; it should stay constant and below the top of the overflow tube. - Listen for at least 1–2 minutes—no trickling or hissing should be audible.
Conclusion
Most “call a pro” problems start as simple issues you can handle yourself with basic tools and a clear process. Stabilizing a wobbly table, clearing a slow drain, fixing a misbehaving door, restoring reliable phone charging, and stopping a running toilet are all well within reach if you tackle them methodically and safely.
Start with one small fix, follow the steps, and build your confidence. The more you solve on your own, the more you’ll save in time, stress, and repair bills—while keeping your home and gadgets working the way they should.
Sources
- [U.S. Environmental Protection Agency – Fixing Leaks at Home](https://www.epa.gov/watersense/fix-leak-week) - Covers how common household leaks (including toilets) waste water and basic guidance on fixing them
- [Family Handyman – How to Fix a Running Toilet](https://www.familyhandyman.com/project/how-to-fix-a-running-toilet/) - Step-by-step visuals and explanations of typical toilet tank repairs
- [Energy.gov – Standby Power and Electronics Safety](https://www.energy.gov/energysaver/articles/reduce-energy-use-standby-power) - Background on safe and efficient use of chargers and electronics
- [Home Depot – How to Unclog a Bathroom Sink](https://www.homedepot.com/c/ah/how-to-unclog-a-bathroom-sink/9ba683603be9fa5395fab902abef9c3) - Practical guide with photos for clearing sink drains and P-traps
- [Bob Vila – How to Fix a Sagging Door](https://www.bobvila.com/articles/how-to-fix-a-sagging-door/) - Explanation of hinge and strike plate adjustments for misaligned doors
Key Takeaway
The most important thing to remember from this article is that this information can change how you think about DIY Solutions.


