Most “small” problems at home quietly turn into expensive issues when we ignore them. A dripping faucet becomes a higher water bill, a slow laptop kills your productivity, and a wobbly chair eventually snaps. This guide walks you through five practical, step‑by‑step DIY solutions you can handle yourself—with basic tools, a little patience, and no need to be “handy.”
Stop a Dripping Faucet and Save Your Water Bill
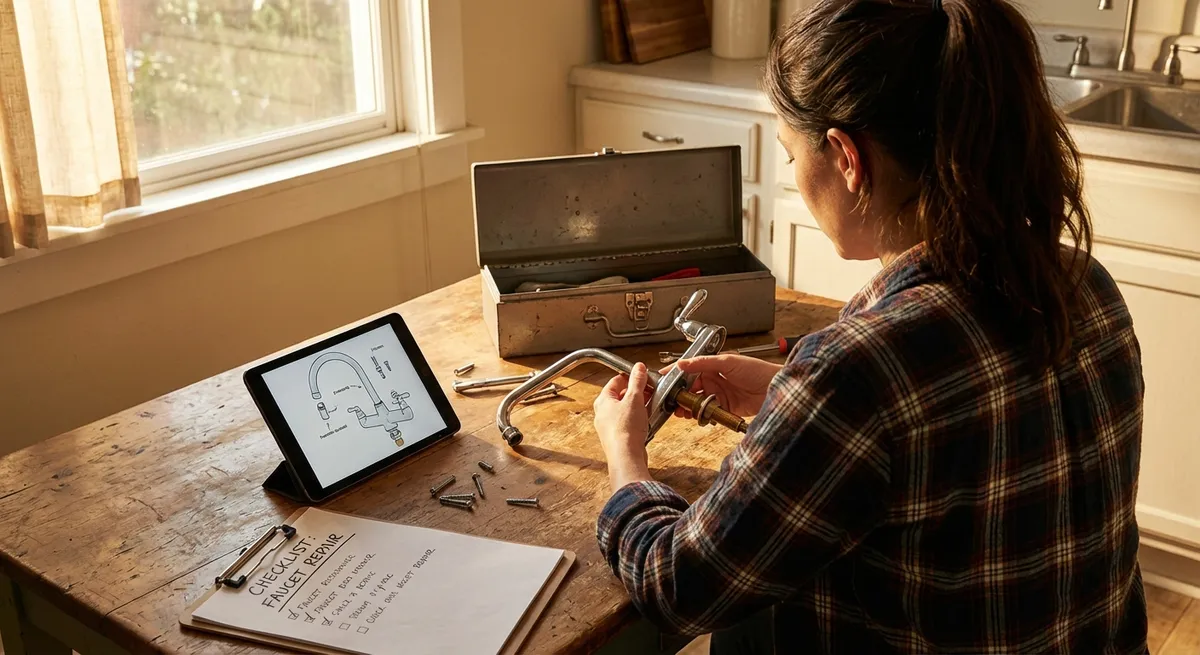
A constant drip is more than annoying—it wastes gallons of water over time. In many cases, you can fix it in under an hour with a wrench and a replacement cartridge or washer.
What you’ll need
- Adjustable wrench or basin wrench
- Flathead and Phillips screwdrivers
- Replacement cartridge or rubber washer/O‑ring (specific to your faucet brand/model)
- Towel and small container (to catch small parts)
Steps
Shut off the water supply
Look under the sink for two shutoff valves (hot and cold). Turn both clockwise until they stop. Open the faucet to release pressure and confirm water is off.
Plug the drain
Use a sink stopper or a rag so screws and tiny parts don’t fall down the drain.
Remove the handle
- Pop off any decorative cap with a flathead screwdriver. - Unscrew the handle screw underneath. - Gently pull the handle off; it may need a wiggle if it’s stuck.
Identify your faucet type
Most common types: cartridge, compression, ball, or ceramic disc. If unsure, search your brand and model online using any markings you see.
Disassemble and inspect the internal parts
- Use the wrench to remove the retaining nut or cover. - Pull out the cartridge or stem. - Inspect rubber washers and O‑rings for cracks, flattening, or wear.
Replace worn components
- Take the old parts to a hardware store to match them exactly. - Install new washers/O‑rings or cartridge in the same orientation as the original. - Tighten the retaining nut snugly but don’t over‑tighten (can crack components).
Reassemble the faucet
Put everything back in reverse order: internal parts, handle, screw, then decorative cap.
Turn water back on and test
Slowly open the shutoff valves. Turn on the faucet, then off, and check for drips at the spout and around the base. If there’s still a drip, ensure all parts are seated properly and screws are tight.
Quiet a Squeaky Door Without Calling a Handyman
A squeaky door usually means metal parts are rubbing without enough lubrication. You don’t need to replace hinges—just clean and lube them properly.
What you’ll need
- Lubricant (silicone spray or white lithium grease; cooking oil is a last resort only)
- Rag or paper towels
- Small flathead screwdriver or nail (for pin removal, if needed)
- Hammer (optional)
Steps
Identify where the noise is coming from
Slowly open and close the door. If the squeak comes from the hinge area, you’re on the right track.
Try lubricating without removing the hinge pin first
- Spray a small amount of lubricant at the top of each hinge, especially where the pin enters. - Open and close the door 10–15 times to work the lubricant in. - Wipe off any drips.
If it’s still squeaky, remove the hinge pins
- Close the door. - Place a flathead screwdriver or nail at the bottom of the hinge pin. - Gently tap upward with a hammer until the pin starts to slide out, then pull by hand. - Do this one hinge at a time so the door stays supported.
Clean and lubricate the pins
- Wipe off old grime and rust with a rag. - Apply a thin coat of lubricant along the entire pin. - You can also put a little lubricant inside the hinge barrel.
Reinstall the pins and test
- Slide each pin back into the hinge from the top. - Tap lightly with a hammer if needed. - Open and close the door several times to distribute the lubricant. - Wipe away any excess so it doesn’t drip on floors or carpet.
Check for lingering noise
If you still hear squeaks, confirm hinges are screwed tightly into the door and frame. Tighten any loose screws, but don’t strip them.
Fix a Wobbly Chair Before It Collapses
Loose joints in chairs are usually caused by worn glue or screws backing out over time. Stabilizing them now makes the chair safer and extends its life.
What you’ll need
- Wood glue (for wooden chairs)
- Clamps or heavy objects (books, paint cans)
- Screwdriver or Allen key (for screw‑based joints)
- Sandpaper (optional, for old glue removal)
- Damp cloth
Steps
Flip the chair and inspect joints
Gently rock each leg and joint to find where the wobble is coming from—often where legs meet the seat or stretchers (horizontal bars) between legs.
Tighten existing screws and bolts
- Use a screwdriver or Allen key to snug up every visible fastener. - If this fixes the wobble entirely, you’re done. - If not, the glue in the joints is likely failing.
Separate loose wooden joints (if safe)
- Carefully wiggle the loose leg or stretcher out of its socket. - Don’t force joints that feel solid—focus only on clearly loose ones. - Scrape or sand off old glue on both surfaces so new glue can bond well.
Apply fresh wood glue
- Squeeze a moderate amount of wood glue into the joint socket and onto the tenon (the end of the leg or stretcher). - Push the pieces together firmly until seated fully.
Clamp and let it cure
- Use clamps to hold the joint tightly. If you don’t have clamps, use a rope or belt to pull legs together and stack heavy books or paint cans for pressure. - Immediately wipe away any squeezed‑out glue with a damp cloth. - Let the glue cure per the label, usually at least 30–60 minutes before moving, 24 hours for full strength.
Final stability check
After curing, set the chair upright and push on it from multiple angles. If there’s still wobble, repeat for other loose joints. Replace stripped screws with slightly larger ones if needed.
Speed Up a Sluggish Laptop Using Basic Maintenance
When your laptop slows to a crawl, it’s often software bloat or simple neglect rather than a fatal hardware issue. A bit of cleanup can restore a lot of speed.
What you’ll need
- Your laptop and power adapter
- Stable internet connection
- External drive or cloud storage for backups (recommended)
Steps (Windows-focused, with notes for macOS)
Back up important files first
Save documents, photos, and anything critical to an external drive or cloud service (OneDrive, Google Drive, iCloud). You’re not planning anything destructive, but backups are insurance.
Uninstall unused programs
- Windows: Settings → Apps → Installed apps (or Apps & features). Remove software you no longer use (toolbars, trials, games, etc.). - macOS: Open Applications folder and drag unused apps to Trash, then empty Trash.
Limit startup programs
- Windows: Press Ctrl + Shift + Esc → Startup tab. Disable non‑essential apps (e.g., game launchers, chat tools you rarely use). - macOS: System Settings → General → Login Items. Remove apps you don’t need at startup.
Clean up disk space
- Windows: Search “Disk Cleanup” → select system drive (usually C:) → check temporary files, recycle bin, etc., then clean. - macOS: Apple menu → About This Mac → Storage → Manage → Review and delete large/unneeded files.
Update operating system and drivers
- Windows: Settings → Windows Update → Check for updates; install critical and recommended ones. - macOS: System Settings → General → Software Update. Updates often include performance and security improvements.
Scan for malware
- Windows: Use Windows Security → Virus & threat protection → Quick scan. - Consider a reputable malware scanner if you suspect infection. - macOS: Still less common, but use a trusted scanner if you see suspicious pop‑ups or unknown apps.
Restart and observe performance
Fully restart the laptop. Notice boot time and how quickly common apps (browser, office suite) respond. If it’s significantly better, maintain this habit every few months.
Clear a Slow‑Draining Sink Without Harsh Chemicals
A sink that drains slowly usually has a partial clog from hair, soap scum, or grease. You can often clear it without resorting to harsh chemical drain cleaners that can damage pipes.
What you’ll need
- Plunger (cup‑style for sinks)
- Bucket or bowl
- Old rag or towel
- Rubber gloves
- Baking soda and vinegar (optional)
- Drain snake or plastic zip‑strip (optional but very helpful)
Steps
Remove the stopper or drain cover
- For bathroom sinks, pull out the stopper; you may need to twist or lift. - If it’s stuck, look under the sink: loosen the small nut on the back of the drainpipe to release the stopper rod and pull it out. - For kitchen sinks, lift or unscrew any drain cover.
Manually remove visible debris
- Put on gloves and pull out hair, food, or gunk near the top of the drain. - Use a plastic zip‑strip or small drain snake to grab deeper clogs in bathroom sinks.
Try plunging the drain
- Fill the sink with a few inches of water. - Cover any overflow holes with a wet rag (especially in bathroom sinks). - Place the plunger over the drain and push down gently at first, then more firmly, 10–15 times. - Lift the plunger and see if water drains faster.
Use a baking soda and vinegar flush (non‑harsh option)
- Pour about 1/2 cup of baking soda into the drain. - Follow with 1/2–1 cup of white vinegar. - Let it fizz for 10–15 minutes. - Flush with a full kettle of hot (not boiling) water to wash loosened debris away.
Clean the P‑trap (if clog persists and you’re comfortable)
- Place a bucket under the curved section of pipe (P‑trap) under the sink. - Unscrew the slip nuts by hand or with pliers. - Remove the trap and clean out any buildup. - Reassemble, ensuring gaskets are seated correctly and nuts are snug—but don’t over‑tighten.
Test for leaks and drainage
Run water for at least a minute and watch for leaks under the sink. If everything stays dry and the drain flows well, you’re done.
Conclusion
Small, nagging issues rarely fix themselves—more often they get worse and more expensive. With a few basic tools and clear steps, you can silence a squeaky door, stabilize a wobbly chair, clear a slow drain, speed up your laptop, and stop that dripping faucet. Start with the problem that annoys you the most, work through the steps methodically, and you’ll quickly build the confidence to tackle the next repair.
Sources
- [U.S. Environmental Protection Agency – WaterSense: Fix a Leak](https://www.epa.gov/watersense/fix-leak-week) – Explains how small leaks waste water and offers guidance on common household leak repairs
- [This Old House – How to Fix a Leaky Faucet](https://www.thisoldhouse.com/plumbing/21015174/how-to-fix-a-leaky-faucet) – Detailed walkthroughs for different faucet types and parts identification
- [Energy Star – Computers & Electronics](https://www.energystar.gov/products/office_equipment/computers) – Background on computer energy use, performance, and maintenance considerations
- [Mayo Clinic – Household Chemicals and Safety](https://www.mayoclinic.org/healthy-lifestyle/adult-health/in-depth/household-chemicals/art-20046488) – Why caution matters with chemical drain cleaners and other household products
- [Family Handyman – How to Fix Wobbly Chairs](https://www.familyhandyman.com/project/how-to-fix-a-wobbly-chair/) – Visual guide to reinforcing loose chair joints and using wood glue effectively
Key Takeaway
The most important thing to remember from this article is that this information can change how you think about DIY Solutions.


