When something breaks at home, your first reaction doesn’t have to be “call someone” or “buy a new one.” With a few basic tools and a clear plan, you can safely handle more than you think. This guide walks you through five practical, step‑by‑step DIY solutions for common problems that waste time, energy, and money. Each fix is designed for beginners, with a focus on safety and results—not perfection.
Stop a Running Toilet That Won’t Quit
A constantly running toilet wastes water and drives up your bill, but it’s usually a simple internal fix—not a plumbing emergency.
What you’ll need
- Adjustable wrench (optional)
- Replacement flapper (if needed)
- Towel or sponge
Step‑by‑step
Remove the tank lid and observe
Flush the toilet once and look inside the tank as it refills. Identify three parts: - Fill valve (tall column where water comes in) - Float (controls water level) - Flapper (rubber piece at bottom that lifts when you flush)
Check the flapper seal
When the tank is full, the flapper should sit flat and sealed on the valve seat. - Gently press down on the flapper. If the running sound stops, the flapper is likely worn or misaligned.
Adjust the chain length
If the chain between the handle and flapper is too tight, the flapper can’t close fully. - Unhook the chain and reattach it so there’s just a little slack. - Test flush again and confirm it closes completely.
Replace a worn flapper (if needed)
- Turn off the water supply valve behind or beside the toilet. - Flush to drain most of the water from the tank. - Unclip the old flapper from the overflow tube and remove it from the chain. - Install the new flapper by clipping it onto the overflow tube and attaching the chain. - Turn the water back on and test several flushes.
Adjust the water level
If water is flowing into the overflow tube, the tank is overfilling. - For a float-cup fill valve: turn the adjustment screw on top clockwise to lower the float. - For a float ball: gently bend the float arm downward to reduce the water level. Aim for the water line to be about 1 inch below the top of the overflow tube.
Final check
Let the toilet sit for 5–10 minutes. There should be no running sound, and the water level should stay put.
Quiet a Squeaky Door Without Special Tools
A squeaky door isn’t just annoying—it usually means metal rubbing on metal with no lubrication. Fixing it is quick and doesn’t require replacing the hinge.
What you’ll need
- Household lubricant (WD‑40, silicone spray, or even petroleum jelly)
- Rag or paper towels
- Flat screwdriver (optional)
- Hammer (optional)
Step‑by‑step
Identify the squeaky hinge
Open and close the door slowly and listen. Often it’s one hinge causing most of the noise.
Try lubricating in place first
- Spray or dab a small amount of lubricant at the top of each hinge pin and along the hinge joints. - Open and close the door 10–15 times to work the lubricant in. - Wipe off any drips.
If it still squeaks, remove the hinge pin
- Close the door. - Place a flat screwdriver under the lip of the hinge pin at the bottom. - Gently tap the screwdriver handle upward with a hammer until the pin starts to rise, then pull it out by hand.
Clean and lubricate the pin
- Wipe the pin with a rag to remove old dirt or rust. - Apply a thin coat of lubricant or petroleum jelly along the pin. - Rotate it in your fingers to spread it evenly.
Reinstall the pin
- Insert the pin back into the hinge from the top. - Tap gently with the hammer until it’s fully seated. - Open and close the door several times to confirm the squeak is gone.
Repeat for other hinges (only if needed)
Don’t overdo it—tackle one hinge at a time so the door stays aligned and easy to close.
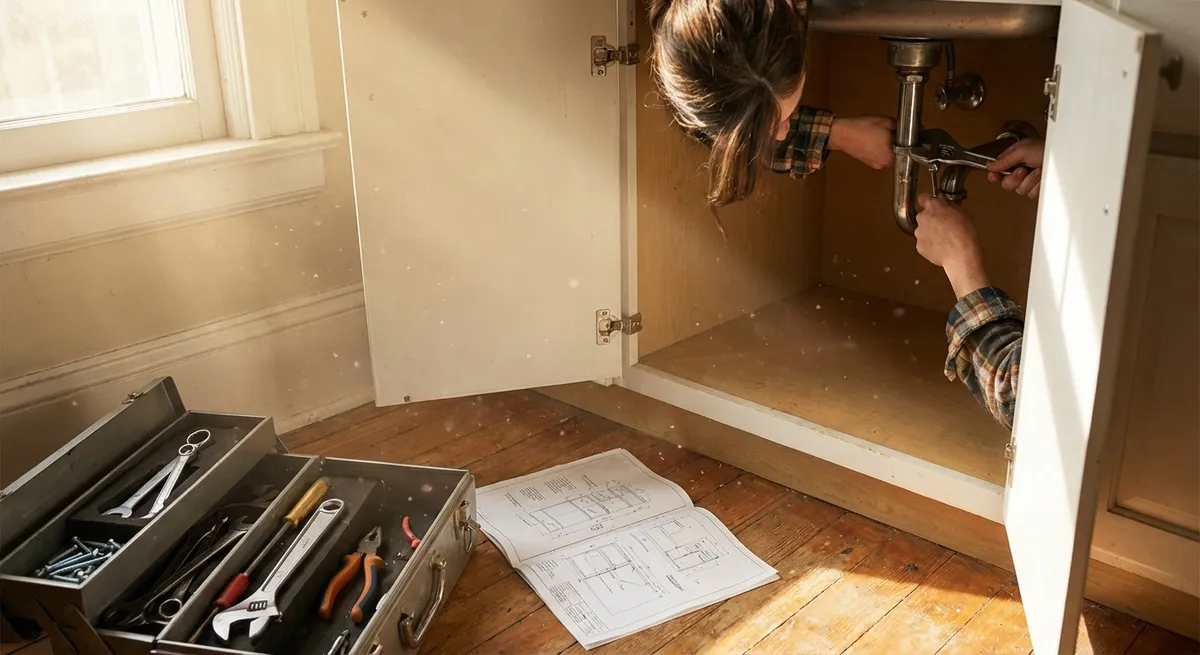
Restore a Slow or Clogged Sink Drain
Slow drains are often caused by buildup near the top of the pipe—not deep in the plumbing. You can usually clear them without harsh chemicals.
What you’ll need
- Rubber gloves
- Small bucket or bowl
- Old toothbrush or small cleaning brush
- Plunger (for sinks)
- Baking soda and white vinegar (optional but helpful)
Step‑by‑step
Clear the area and remove the stopper
- Empty the sink and clear items from around it. - For pop‑up stoppers: pull it straight up; if it doesn’t come out, you’ll likely need to remove the pivot rod under the sink. - Place a small bucket under the drain pipe before working underneath.
Clean the stopper thoroughly
- Rinse with hot water. - Scrub away hair, soap scum, and grime with an old toothbrush. - Set aside to dry.
Remove accessible debris from the drain
- Put on gloves. - Reach into the drain opening and pull out hair or gunk you can easily grab. - Avoid pushing the debris deeper.
Use a simple baking soda + vinegar flush (optional)
- Pour about ½ cup baking soda into the drain. - Follow with 1 cup white vinegar. - Let it fizz for 10–15 minutes, then flush with hot water.
Use a plunger if the drain is still slow
- Block the overflow hole with a damp cloth (if your sink has one). - Fill the sink with enough water to cover the plunger cup. - Place the plunger over the drain and plunge firmly 10–15 times. - Lift the plunger and see if water drains more quickly.
Reassemble and test
- Reinstall the stopper (reconnecting the pivot rod below if you removed it). - Run hot water for 30–60 seconds. - Watch how quickly it drains; repeat plunging if necessary.
Prevent future clogs
- Use a small drain screen or hair catcher. - Once a month, flush with hot water and a mild baking soda/vinegar treatment to limit buildup.
Fix a Loose Cabinet Door That Won’t Stay Aligned
Cabinet doors that sag, rub, or won’t close properly make the whole kitchen feel worn out. The fix is usually just careful hinge adjustment—not new cabinets.
What you’ll need
- Phillips screwdriver (most common)
- Small level (optional but helpful)
- Pencil
Step‑by‑step
Inspect the hinges and door alignment
- Close the cabinet door slowly. - Note if it rubs the frame, sits too high/low, or sticks out. - Look for loose screws or gaps at the hinges.
Tighten all hinge screws first
- Open the door and tighten the screws that attach the hinge to the door. - Then tighten the screws attaching the hinge to the cabinet frame. - Don’t overtighten—just firm enough that nothing moves.
Adjust side‑to‑side position
Many modern hinges have a screw that shifts the door left/right. - Turn this screw a quarter turn at a time. - Close the door and check alignment after each tweak. - Use a pencil to lightly mark “before” positions if needed.
Adjust in/out depth
Another hinge screw often moves the door closer to or farther from the cabinet frame. - Adjust until the door sits flush with adjacent doors or the cabinet edge. - Check from the side to ensure it’s not sticking out.
Adjust up/down position (if available)
On some hinges, the mounting plate can be shifted slightly up or down. - Loosen the mounting screws (don’t remove them). - Gently move the door up or down, then retighten. - Use a small level if you want the top edges of doors lined up perfectly.
Test the close and gap around the door
- Close the door and look for an even gap on all sides. - Make tiny adjustments—small turns on adjustment screws can make noticeable changes.
Patch a Small Drywall Hole Cleanly
Small holes from doorknobs, curtain rods, or wall anchors are easy to fix with basic supplies and a bit of patience. You don’t need to be a pro to make them disappear.
What you’ll need
- Putty knife (2–4 inch)
- Spackle or lightweight joint compound
- Fine‑grit sandpaper (120–220 grit)
- Damp sponge or cloth
- Primer and matching paint (or as close as you can get)
Step‑by‑step
Prepare the area
- Remove any loose drywall or flaking paint around the hole. - Wipe the area with a damp cloth to remove dust. - Let it dry fully.
Fill small nail or screw holes
- For holes smaller than a pencil eraser, you can often apply spackle directly with your finger. - Press it into the hole and smooth the surface with a putty knife. - Remove excess so it’s almost flush with the wall.
Fill larger holes (up to about 2 inches)
- Use a putty knife to press spackle or joint compound firmly into the hole. - Slightly overfill, then smooth it out, feathering the edges beyond the hole by 1–2 inches. - Aim for a thin, even layer rather than a thick lump.
Let it dry completely
- Follow the drying time on the product label (commonly 1–24 hours depending on thickness). - Don’t rush this step—sanding damp spackle will cause gouges.
Sand for a smooth finish
- Lightly sand the patched area with fine‑grit sandpaper until it’s flush with the surrounding wall. - Run your fingers over it; if you feel an edge, sand a bit more. - Wipe away dust with a damp cloth and let dry.
Prime and paint
- Apply a small amount of primer over the patched area to prevent flashing (a visible difference in sheen). - Once dry, paint over the patch, feathering slightly into the surrounding wall to blend. - A second coat of paint may be needed for a perfect match.
Step back and check under different light
Look at the repair in daylight and with interior lights on. If you see unevenness, a light sanding and another thin coat of spackle can refine the result.
Conclusion
You don’t need a workshop full of tools or years of experience to solve everyday home problems. By breaking each task into clear steps and focusing on safety, you can stop a running toilet, silence squeaky doors, clear sluggish drains, realign cabinet doors, and erase wall damage—all on your own schedule.
Each successful repair builds confidence, saves money, and teaches you more about how your home actually works. Start with the issue that bothers you most, follow the steps carefully, and keep learning as you go. Your home doesn’t need to be perfect—just steadily improving, one practical fix at a time.
Sources
- [U.S. Environmental Protection Agency – Fix a Leak](https://www.epa.gov/watersense/fix-leak-week) – Explains how running toilets and leaks waste water and offers basic diagnostic tips
- [The Family Handyman – How to Fix a Running Toilet](https://www.familyhandyman.com/project/how-to-fix-a-running-toilet/) – Step‑by‑step visuals and explanations of common toilet tank repairs
- [This Old House – How to Fix Squeaky Doors](https://www.thisoldhouse.com/doors/21016733/stop-squeaky-doors) – Practical guidance on lubricating and adjusting door hinges
- [Lowe’s – How to Unclog a Sink](https://www.lowes.com/n/how-to/unclog-a-sink) – Detailed overview of clearing sink drains with and without chemicals
- [Home Depot – How to Patch and Repair Drywall](https://www.homedepot.com/c/ah/how-to-patch-and-repair-drywall/9ba683603be9fa5395fab9015af95a7) – Visual guide to fixing small and medium drywall holes and finishing them for painting
Key Takeaway
The most important thing to remember from this article is that this information can change how you think about DIY Solutions.


