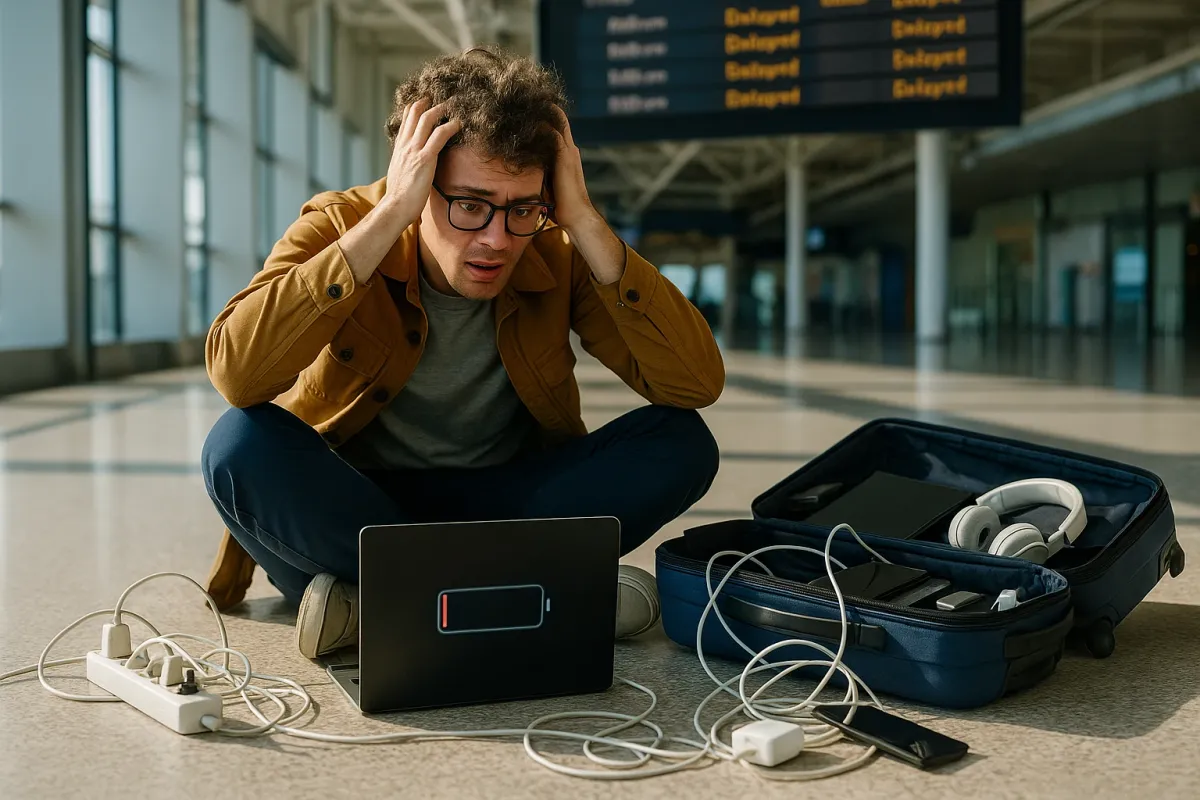
If your social feeds are already full of “holiday travel horror stories,” you’re not alone. Viral gift guides and travel gadget lists are everywhere right now, and for good reason: airports are packed, chargers are scarce, and one dead phone can turn a normal trip into a full‑blown crisis. As people scramble to prep for “the chaos of holiday travel,” your electronics are about to work harder than they do all year.
Instead of buying more shiny gadgets that might fail when you need them most, this guide focuses on something more practical: how to fix the gear you already own so it actually survives the trip. Below are five common electronics problems you’re likely to face on the road—and step‑by‑step ways to repair or at least stabilize them before they ruin your travel day.
---
1. Phone Won’t Charge Reliably (Loose Cable, Random Disconnects)
Holiday travel exposes the weakest part of your tech setup: your charging connection. If you find yourself twisting cables at weird angles to get your phone to charge in an airport outlet, the problem is usually not “bad luck”—it’s a fixable physical issue.
How to troubleshoot and fix it:
- **Rule out the obvious: test with a known‑good combo.**
- Borrow or use a different *cable* and *charger brick* that you know works on another phone.
- If your phone charges perfectly with that combo, your original cable or brick is the culprit—not the phone.
- **Check the charging port for lint and debris.**
- Power off your phone completely.
- Use a bright flashlight and look inside the charging port (USB‑C or Lightning).
- If you see fuzz or dust, use a **plastic** or **wooden** toothpick (never metal) to gently scrape along the bottom and sides.
- Follow up with a short burst of compressed air if you have it (keep the straw at an angle, not straight in).
- **Inspect the cable ends.**
- Look for bent metal tongues, corrosion (green/white buildup), or frayed plastic near the plug.
- If the plug wiggles inside the phone port more than 1–2 mm, that cable is on its way out. Retire it from travel and keep it only as a backup for low‑risk use at home.
- **Test charging angles methodically.**
- Plug in your best cable and gently move the connector up/down/sideways.
- If charging drops when you move it even slightly, your phone’s port may be worn or cracked inside. That’s shop‑level repair—but you can stabilize it for travel:
- Avoid using your phone while it charges.
- Use a short cable and keep the phone flat on a table while charging to reduce strain.
- **Create a “travel charging kit” that prevents repeat damage.**
- Take **two short cables** instead of one long one (less torque on the port when dangling).
- Use a **right‑angle cable** if you watch videos while charging—it puts less stress on the port.
- Add a **single, decent 2–3‑port charger** rather than multiple random bricks.
If your phone still won’t charge after all this, back up your data immediately on Wi‑Fi wherever you are. A failing battery or port can go from “annoying” to “dead” mid‑trip with no warning.
---
2. Power Bank “Dead” Or Charging Way Too Slowly
Portable chargers are all over holiday gadget lists, but many fail exactly when you need them. If your power bank seems dead, or takes all day to recharge, don’t toss it yet—most are recoverable with a few checks.
How to get a stubborn power bank working again:
- **Confirm it’s not just the cable or brick.**
- Use the same USB cable and wall brick to charge your phone.
- If your phone charges fast, the cable/brick are fine and the power bank needs attention.
- **Hard‑reset the power bank.**
- Many models have a small reset behavior:
- Plug it into wall power.
- Hold the power button (if it has one) for 10–15 seconds.
- Watch for LED changes—sometimes a stuck protection circuit needs this to wake up.
- **Try a higher‑wattage charger.**
- If you’re using an old 5W brick, a modern 10,000+ mAh bank can take forever.
- Use a **USB‑C PD** charger (20W+ if possible). The bank may support fast input but only if you feed it enough power.
- **Read the input specs on the label.**
- Look for something like: `Input: 5V⎓2A` or `5V⎓3A / 9V⎓2A`.
- If it says 2A or 3A, but you’re using a charger that only outputs 1A, it will charge painfully slowly. Match the brick’s output to the bank’s input rating as closely as possible.
- **Test with a low‑draw device.**
- Plug in wireless earbuds or a small device first to see if the bank will output power at all.
- Some banks have issues detecting very low power draw; in that case, plug in your phone and briefly wake the screen—this sometimes triggers output.
- **Stabilize an aging battery for travel.**
- If the power bank still works but drains fast:
- Charge it to around **80–90%** the night before travel instead of leaving it at 100% for days.
- Avoid leaving it in direct sun or in a hot car (heat accelerates battery wear).
- Don’t run it completely flat if you can help it; partial cycles are healthier.
If your bank swells, feels hot when idle, or the casing separates, stop using it immediately. That’s not a “fix at home” situation—that’s a “recycle at an electronics drop‑off” situation.
---
3. Bluetooth Headphones Cutting Out On Planes, Buses, And Crowded Hubs
Travel environments are Bluetooth nightmares: dozens of phones, multiple Wi‑Fi networks, and metal everywhere. If your wireless earbuds keep dropping audio or refusing to connect, some quick settings changes can make them usable again.
How to get stable audio in high‑interference environments:
- **Forget and re‑pair your headphones.**
- On your phone, go to Bluetooth settings, tap your headphones, and select **Forget**.
- Put your headphones into pairing mode (usually hold the button for 5+ seconds until LED flashes).
- Reconnect from scratch. This clears out some connection quirks that build up over time.
- **Force a “simple” connection mode.**
- If your earbuds support multiple codecs (AAC, SBC, aptX, LDAC), high‑bandwidth modes can be less stable in busy environments.
- On Android, go to **Developer Options → Bluetooth Audio Codec** and try **SBC** or **AAC** instead of advanced codecs.
- On iOS, you can’t pick codecs directly, but turning **off** features like **Spatial Audio** or **Lossless** (if applicable) can reduce overhead.
- **Simplify what’s connected.**
- Turn off Bluetooth on secondary devices (laptop, tablet, work phone) while you’re pairing on your main phone.
- Many headphones get confused when they’re paired to multiple devices; disable multipoint in the headphone’s app if it’s buggy.
- **Keep the signal path clean.**
- Don’t stuff your phone deep in a crowded backpack or under a metal tray table.
- In planes/buses, keep your phone in a side pocket or shirt pocket on the **same side** as your headphone’s primary antenna (often the right earbud).
- **Avoid Wi‑Fi/Bluetooth overlap when possible.**
- If you notice audio glitches when you open certain apps, your phone may be slamming the 2.4 GHz band for Wi‑Fi at the same time as Bluetooth.
- Temporarily turn off Wi‑Fi while listening to downloaded content on flights or trains.
- Download playlists, podcasts, or movies **before** you leave home or hotel Wi‑Fi.
- **Clean the contacts and ear tips.**
- For true wireless earbuds, dirty charging contacts can cause random shutdowns because one bud never fully charges.
- Gently wipe the gold contacts on the buds and in the case with a dry cotton swab.
- Replace worn silicone tips; a loose seal can trick noise‑cancelling into overworking and draining the battery faster.
These steps won’t turn budget earbuds into premium sets, but they can cut dropouts and randomness dramatically—especially important when you’re relying on them to drown out terminal noise.
---
4. Laptop Overheating Or Draining Fast On The Road
Between remote work, streaming, and travel delays, your laptop is suddenly a lifeline—right when air circulation and power outlets are worst. If your device heats up or the battery drops like a rock in airports and hotels, there are practical fixes you can apply with what you already have.
How to cool things down and stretch battery life:
- **Give it breathing room—no blankets, no laps.**
- Always place the laptop on a **hard, flat surface**: a tray table, a book, or even an upside‑down empty backpack.
- Blocked air vents are the most common cause of travel overheating.
- **Close background drains before you leave Wi‑Fi.**
- Quit heavy apps: video editors, games, browser tabs with auto‑playing video.
- On Windows:
- Open **Task Manager → Processes** and close anything that’s using high CPU.
- On macOS:
- Open **Activity Monitor** and do the same.
- **Switch to a “travel power profile.”**
- On Windows:
- Click the battery icon → select **Best Power Efficiency** or a balanced plan.
- On macOS:
- Go to **System Settings → Battery** and set to **Low Power Mode** when on battery.
- Turn down **screen brightness** to the dimmest level that’s still comfortable.
- **Stop emergency updates in transit.**
- Disable automatic OS and app updates while on mobile hotspots or weak Wi‑Fi:
- Windows: **Settings → Windows Update → Pause updates** for the trip.
- macOS: **System Settings → General → Software Update → turn off Auto‑Update** temporarily.
- Updates can push the CPU hard and drain battery when you’re nowhere near a stable outlet.
- **Use a simple cooling hack if it still runs hot.**
- Place **two identical objects** (power banks, paperback books, even rolled socks) under the left and right sides of the laptop to create a small air gap.
- This low‑tech stand can drop temps significantly by letting hot air escape.
- **Plan a “charging strategy” around your travel.**
- Charge to **80–90%** just before you leave your accommodation, not 100% five hours before.
- If your laptop supports USB‑C charging, pack a **single USB‑C PD charger** that can handle both your phone and laptop (check wattage and your laptop’s requirements).
Keeping your laptop cool and power‑efficient is less about fancy accessories and more about removing simple obstacles—blocked vents, runaway software, and needless background tasks.
---
5. USB Ports, Adapters, And “Nothing Works In This Outlet” Problems
With holiday travel exploding, you’ll run into hotel rooms with one sketchy outlet, airport lounges with worn‑out sockets, and planes with flaky seat‑back USB. When “everything” seems broken, the best fix is a systematic approach and a small, well‑chosen set of adapters.
How to diagnose and stabilize your power situation:
- **Start with your own gear, not the outlet.**
- Test your charger and cable in **two different locations**: your home/hotel room and a public area.
- If it only fails in one place, the outlet or built‑in USB port is the issue.
- **Avoid built‑in USB ports when you can.**
- Many seat‑back or lamp‑base USB ports output very low power (0.5–1A) or are worn out.
- Use the **AC outlet + your own charger** whenever possible—more stable and usually faster.
- **Carry one reliable, multi‑port charger.**
- Choose a small 2‑ or 3‑port USB‑C/USB‑A charger from a reputable brand (Anker, UGREEN, Belkin, etc.).
- This reduces your reliance on questionable hotel bricks and mystery adapters.
- **Use a travel‑safe power strip wisely (if allowed).**
- Some countries and airlines have rules against large extension cords, but small, short‑cable travel strips are usually fine in hotels.
- Plug **only low‑power devices** (phones, tablets, cameras) into the strip—avoid hair dryers or kettles.
- **Verify outlet issues without tools.**
- If **nothing** powers on in a specific outlet, test a different wall outlet in the same room.
- If the rest work, that one outlet may be switched (controlled by a wall switch) or simply dead—check the switches.
- If **only high‑draw devices** trip or shut off, the circuit may be weak; stick to charging smaller devices there.
- **Prepare for international sockets without frying your gear.**
- Know the difference:
- **Plug adapter** = changes the *shape* of the plug.
- **Voltage converter** = changes the *voltage*.
- Most modern phone and laptop chargers say `100–240V` on the label; they only need a **plug adapter**, not a converter.
- If a charger says just `110V` or similar, don’t plug it straight into 220–240V outlets without a converter.
A minimal, thought‑through power kit—one good brick, a short travel strip (if permitted), and the right adapters—solves far more problems than loading your bag with random “travel gadgets” that may fail on first contact with a loose airport outlet.
---
Conclusion
This travel season, viral lists are telling you what to buy. The smarter move is making sure what you already own actually works when you’re tired, delayed, and fighting for the last seat near an outlet. Cleaning a charging port, resetting a power bank, taming Bluetooth, cooling a laptop, and stabilizing your power setup are all simple, repeatable fixes you can do today—before you board.
If you treat these steps as a pre‑flight checklist for your electronics, you’ll arrive with working gear, fewer panicked searches for “free outlets,” and a much lower chance of your holiday turning into a tech emergency story of its own.
Key Takeaway
The most important thing to remember from this article is that following these steps can lead to great results.


