Unexpected problems at home usually show up at the worst possible time: a dripping faucet right before bed, a phone that won’t charge when you need it, or a wobbly chair just as guests are arriving. You don’t always need a pro—or a full afternoon—to solve them. With a few simple tools and a clear plan, you can handle a lot of these issues quickly and safely.
This guide walks you through five practical, step‑by‑step quick fixes you can tackle in minutes, using tools you probably already own.
---
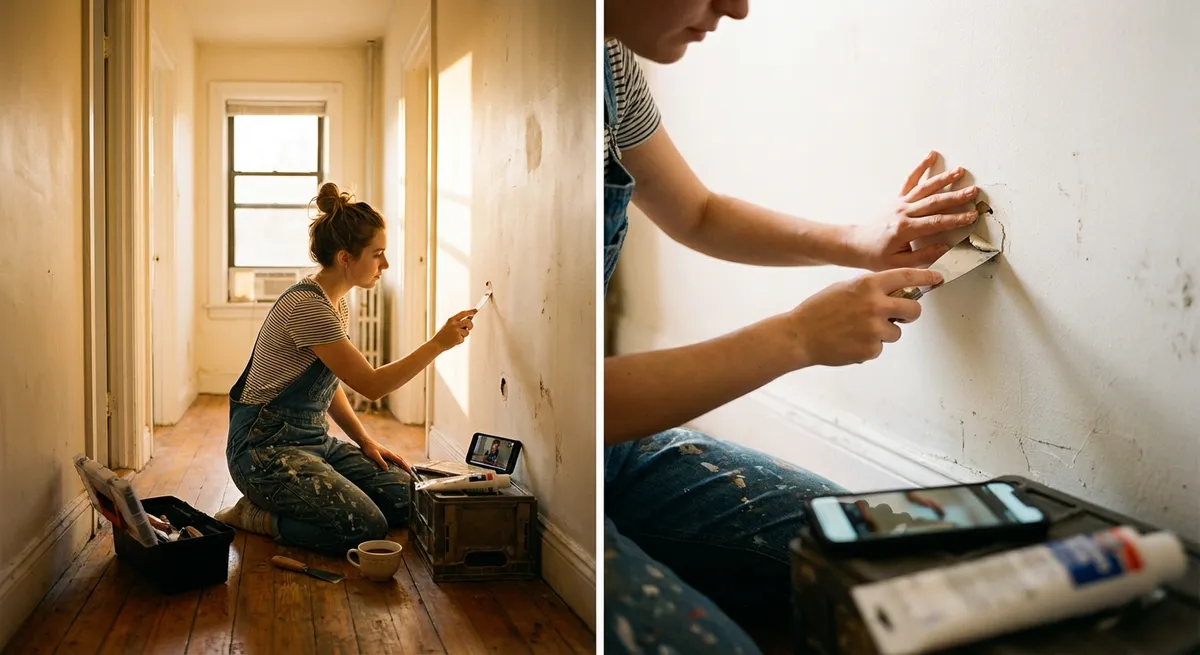
Fix 1: Quiet a Dripping Faucet Without Replacing the Whole Fixture
A dripping faucet wastes water and slowly drives you crazy. In many cases, the problem is a worn washer or cartridge you can access without special plumbing skills.
What you’ll need
- Adjustable wrench or pliers
- Flathead and/or Phillips screwdriver
- Old towel
- Replacement washer or cartridge (if available)
Step-by-step
**Turn off the water supply**
- Look under the sink for two small valves (hot and cold). - Turn both clockwise until they stop. - Open the faucet to release any remaining water and confirm it’s off.
**Plug the drain**
- Use a sink stopper or stuff a rag in the drain. - This prevents small screws or parts from falling in.
**Remove the handle**
- Pry off any decorative cap with a small flathead screwdriver. - Unscrew the handle screw underneath. - Gently pull the handle off the stem.
**Inspect and remove the cartridge or stem**
- Use your wrench or pliers to loosen the retaining nut. - Pull out the cartridge or stem carefully, noting how it sits. - Check rubber washers and O‑rings for cracks, flattening, or damage.
**Replace worn parts**
- If you have the right replacement washer or cartridge, swap it now. - Lightly tighten the retaining nut—snug, not over‑tight.
**Reassemble and test**
- Put the handle back on and secure the screw. - Turn the water valves back on slowly. - Test the faucet. If the drip stops, you’re done. If not, the valve seat may be damaged and you may need a full cartridge replacement or a plumber.
Quick tip: If you’re unsure which part you need, take the old cartridge or washer to a hardware store for a staff member to match.
---
Fix 2: Bring a “Dead” Phone Charger Back to Life
When your phone won’t charge, the cable or adapter isn’t always the problem—the charging port or outlet might be the real culprit.
What you’ll need
- Wooden or plastic toothpick (no metal)
- Soft brush (clean, dry toothbrush works)
- A known‑good cable and adapter (borrow from a friend or another device)
Step-by-step
**Test the outlet first**
- Plug in a lamp or another device to the same outlet. - If that device doesn’t power on, try a different outlet or reset your breaker.
**Check the cable and adapter**
- Try your cable and adapter on another phone or device. - Try a different cable/adapter on your phone. - If only one combination fails, you’ve found the weak link.
**Inspect the phone’s charging port**
- Power off your phone. - Shine a flashlight into the port. - Look for lint, dust, or bent pins.
**Clean the charging port carefully**
- With the phone still off, insert a wooden or plastic toothpick gently. - Scrape out lint and debris with very light pressure. - Use a soft brush to dislodge loose dust. - Do not use metal tools or liquids; they can damage the port.
**Retest charging**
- Plug the charger back in securely. - Wiggle the connector slightly—if it feels tighter and charging starts, debris was the issue. - If it still fails, you may have a damaged port or internal issue that needs professional repair.
Quick tip: Keeping your phone in a pocket or bag with loose fabric is the fastest way to clog the charging port. A simple case with a port cover can prevent repeat issues.
---
Fix 3: Stop a Running Toilet That Won’t Quit
A toilet that runs constantly wastes water and money. Most of the time, the problem is inside the tank and can be fixed without any plumbing experience.
What you’ll need
- Towel (to catch drips)
- Optional: adjustable wrench
- Optional: universal toilet repair kit (if parts are worn)
Step-by-step
**Remove the tank lid**
- Lift it straight up and set it carefully on a towel to avoid cracks. - Look inside while you flush once to see what’s happening.
**Check the flapper**
- The flapper is the rubber piece at the bottom of the tank connected to the chain. - If it doesn’t seal fully after flushing, water will keep running. - Adjust the chain so it has a little slack when the flapper is down (not tight, not overly loose).
**Inspect the flapper surface**
- Turn off the water valve behind the toilet (clockwise) and flush to empty most of the tank. - Feel the flapper’s sealing surface—if it’s warped, cracked, or slimy, it may not seal. - Wipe it clean and reseat. If it’s badly worn, plan to replace it.
**Set the correct water level**
- Turn water back on and let the tank refill. - The water should stop about 1 inch below the top of the overflow tube. - If it’s too high, adjust the float: - For a float arm: turn the screw at the top of the fill valve a few turns. - For a float cup: squeeze the clip on the side and slide the float down.
**Test for leaks into the bowl**
- With the tank full and quiet, add a few drops of food coloring to the tank. - Wait 10–15 minutes without flushing. - If colored water appears in the bowl, the flapper isn’t sealing and should be replaced.
**Replace worn parts (if needed)**
- If adjustments didn’t help, install a new flapper or a universal repair kit following the package instructions. - These are designed for DIYers and often fix running toilets completely.
Quick tip: A running toilet can waste hundreds of gallons per day. Fixing it now can show up as real savings on your next water bill.
---
Fix 4: Stabilize a Wobbly Chair or Table
Loose joints and hardware cause wobbling, squeaking, and premature damage to furniture. A quick tightening and reinforcement can add years of life.
What you’ll need
- Screwdriver set
- Allen (hex) keys (often come with furniture)
- Wood glue (for wooden joints)
- Small clamps or heavy books (optional)
Step-by-step
**Flip or lay the furniture down safely**
- Place it on a soft surface (rug or blanket) to avoid scratches. - Make sure it’s stable before you start working.
**Identify all loose points**
- Try moving each leg or joint by hand. - Note which screws, bolts, or dowels move or feel loose.
**Tighten visible screws and bolts**
- Use the right screwdriver or hex key to tighten existing fasteners. - Don’t over‑tighten—stop when snug to avoid stripping.
**Reinforce wooden joints**
- For joints that still feel loose, gently separate them if possible. - Add a small amount of wood glue inside the joint. - Press the parts back together and wipe away excess glue. - Use clamps or heavy books to hold the joint tight while drying (check the glue label for dry time).
**Replace missing or stripped hardware**
- If screws spin without tightening, replace them with slightly longer or thicker ones designed for wood. - Avoid random metal that can split the wood—use proper wood screws.
**Test on a flat, hard surface**
- Once everything is tight and glue is dry, set the furniture upright on a hard floor (not carpet). - Rock it gently. If it still wobbles slightly, add small adhesive furniture pads to the shorter leg.
Quick tip: Keep all Allen keys that come with flat‑pack furniture in a labeled bag—you’ll need them again for future tightening.
---
Fix 5: Revive a Weak or Uneven Shower Spray
Mineral buildup in your showerhead can reduce water flow and create uneven spray patterns. A simple cleaning often restores good pressure.
What you’ll need
- White vinegar
- Small plastic bag
- Rubber band or twist tie
- Soft brush or old toothbrush
- Cloth or paper towels
Step-by-step
**Check the water supply first**
- Turn on other faucets in your home. - If all fixtures have low pressure, you may have a bigger plumbing or municipal water issue. - If only the shower is weak, continue.
**Inspect the showerhead**
- Look for white or green mineral deposits on the nozzles. - Run your thumb over them—if they feel rough, they’re likely clogged.
**Soak the showerhead in vinegar (without removing it)**
- Fill a small plastic bag with enough white vinegar to cover the showerhead face. - Place the bag over the showerhead so it’s submerged in vinegar. - Secure the bag with a rubber band or twist tie. - Let it soak for 30–60 minutes (for heavy buildup, up to a few hours).
**Scrub and rinse**
- Remove the bag carefully and discard the vinegar. - Use a soft brush to scrub the nozzle area. - Turn on the shower to flush out loosened deposits for 1–2 minutes.
**Deep clean by removing the head (optional)**
- If buildup is severe, unscrew the showerhead (use a wrench with a cloth to avoid scratching). - Soak the entire head in a bowl of vinegar for 30–60 minutes. - Rinse thoroughly and reinstall with plumber’s tape if needed.
**Test water flow**
- Turn on the shower and check the spray pattern. - If it’s still weak, the internal components may be worn, and a replacement showerhead is often the simplest fix.
Quick tip: If you live in a hard‑water area, plan on cleaning your showerhead every 3–6 months to maintain performance.
---
Conclusion
Quick fixes don’t have to be stressful or complicated. With a few basic tools and a calm, step‑by‑step approach, you can stop a drip, quiet a toilet, rescue a charger, stabilize furniture, and improve your shower—often in less time than it takes to watch a TV episode.
The key is to:
- Diagnose the problem carefully
- Work methodically and safely
- Know when a simple repair is enough and when it’s time to call a pro
Share this guide with someone who keeps saying, “I’ll deal with that later”—future them (and their utility bills) will be grateful.
---
Sources
- [U.S. Environmental Protection Agency – Fix a Leak](https://www.epa.gov/watersense/fix-leak-week) - Explains how much water common leaks waste and provides basic guidance on fixing toilets and faucets
- [The Family Handyman – How to Fix a Leaky Faucet](https://www.familyhandyman.com/project/how-to-repair-a-compression-faucet/) - Step-by-step faucet repair instructions with photos
- [Apple Support – If your iPhone or iPod touch won’t charge](https://support.apple.com/en-us/HT204267) - Official charging troubleshooting tips, including port inspection and cleaning considerations
- [U.S. Department of Energy – Low-Flow Fixtures](https://www.energy.gov/energysaver/low-flow-fixtures) - Background on showerheads, water flow, and efficiency benefits
- [University of Minnesota Extension – Repairing Toilets](https://extension.umn.edu/plumbing/repairing-toilets) - Detailed guidance on common toilet problems, including running toilets and part replacement
Key Takeaway
The most important thing to remember from this article is that this information can change how you think about Quick Fixes.


