Everyday problems don’t wait for a free weekend or a professional appointment. A door starts squeaking right before guests arrive, a phone cable stops charging at 10% battery, or a slow drain turns hand‑washing into a mini flood. This quick fix playbook walks you through five common issues and shows you exactly how to stabilize, repair, or safely work around them—fast—so you can get on with your day.
---
Stop a Squeaky Door in Minutes
A squeaky door usually means friction between the hinge pin and hinge plates. Fortunately, you can quiet it quickly with items you likely already have.
Step-by-step:
**Identify the noisy hinge**
Open and close the door slowly. Listen for which hinge squeaks (top, middle, or bottom).
**Try a quick external lubrication first**
- Use a **dry lubricant** like silicone spray or a **multipurpose oil** (e.g., WD‑40). - Place a paper towel or rag under the hinge to catch drips. - Spray or drip a small amount directly onto the hinge seams. - Open and close the door 10–15 times to work it in.
**For a deeper fix, remove the hinge pin**
- Support the door slightly with a wedge or stack of books if it feels heavy. - Use a flathead screwdriver and hammer (or sturdy object) under the hinge pin’s head and tap gently upward. - Pull the pin out fully.
**Clean and lubricate the pin**
- Wipe off dirt, old paint, or rust with a rag. - Apply a thin coat of lubricant, petroleum jelly, or bar soap along the pin. - Reinsert the pin and tap gently back into place.
**Test and adjust**
Open and close the door several times. If you still hear squeaking, repeat for the other hinges.
Safety note: Avoid over‑spraying lubricant on floors—it can create a slip hazard. Wipe any overspray immediately.
---
Rescue a Slow or Clogged Bathroom Sink
A slow drain is often caused by hair, soap scum, or toothpaste buildup near the top of the pipe—not deep underground. Most clogs can be cleared without harsh chemicals.
Step-by-step:
**Clear standing water**
Remove as much water from the sink as possible with a cup or small container. This makes the next steps easier.
**Check and clean the stopper**
- Lift the stopper all the way up and pull it out (some just lift; others twist counterclockwise). - If it doesn’t come out, look under the sink for a **pivot rod** held by a small nut at the back of the drain. Loosen that nut carefully, pull out the rod, then remove the stopper from above. - Clean hair and gunk off the stopper using paper towels or gloves. Rinse it.
**Remove debris from the drain opening**
- Use a **plastic drain cleaning strip** or a straightened wire hanger with a tiny hook bent at the end. - Gently insert it into the drain, twist, and pull out hair and buildup—repeat several times. - Avoid scratching metal surfaces; work slowly.
**Flush with hot water and mild cleaner**
- Pour a kettle or pot of **hot (not boiling)** tap water down the drain. - Follow with a squirt of dish soap and another flush of hot water. - For mild buildup, you can also use **½ cup baking soda, then ½ cup vinegar**, wait 10–15 minutes, then rinse with hot water.
**Reassemble and test**
- Reinsert the stopper, reattach the pivot rod and nut (hand‑tight plus a small snug turn). - Run water and check for leaks under the sink while the tap is on. - If water still drains slowly, repeat the cleaning once more before considering a small hand‑crank drain snake.
Safety note: Avoid mixing commercial drain cleaners with other chemicals or the baking soda/vinegar method—this can produce dangerous reactions. If you already used a chemical cleaner, skip home mixtures and follow label warnings.
---
Get a “Dead” Phone Charging Again
If your phone suddenly won’t charge, it’s often a simple connection issue, not instant battery death. Before assuming the device is ruined, work through these quick checks.
Step-by-step:
**Inspect the cable and charger**
- Look for frayed or kinked sections, bent connectors, or discoloration. - Try a **different cable** and **different wall adapter** if you have them. - Plug another device into the same outlet to confirm the outlet works.
**Clean the charging port (gently)**
- Power off your phone. - Use a **wooden toothpick** or **plastic tool**, never metal. - Gently scrape out lint and dust from the port, working carefully along the bottom and sides. - Blow out debris using short bursts of canned air (hold it upright to avoid moisture).
**Check for a loose fit**
- Insert the cable and wiggle lightly. - The connector should sit firmly and not feel wobbly. If you need to hold it at an angle to charge, the port or cable may be worn.
**Try a different power source**
- Plug into a different wall outlet or a laptop USB port. - Avoid cheap third‑party power strips for troubleshooting.
**Force restart the phone**
- Some phones appear “dead” but are frozen. - Use your device’s **forced restart** key combo (varies by brand; typically power button + volume up/down for several seconds). - After restart, leave it plugged in for 15–30 minutes.
When to stop and seek help:
If the port feels loose, appears damaged, or smells burnt, or the phone gets unexpectedly hot while charging, disconnect immediately and contact the manufacturer or a reputable repair shop.
---
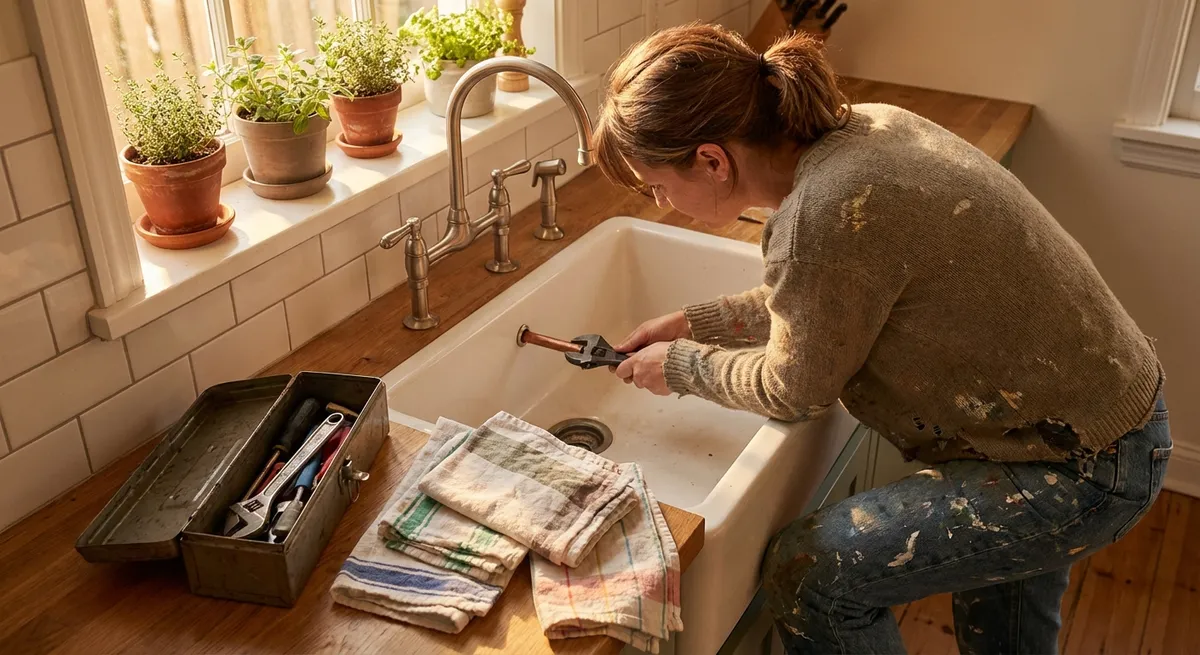
Silence a Dripping Faucet Without Special Tools
A constantly dripping faucet wastes water and can drive you crazy. While a full cartridge replacement might be a bigger job, you can often make an immediate improvement using basic tools.
Step-by-step:
**Turn off the water supply**
- Look under the sink for two small **shutoff valves** (one for hot, one for cold). - Turn both clockwise until they stop. - Open the faucet to confirm water flow stops.
**Block the drain**
Use the sink stopper or a rag so you don’t lose any small screws down the drain.
**Remove the faucet handle**
- Look for a small decorative cap (often labeled H/C or showing a logo). Pry it up gently with a flat tool or fingernail. - Unscrew the exposed screw with a matching screwdriver. - Pull the handle off. If it’s stuck, rock it gently side to side rather than prying hard.
**Tighten or replace the simple parts first**
- For **compression faucets** (separate hot and cold handles), there’s usually a **rubber washer** at the end of a valve stem. If it’s visibly cracked or worn and you have a matching washer, replace it. If not, gently snug the retaining screw. - For **cartridge faucets**, try removing the cartridge, rinsing off debris, and reinstalling it in the same orientation. Sometimes simply reseating it helps. - Tighten any visible packing nuts slightly with an adjustable wrench—just a small turn, don’t overtighten.
**Reassemble and restore water**
- Reinstall the handle and screws. - Turn the under‑sink shutoff valves back on slowly. - Test the faucet for leaks at both low and high flow.
If the drip continues:
You may need a new cartridge or professional repair, but tightening and cleaning often reduces or stops the drip, buying you time to plan a full fix.
---
Stabilize a Wobbly Chair or Table
A shaky chair or table is more than annoying—it’s a tip‑over risk. You can quickly stabilize it and extend its life with simple checks and low‑cost materials.
Step-by-step:
**Flip and inspect**
- Turn the chair or table upside down on a soft surface. - Look for loose screws, missing hardware, or cracks where legs meet the frame.
**Tighten all fasteners**
- Use a screwdriver or hex key on every visible screw and bolt—not just the obviously loose ones. - Tighten until snug, then add a small extra turn. Avoid overtightening into soft wood.
**Add support where wood has worn**
- If screw holes feel stripped (the screw turns freely without tightening), remove the screw. - Insert **wooden toothpicks** or small pieces of a wooden skewer coated in wood glue into the hole. - Break them off flush with the surface, then reinsert and tighten the screw. This gives the screw new material to bite into.
**Level the legs**
- Set the piece upright on a flat floor. - Gently rock each corner and identify the short leg. - Add **self‑adhesive felt pads** or small shims under the shorter leg to level it. Stack pads if needed.
**Check for remaining wobble**
- Sit on the chair or press on the table edges to test stability. - If the furniture still feels unsafe (large cracks, severe looseness), retire it from heavy use until you can do a more thorough repair or replacement.
Safety note: Don’t rely on tape or cardboard wedges alone for structural wobbles; they can slip unexpectedly. Always address loose joints and hardware first.
---
Conclusion
Quick fixes aren’t about perfection—they’re about restoring function safely and fast so your life isn’t held hostage by small problems. By understanding the basics of how hinges, drains, chargers, faucets, and furniture joints work, you can solve many issues in minutes instead of waiting days for help.
Use this playbook as a starting point: stabilize, clean, tighten, and test. If a problem returns frequently, that’s your signal to plan a deeper repair or call in a pro. In the meantime, these practical steps keep your home, devices, and furniture working when you need them most.
---
Sources
- [U.S. Department of Energy – Fixing Leaks](https://www.energy.gov/energysaver/fixing-leaks) - Guidance on the impact of water leaks and basic homeowner fixes
- [Environmental Protection Agency – WaterSense: Leaks](https://www.epa.gov/watersense/fix-leak-week) - Data on faucet drips and water waste, plus repair tips
- [Apple Support – If your iPhone or iPod touch won’t charge](https://support.apple.com/en-us/HT208077) - Official troubleshooting steps for non-charging Apple devices
- [Family Handyman – How to Fix a Leaky Faucet](https://www.familyhandyman.com/project/how-to-fix-a-leaky-faucet/) - Detailed breakdown of faucet types and component repairs
- [The Spruce – How to Fix a Clogged Bathroom Sink](https://www.thespruce.com/how-to-fix-a-clogged-bathroom-sink-2718721) - Practical guide to clearing sink drains without harsh chemicals
Key Takeaway
The most important thing to remember from this article is that this information can change how you think about Quick Fixes.


