If you’ve been on X (Twitter) lately, you’ve probably seen parents sharing stories of “criminal mastermind” kids—toddlers quietly pouring shampoo into toilets, grade‑schoolers cutting their own hair, tech‑savvy teens locking parents out of their own devices. That viral thread of parents confessing how their kids outsmart them isn’t just funny—it’s a real‑life maintenance problem waiting to happen.
Kids treating your home like their personal science lab means spills, stains, broken things, and “where did all my data go?” moments are now part of normal life. Instead of panicking (or yelling), you can put a simple DIY playbook in place so you can fix the damage fast and move on.
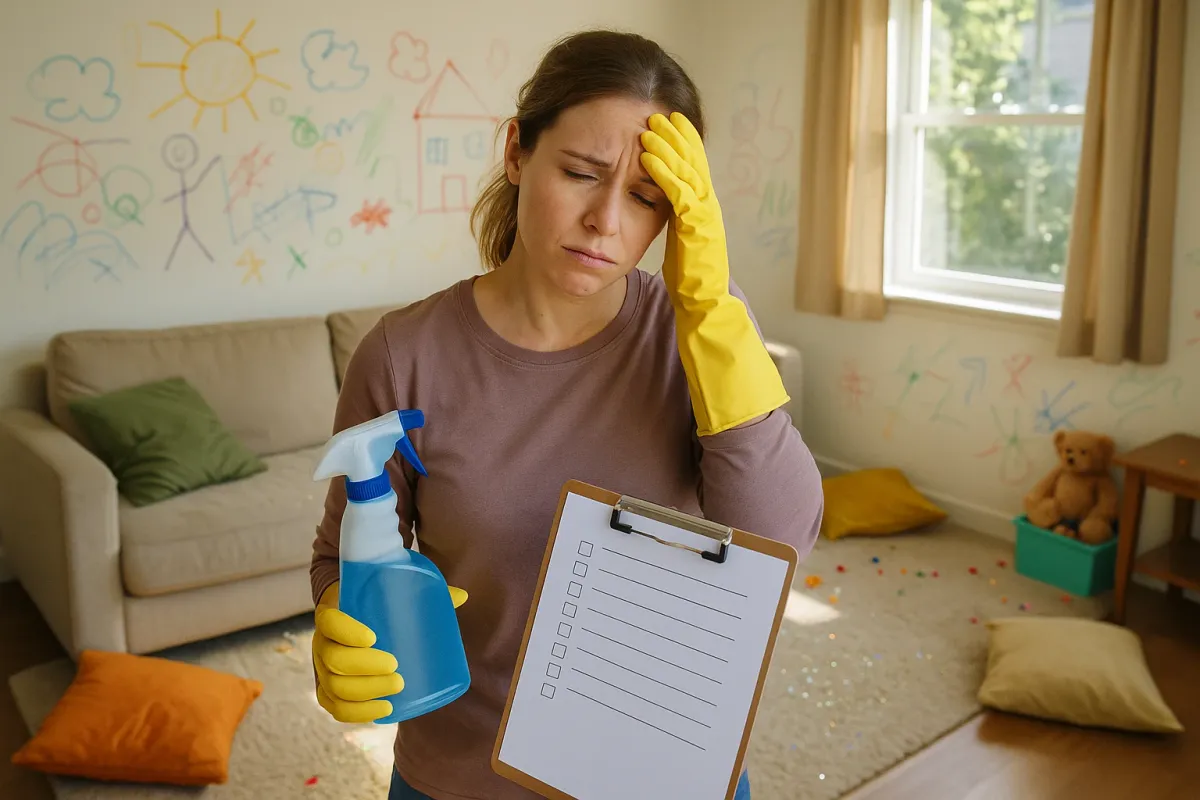
Below are five practical, step‑by‑step fixes inspired by the kind of chaos parents are posting about right now.
---
1. Marker And Crayon On The Walls: Erase “Art Attacks” Without Repainting
When your kid decides the living room is their canvas, you don’t always need to repaint. Tackle it by surface and stain type.
What you’ll need (have a “wall rescue kit” ready):
- Microfiber cloths
- Magic eraser sponge (melamine sponge)
- Baking soda
- Mild dish soap
- Rubbing alcohol (isopropyl alcohol)
- Cotton pads or old t‑shirt rags
- Small bowl of warm water
Step‑by‑step:
- **Test a tiny spot first.**
On any painted wall (especially flat/matte paint), test your cleaner behind a piece of furniture or near the baseboard so you don’t create a bigger problem.
- **For crayon (waxy): baking soda paste.**
- Mix 1 tablespoon baking soda with a few drops of water to make a paste.
- Dab onto the crayon marks and gently rub with a microfiber cloth in small circles.
- Wipe with a clean damp cloth to remove residue and dry with a towel.
- **For washable markers: soap and water.**
- Add a drop of mild dish soap to warm water.
- Dip a cloth, wring well, and gently wipe the marks from top to bottom.
- Rinse the cloth and go over the area again with just water, then dry.
- **For permanent marker: rubbing alcohol.**
- Apply a small amount of rubbing alcohol to a cotton pad or rag.
- Lightly dab (don’t scrub hard) directly on the marker line.
- Keep moving to a clean section of the cloth as the ink transfers.
- Wipe with a damp cloth afterward to remove any haze.
- **For glossy painted or semi‑gloss trim: magic eraser.**
- Dampen the magic eraser, squeeze out excess water.
- Rub very lightly—these sponges are micro‑abrasive and can dull finishes if you overdo it.
- Wipe dry with a cloth.
Prevention tip:
Put a sheet of peel‑and‑stick dry‑erase vinyl or kraft paper on one low section of wall as the “legal graffiti zone.” Kids will often use the surface they’re told is for drawing.
---
2. Glue, Slime, And Putty In Carpet: Save The Fibers Instead Of Replacing It
The same kids inventing TikTok “slime hacks” are also the ones grinding it into your rug. You can usually remove it without calling a cleaner.
What you’ll need:
- Ice cubes or a freezer pack
- Plastic scraper or old credit card
- White vinegar
- Spray bottle
- Old towels or rags
- Soft brush (old toothbrush works)
Step‑by‑step for slime/putty:
- **Freeze it solid.**
- Place a freezer pack or ice cubes (in a bag) directly on the slime/putty for 10–15 minutes.
- The goal: turn it brittle so it breaks, not smears.
- **Scrape, don’t yank.**
- Use a plastic scraper or old card to gently lift and chip away the frozen slime.
- Always work from the outer edge toward the center to avoid spreading it.
- **Treat the leftover residue: vinegar solution.**
- Mix equal parts white vinegar and warm water in a spray bottle.
- Lightly mist the remaining gunk—don’t soak the carpet.
- Let it sit for 3–5 minutes to break down the gluey binders.
- **Loosen with a brush.**
- Gently agitate the area with a soft brush to break up remaining bits.
- Blot (never rub) with a clean towel to lift loosened material.
- **Repeat as needed, then dry thoroughly.**
- Repeat the spray–brush–blot cycle if needed.
- Press a dry towel firmly on the area, then let it air‑dry completely. If you have one, point a small fan at the spot.
Prevention tip:
Create a “mess‑allowed zone” with a washable mat or old towel for slime, paint, or glue projects. Make it a rule: if it’s squishy or sticky, it lives on the mat.
---
3. Stuffed Toilets And Overflow Drama: Unclog Safely (Without A Plumber)
Those viral posts about kids flushing toys, underwear, and half a roll of paper towels are funny until water hits your floor. Handle clogs methodically so you don’t turn a small blockage into a pipe problem.
What you’ll need:
- Heavy‑duty rubber gloves
- Plunger (flange plunger for toilets)
- Bucket
- Old towels
- Optional: toilet auger (closet auger)
Step‑by‑step:
- **Stop the water from rising.**
- If the bowl is close to overflowing, remove the tank lid.
- Push the flapper (rubber piece at the bottom) down to stop more water entering the bowl.
- Turn off the water valve behind the toilet (turn clockwise).
- **Remove visible objects.**
- Wearing gloves, see if you can safely reach and remove any visible toys, wipes, or objects from the bowl opening. Don’t force anything deeper.
- **Use the right plunger correctly.**
- Use a flange plunger (with the extra rubber sleeve at the bottom).
- Ensure there’s enough water to cover the plunger cup; add some from a bucket if needed.
- Position over the hole, push down gently first to get a seal, then plunge with firm, steady thrusts for 15–20 seconds.
- **Check the drain.**
- After several plunges, briefly open the tank flapper or turn the valve back on and do a test flush.
- If water still rises dangerously, stop and go back to plunging.
- **If plunging fails: use a toilet auger.**
- Feed the auger cable into the bowl’s drain opening and crank slowly.
- You’re either breaking up a blockage or hooking it to pull it back.
- Once you feel resistance give way, retract the cable and flush.
- **Disinfect and dry.**
- Use a disinfectant cleaner on any splashes on the floor and base.
- Wash or dispose of any towels used for cleanup.
Prevention tip:
Install a simple child‑proof door handle cover or toilet lock in bathrooms toddlers can access unsupervised. Also, teach: “Only pee, poop, and toilet paper go in the toilet.” Repeat often.
---
4. DIY Haircuts And Scissor Mishaps: Fix Fabric, Furniture, And Hair Tools
X is full of photos of kids cutting their own hair, their sibling’s hair, the curtains, and sometimes the couch. You can’t put the hair back, but you can often fix or disguise the damage to everything else.
A. Curtains And Soft Furniture
What you’ll need:
- Fabric glue or fusible bonding tape
- Iron (for bonding tape)
- Small sharp scissors
- Matching thread and needle (optional)
Step‑by‑step (small cuts/frays):
- **Trim loose threads.**
- Gently snip any long, loose threads around the cut so they don’t pull further.
- **For straight cuts in curtains: create a “fake hem.”**
- Line up the edges of the cut so they meet cleanly.
- Apply fabric glue along the cut edge and press together, or use fusible bonding tape between the layers and press with a warm iron (follow tape instructions).
- Let cure fully before hanging the curtain back.
- **For frayed areas on cushions: patch from the inside.**
- Open a nearby seam carefully with a small cut if needed.
- Apply fabric glue to the frayed edges to stop further unraveling.
- If fabric is missing, place a small piece of matching or contrasting fabric behind the hole and glue edges onto it.
- Sew or glue the seam you opened back up.
B. Clogged Hair Clippers And Scissors
What you’ll need:
- Small brush (old toothbrush or included clipper brush)
- Rubbing alcohol
- Cotton pads/swabs
- Light machine oil or clipper oil
Step‑by‑step:
- **Unplug everything first.**
- Safety before cleaning.
- **Brush out hair thoroughly.**
- Use the brush to remove hair from clipper blades and scissors’ pivot area.
- **Disinfect the blades.**
- Wipe blades with a cotton pad lightly dampened with rubbing alcohol.
- Avoid soaking or getting liquid into the motor of clippers.
- **Sharpen or replace as needed.**
- If scissors are dull, use a budget pair for kid crafts and keep your good ones in a high, closed spot.
- For clippers, check for replacement blades if they pull hair instead of cutting.
- **Oil moving parts lightly.**
- Apply a drop or two of clipper oil to blades while they’re running (and unplug after).
- Wipe off excess with a clean cloth.
Prevention tip:
Have a clearly labeled “kid scissors” and “grown‑up scissors” policy. Store fabric shears and hair tools high up or in a locked drawer.
---
5. Tech Sabotage: Recover From Deleted Files, Random Settings, Or Locked Screens
The trend of kids outsmarting parents with phones and tablets—changing languages, deleting photos, spending money in games—shows how fast they learn. You don’t need to be an IT pro to recover from most of it.
> Note: Steps can vary by device model and OS version, but this gives you a clear starting framework.
A. If Photos Or Files Vanish
- **Check the “Recently Deleted” folder first.**
- iPhone/iPad: Photos → Albums → Recently Deleted → Select → Recover.
- Android (Google Photos): Library → Bin/Trash → Select → Restore.
- Windows: Recycle Bin on the desktop.
- Mac: Trash in the Dock.
- **Check cloud backup.**
- iCloud, Google Drive, OneDrive, or Dropbox often keep deleted files for 30 days or more.
- Log in via browser, check “Trash/Bin” or “Recently Deleted” sections.
- **Turn on automatic backup going forward.**
- Enable iCloud Photos or Google Photos backup.
- For computers, set scheduled backups to an external drive or cloud service.
B. If The Device Language Or Settings Are Changed
- **Use icons, not words.**
- Even if you can’t read the language, icons for Settings (gear symbol) and General/Language often look similar.
- On most phones: Settings → General Management / System → Language.
- **Search by icon position.**
- On iPhone, the search bar in Settings is at the top—type “Language.”
- On Android, tap the magnifying glass in Settings and search for “Language.”
- **Reset only what’s needed.**
- If the whole device feels broken, look for “Reset settings”/“Reset all settings” rather than “Erase all content”—that wipes data.
C. If Kids Keep Messing With Devices
- **Set up a child profile or parental controls.**
- Android: Settings → Digital Wellbeing & parental controls → Set up.
- iOS: Settings → Screen Time → Content & Privacy Restrictions.
- Game consoles and smart TVs also have built‑in parental controls.
- **Require approval for purchases.**
- Enable “Ask to Buy” (Apple) or Family Link (Google) so app/game purchases need your approval.
Prevention tip:
Create a “kid mode” on any shared device: limited apps, no payment info, strict app store rules. Use your devices’ built‑in family features instead of handing over your unlocked main profile.
---
Conclusion
The stories parents are posting right now about “mini masterminds” aren’t going away—today’s kids are clever, curious, and not afraid to experiment on your walls, carpet, plumbing, and tech. You can’t bubble‑wrap your entire home, but you can be ready with a practical response plan.
Keep a small “damage control” kit on hand (cleaners, cloths, basic tools), learn the simple repair steps above, and set up a few smart boundaries—child locks, “mess zones,” and kid‑safe device profiles. When the next incident happens, you’ll spend less time panicking and more time fixing, teaching, and moving on with your day.
Key Takeaway
The most important thing to remember from this article is that following these steps can lead to great results.


