Household issues rarely happen at a “good” time—leaky faucets at midnight, a toilet that won’t stop running, or a power outlet that suddenly dies. The good news: many of these problems don’t need a professional right away. With a bit of guidance and basic tools, you can solve a surprising number of them yourself, safely and quickly.
This playbook walks through five common household problems and shows you exactly how to fix them, step by step.
---
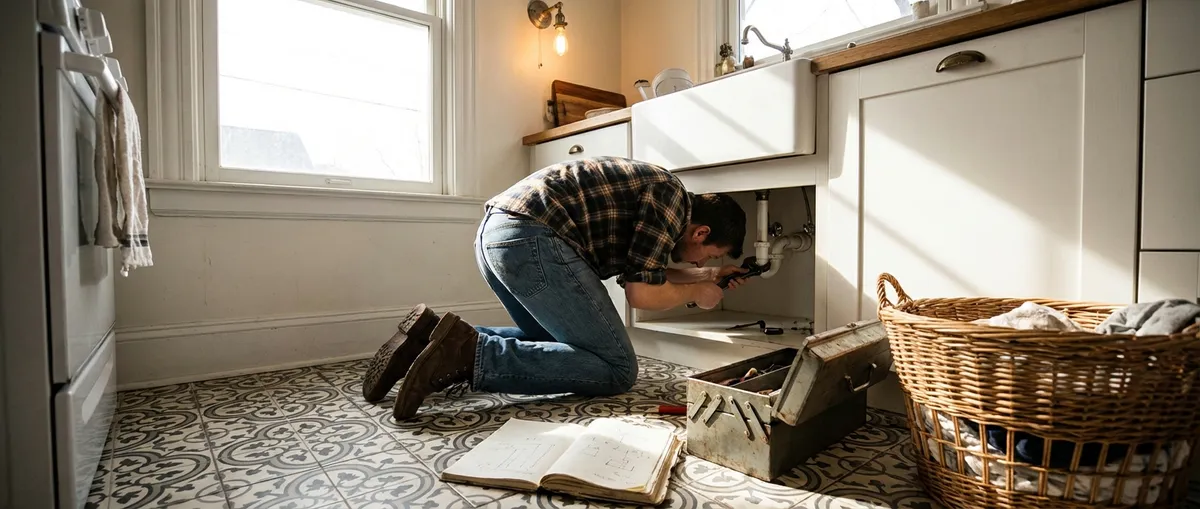
1. Stopping a Dripping Faucet
A dripping faucet wastes water, drives up your bill, and is just plain annoying. Most drips come from worn-out internal parts that no longer seal properly.
What you’ll need
- Adjustable wrench or set of wrenches
- Screwdriver (Phillips and flathead)
- Replacement parts (cartridge, O-ring, or washer depending on faucet type)
- Plumber’s grease (optional but helpful)
- Towel to catch small parts
Step-by-step: Standard cartridge or single-handle faucet
**Shut off the water supply**
Look under the sink for two shutoff valves (hot and cold). Turn them clockwise until they stop. Open the faucet to release pressure and confirm water is off.
**Plug the drain**
Use the sink stopper or a rag so small screws or parts don’t fall in.
**Remove the handle**
- Look for a small cap or plug on the handle (often with hot/cold indicator). - Pry it off gently with a flathead screwdriver. - Unscrew the handle screw underneath and pull the handle off.
**Access the cartridge or valve**
- You’ll usually see a retaining nut or clip. - Use the wrench to loosen the nut or remove the clip. - Pull out the cartridge or valve straight up. Take a picture before removing so you know how it goes back in.
**Inspect and replace worn parts**
- Look for cracked O-rings, mineral buildup, or obvious wear. - Take the old cartridge or washer to a hardware store and get an exact match. - Lightly coat O-rings with plumber’s grease before reinstalling.
**Reassemble the faucet**
- Insert the new or cleaned cartridge in the same orientation. - Tighten the retaining nut snugly (don’t overtighten—this can damage parts). - Reinstall the handle and screw, then snap the cap back on.
**Turn the water back on and test**
Turn the shutoff valves counterclockwise. Open the faucet slowly and check for leaks at the base and spout. If it still drips, double-check that the cartridge is seated correctly and the nut is tight.
---
2. Fixing a Running Toilet
A toilet that runs constantly wastes a lot of water and often comes down to three issues: a bad flapper, an incorrect water level, or a sticky fill valve.
What you’ll need
- Adjustable pliers (optional)
- Replacement flapper (common fix)
- Towel
Step-by-step: Diagnose the problem
**Remove the tank lid and set it aside carefully**
Don’t drop it—porcelain lids are fragile and costly to replace.
**Identify the main parts**
- **Flapper:** Rubber piece covering the flush valve at the bottom. - **Chain:** Connects flapper to flush handle. - **Fill valve:** The tall assembly that refills the tank. - **Overflow tube:** Vertical tube in the middle.
**Check the flapper first**
- Push down gently on the flapper. If the running stops, it’s not sealing properly. - Inspect it for warping, cracks, or slime buildup.
**Replace the flapper if needed**
- Turn off the water at the shutoff valve behind the toilet. - Flush the toilet to drain most of the water. - Unclip the old flapper from the overflow tube and disconnect the chain. - Attach the new flapper to the tabs on the overflow tube and reconnect the chain. - Adjust chain length so there’s a small amount of slack—too tight or too loose will cause problems.
**Set the correct water level**
- The water should stop about 1 inch below the top of the overflow tube. - On many modern fill valves, you can turn a screw or move a clip to raise or lower the float. - Adjust until the fill stops at the right height.
**Check for overflows or slow leaks**
- If water is constantly going into the overflow tube, the water level is too high or the fill valve is faulty. Lower the float. - If it still overflows, consider replacing the fill valve (most modern ones come with clear instructions).
**Turn water back on and test multiple flushes**
Watch the tank refill. The flapper should close fully, and the water should stop at the set level without continuing to run.
---
3. Resetting a Dead Power Outlet (Safely)
When an outlet suddenly stops working, especially in kitchens, bathrooms, garages, or outdoors, it’s often a tripped GFCI (Ground-Fault Circuit Interrupter) outlet rather than a broken circuit.
Safety first
If you see burn marks, smell burning, or the outlet feels hot, stop and call a licensed electrician. Don’t attempt a DIY fix in those cases.
What you’ll need
- Small lamp or phone charger to test
- Flashlight (if area is dark)
Step-by-step: Restore power
**Test the outlet with a known working device**
Plug in a lamp or phone charger you know works. If it doesn’t power on, move to the next step.
**Locate GFCI outlets on the circuit**
- Look around the same room first, then nearby rooms. - GFCI outlets have “Test” and “Reset” buttons on their face. - They may protect several regular outlets on the same circuit.
**Press the Reset button**
- Firmly press the “Reset” button on the GFCI until it clicks. - If the button won’t stay in or immediately pops back out, unplug everything on the circuit and try again.
**Test the original outlet again**
Plug your test device back into the dead outlet. If it now works, you’ve solved it.
**Check your breaker panel if it’s still dead**
- Go to your electrical panel. - Look for a tripped breaker (often sitting between ON and OFF positions). - Flip it all the way OFF, then firmly back to ON.
**If power still doesn’t return**
- Don’t disassemble the outlet unless you’re familiar with electrical work. - At this point, a licensed electrician should inspect for loose wiring, a failed outlet, or a deeper circuit issue.
---
4. Clearing a Slow-Draining Sink Without Harsh Chemicals
Slow drains are often caused by hair, soap scum, or grease buildup. Chemical drain cleaners can damage pipes over time and are risky to handle. Mechanical methods are safer and often more effective.
What you’ll need
- Rubber gloves
- Bucket or large bowl
- Old toothbrush or small brush
- Plunger (for sinks, not toilets)
- Plastic drain snake or zip-it style tool
- Baking soda and vinegar (optional)
Step-by-step: Bathroom sink
**Remove the stopper**
- Many bathroom sinks have a lift rod behind the faucet that connects to a pivot rod under the sink. - Under the sink, loosen the nut holding the pivot rod and slide the rod out. - Pull the stopper up and out from the sink.
**Clean the stopper and visible gunk**
- Use an old toothbrush to scrub hair and buildup off the stopper. - Reach into the drain with gloved fingers or a plastic drain snake and pull out any hair clumps.
**Use a drain snake**
- Insert a plastic drain snake into the drain and twist/pull to grab more debris. - Repeat until it comes back relatively clean.
**Flush with hot water**
- Run hot (not boiling) water for a few minutes to help wash away residue. - Optionally, pour ½ cup baking soda followed by ½–1 cup vinegar into the drain, let it foam for 10–15 minutes, then flush with hot water.
**Reassemble the stopper mechanism**
- Reinsert the stopper into the drain. - Under the sink, slide the pivot rod back into the hole on the drain tailpiece and tighten the nut. - Test the lift rod to ensure the stopper opens and closes properly.
Step-by-step: Kitchen sink (non-disposal)
**Try a sink plunger**
- Fill the sink with a few inches of water. - Place the plunger over the drain and plunge firmly several times. - If you have a double sink, plug the other drain while plunging.
**Check the P-trap if still slow**
- Place a bucket under the curved pipe (P-trap) under the sink. - Unscrew the slip nuts and remove the trap. - Clear out any clogs and rinse the trap before reinstalling.
---
5. Silencing a Squeaky Interior Door
Squeaky doors are usually caused by friction in the hinges—dust, rust, or lack of lubrication. Fixing it takes only a few minutes.
What you’ll need
- Lubricant (silicone spray, dry lubricant, or petroleum jelly; avoid cooking oil)
- Hammer
- Small nail or punch (for tight hinge pins)
- Rag or paper towels
Step-by-step: Lubricate the hinges
**Determine if the squeak is from the hinge**
Slowly open and close the door, listening at each hinge. If the sound comes from the metal joints, you’re in the right place.
**Try lubricating without removing the pins**
- Spray or apply a small amount of lubricant directly onto the hinge joints. - Open and close the door several times to work it in. - Wipe off any drips.
**If it still squeaks, remove the hinge pins**
- Start with the center hinge if there are three. - Place a nail or punch under the bottom of the pin and gently tap upward with a hammer until it loosens. - Pull the pin out completely.
**Clean and lubricate the pin**
- Wipe dirt and old grease off with a rag. - Apply a thin coat of lubricant along the pin. - You can also dab a small amount inside the hinge barrel.
**Reinstall the pin and test**
- Slide the pin back into the hinge from the top. - Tap it down gently with the hammer if needed. - Open and close the door several times. - Repeat for other hinges if needed until the squeak is gone.
**Check door alignment**
If the door rubs against the frame, squeaking can return. Tighten loose hinge screws. If a screw hole is stripped, use a longer screw or fill the hole with wood glue and toothpicks, let it dry, then reinsert the screw.
---
Conclusion
Most everyday household problems don’t require a full toolkit or an expert on speed dial—just a clear process and a bit of patience. By learning how to fix a dripping faucet, a running toilet, a dead outlet, a slow drain, and a squeaky door, you’re cutting down on water waste, preventing damage, and reducing the number of emergency repair calls you need to make.
Save or share this guide so the next time something goes wrong at home, you’ve got a straightforward plan to get it back under control.
---
Sources
- [U.S. Environmental Protection Agency – Fix a Leak](https://www.epa.gov/watersense/fix-leak-week) – Covers how household leaks (like faucets and toilets) waste water and basic steps to address them
- [Family Handyman – How to Fix a Leaky Faucet](https://www.familyhandyman.com/project/how-to-fix-a-leaky-faucet/) – Detailed visual walkthroughs for different faucet types and common replacement parts
- [US Department of Energy – Reducing Hot Water Use](https://www.energy.gov/energysaver/reducing-hot-water-use) – Explains how leaks and inefficient fixtures affect energy and water consumption
- [Electrical Safety Foundation International (ESFI) – GFCI Outlets](https://www.esfi.org/resource/ground-fault-circuit-interrupters-gfcis/) – Safety information and proper use of GFCI outlets in the home
- [Cornell Cooperative Extension – Home Drain Maintenance](https://ecommons.cornell.edu/handle/1813/1266) – Guidance on safe, non-chemical methods for maintaining and clearing household drains
Key Takeaway
The most important thing to remember from this article is that this information can change how you think about Household Repairs.


