When something breaks at home, most people jump straight to “I need a pro” or “I’ll just replace it.” But a lot of everyday problems can be solved in under an hour with things you already have. This guide walks you through five practical, step‑by‑step fixes that almost anyone can do safely—no fancy workshop or advanced skills required.
---
Fix 1: A Wobbly Chair or Table That Won’t Sit Still
A shaky chair or table is more than annoying—left alone, it can split joints and eventually break. The goal is to tighten what’s loose and rebuild support where wood has worn down.
What You’ll Need
- Wood glue (interior or exterior, matching where the furniture lives)
- Small hammer or rubber mallet
- Clamps or a strong belt/rope with a buckle
- Sandpaper (120–220 grit)
- Wood shims, toothpicks, or wooden skewers
- Damp cloth
Step‑By‑Step
**Flip and inspect**
Turn the chair or table upside down. Gently wiggle each leg to see which joints are loose. Look for gaps where the leg meets the frame.
**Clean the loose joint**
If a joint is very loose and slides out, pull it apart carefully. Use sandpaper to remove old glue and dust from both surfaces. Wipe clean with a damp cloth and let dry.
**Tighten slightly loose joints with shims**
For a leg that wiggles but doesn’t come apart easily, press in wood shims, toothpicks, or small pieces of wooden skewer into the gap. Trim them flush with a knife or utility blade.
**Glue properly**
For joints you can separate, squeeze wood glue evenly over the tenon (the part that inserts) and into the mortise (the hole). Don’t flood it—thin, full coverage is better than a big glob.
**Reassemble and clamp**
Tap the leg back into place with a rubber mallet or a wrapped hammer (to avoid dents). Use clamps—or a belt or rope tightened around the frame—to pull the joints snug.
**Wipe squeeze‑out**
Immediately wipe away any glue that seeps out with a damp cloth. Dried glue is harder to remove and can mess up the finish.
**Let it cure**
Leave the chair or table clamped and untouched for at least the drying time listed on the glue bottle (usually 12–24 hours) before using it.
When to stop and call a pro: Deep cracks in structural parts (like chair legs split lengthwise) or antique pieces with high value should be evaluated by a furniture repair specialist.
---
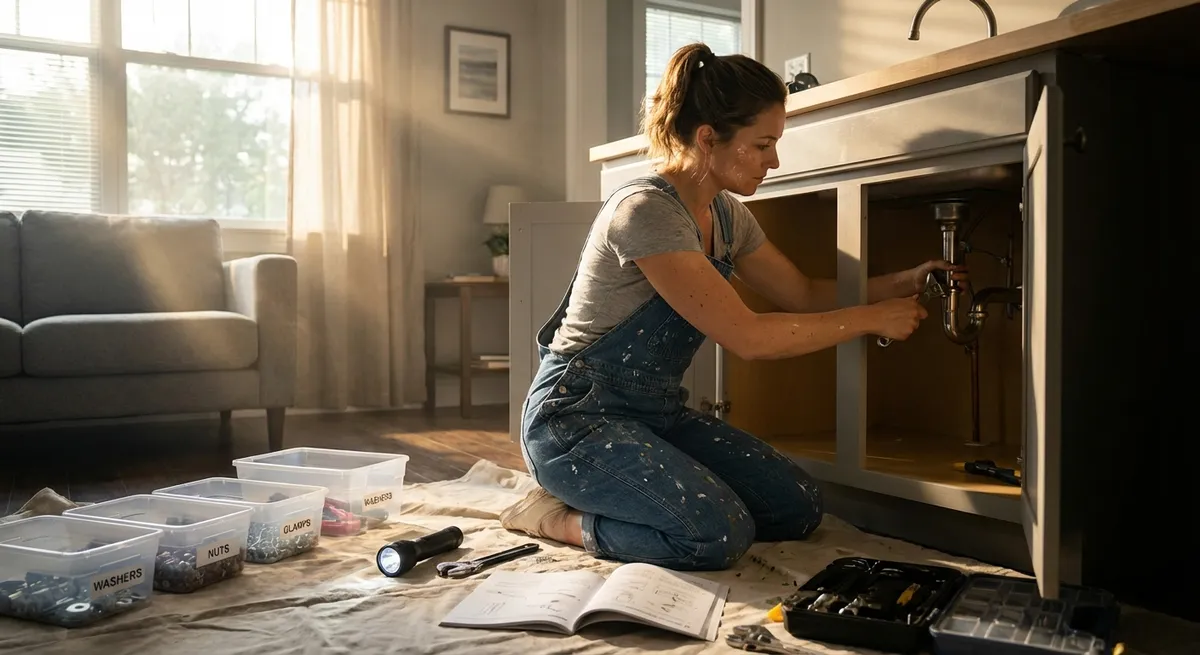
Fix 2: A Clogged Sink That Still Won’t Drain After Plunging
If your sink drains slowly or not at all and basic plunging hasn’t fixed it, the clog is often sitting in the trap or just beyond it. You can usually clear it without harsh chemicals.
What You’ll Need
- Bucket
- Rubber gloves
- Old towel or rag
- Adjustable wrench or slip‑joint pliers
- Small brush or bottle brush
- Wire coat hanger or drain snake (manual)
Step‑By‑Step
**Clear the area and protect the floor**
Remove cleaning supplies from under the sink. Put an old towel on the floor and place a bucket directly under the U‑shaped pipe (P‑trap).
**Loosen the slip nuts**
Wearing gloves, use your hand or pliers to loosen the two plastic or metal slip nuts at each end of the P‑trap. Turn counterclockwise. Go gently—older pipes can be brittle.
**Remove the trap carefully**
Lower the P‑trap into the bucket; water and gunk will come out. This is normal and usually where the clog is hiding.
**Clean the trap thoroughly**
Use a bottle brush or old toothbrush to scrape out hair, soap scum, grease, or food. Rinse it in another sink or outside with a garden hose if possible.
**Check further in the line**
If the P‑trap was clear, straighten a wire coat hanger or use a small drain snake to gently feed into the pipe leading into the wall. Rotate and pull back to hook debris.
**Reassemble and hand‑tighten**
Put the trap back in place, aligning the joints properly. Hand‑tighten the slip nuts and then give a slight extra turn with pliers—do not overtighten.
**Test for leaks and flow**
Run water for 1–2 minutes. Check each joint with your hand to feel for moisture. If it drips, tighten a quarter turn more.
Stop and call a plumber if: The clog persists, multiple fixtures are backing up, you smell strong sewage odors, or you see corrosion or cracks in the pipes.
---
Fix 3: A Door That Scrapes, Won’t Latch, or Sticks in the Frame
Seasonal humidity, house settling, or loose hinges can turn a good door into a constant fight. Most sticking doors are fixed by adjusting hinges and subtly reshaping contact points.
What You’ll Need
- Screwdriver (usually Phillips)
- Pencil
- Sandpaper (80–220 grit) or sanding block
- Utility knife (optional)
- Wood filler (if hinge screws are stripped)
- Short wood dowels or toothpicks
- Drill (optional but helpful)
Step‑By‑Step
**Find the problem area**
Open and close the door slowly. Listen and feel for the sticking point. Look for rub marks on the edge, frame, or floor.
**Tighten hinge screws**
With the door open, tighten all screws on the hinges—both on the door and on the frame. Loose hinges are the cause surprisingly often.
**Fix stripped hinge screws**
If a screw keeps turning without tightening, remove it. Insert glued wooden toothpicks or a short piece of wood dowel into the hole, let the glue set a bit, then reinsert the screw. This gives the screw something to bite into.
**Check the door alignment**
Close the door gently. The gap at the top and sides should be fairly even. If the top corner near the latch side touches first, the top hinge may be loose or bent.
**Adjust the hinge position (if needed)**
For a door that’s too high or low on one side, you can slightly shift a hinge: - Loosen its screws just enough to move it. - Nudge it up, down, or sideways by 1–2 mm. - Tighten and test again.
**Mark and sand rubbing spots**
Close the door until it barely catches, then run a pencil along the edge where it meets resistance. Remove the door by pulling the hinge pins or unscrewing hinges. Sand the marked area in small, even strokes. Test fit and repeat until it closes smoothly.
**Fix a latch that won’t catch**
If the door closes but doesn’t latch: - Apply lipstick, marker, or chalk to the latch. - Close the door and open it again. - Where the mark hits the strike plate shows if it’s too high/low/sideways. - Loosen the strike plate screws and shift slightly, then retighten. - If needed, file the strike plate opening a bit wider.
Call for help if: The frame is cracked, the door or frame is badly warped, or your door is part of a fire‑rated or security system that must meet specific codes.
---
Fix 4: A Toilet That Won’t Stop Running After You Flush
A constantly running toilet wastes water and money, but the internal parts are simple. You’re usually dealing with one of three culprits: the flapper, the fill valve, or the float adjustment.
What You’ll Need
- Adjustable wrench or pliers
- Replacement flapper (bring the old one to match style/size)
- Towel or sponge
- Bucket or small container
Step‑By‑Step
**Take off the tank lid and observe**
Flush the toilet with the lid off and watch what happens. Does the flapper close fully? Does water stop at the correct level, or keep rising to the overflow tube?
**Check the flapper seal**
Push down gently on the flapper with your finger after the tank refills. If the running sound stops, the flapper is likely not sealing and needs replacement.
**Replace the flapper**
- Turn off the water supply at the shutoff valve behind or under the toilet. - Flush to empty most of the water from the tank. - Unhook the old flapper from the overflow tube and chain. - Attach the new flapper in the same spots and connect the chain with a slight slack (it shouldn’t hold the flapper open or be so loose it tangles).
**Adjust the water level**
If water climbs into the overflow tube, adjust the float: - For float arm types, gently bend the metal arm down so the float sits lower. - For vertical float/float cup types, squeeze the clip and slide the float down the rod.
**Assess the fill valve**
If adjusting the float doesn’t change the fill level or the valve is noisy or slow, it may be failing. Most modern fill valves are replaceable as a single unit and come with clear instructions.
**Turn water back on and test**
Turn the supply valve on slowly. Let the tank fill, then listen. A properly working toilet goes silent once it reaches the set level. Flush several times to confirm the fix.
Call a plumber if: The tank or bowl is cracked, the shutoff valve won’t turn or is leaking, or you see water seeping from the base onto the floor.
---
Fix 5: A Wall Anchor That Pulled Out and Left a Big Hole
Shelves, towel bars, or curtain rods can rip out of drywall if overloaded or improperly anchored. Instead of giving up on that spot, you can repair the hole and mount it stronger than before.
What You’ll Need
- Utility knife
- Sandpaper (120–220 grit)
- Joint compound or spackle
- Putty knife
- Self‑drilling drywall anchors or toggle bolts (rated for your load)
- Drill and appropriate bit
- Stud finder (optional but ideal)
Step‑By‑Step
**Clean up the damaged area**
Use a utility knife to trim off loose paper or crumbling drywall around the hole. Chamfer the edges slightly (angle them in) to help the patch blend.
**Fill small holes (up to ~1/2")**
Apply joint compound or spackle with a putty knife, pressing firmly to fill the entire void. Smooth it slightly higher than the wall surface. Let it dry fully, then sand flush.
**Repair larger holes (up to ~2")**
For larger damage: - Cut a neat, round or square opening around the hole. - Fill partially with joint compound in layers, letting each dry, or use a small patch kit. - Sand smooth when fully dry.
**Find a stud if possible**
Use a stud finder to locate solid framing behind the wall. Mark stud centers with light pencil marks. Mounting directly into a stud is always stronger than any anchor.
**Choose the right anchor**
- For light loads (small frames, hooks): self‑drilling plastic anchors. - For medium loads (towel bars, small shelves): metal self‑drilling anchors or toggle bolts. - For heavy loads (large shelving, TVs): into studs with proper structural hardware.
**Install the new anchor**
- For self‑drilling anchors: Screw them directly into the drywall with a screwdriver or drill until flush. - For toggle bolts: Drill the recommended hole size, insert the folded toggle through, and tighten carefully as the toggle spreads behind the wall.
**Re‑mount the hardware**
Screw your bracket, bar, or shelf into the new anchor or stud. Do not overtighten—snug and solid is the goal, not crushing the drywall.
Recheck periodically: Especially for anything bearing weight (shelves, closet rods), give it a quick hand‑check every few months and correct small looseness before it becomes a tear‑out.
---
Conclusion
Most everyday home problems aren’t emergencies—they’re signals. A wobble, a drip, a scrape, or a slow drain is your house asking for routine maintenance, not necessarily a full‑scale repair bill. With a bit of patience, a handful of basic tools, and clear steps like the ones above, you can solve a surprising number of issues on your own and extend the life of what you already own.
Use these fixes as your starting point, work safely, and don’t be afraid to stop and call a professional when something is beyond your comfort zone. The more repairs you tackle, the more confident you’ll get—and the less likely you are to ignore small problems until they become big ones.
---
Sources
- [U.S. Department of Energy – Home Maintenance and Repair](https://www.energy.gov/energysaver/articles/do-it-yourself-home-energy-audits) - General guidance on homeowner maintenance and small do‑it‑yourself tasks that prevent bigger issues
- [Family Handyman – How to Fix a Wobbly Chair](https://www.familyhandyman.com/project/how-to-fix-a-wobbly-chair/) - Detailed walkthrough of tightening and regluing loose furniture joints
- [Mayo Clinic – Household Chemicals Safety](https://www.mayoclinic.org/healthy-lifestyle/adult-health/in-depth/household-chemicals/art-20046488) - Safety considerations when dealing with chemical drain cleaners and other home products
- [EPA – WaterSense: Fixing Leaks](https://www.epa.gov/watersense/fix-leak-week) - Information on diagnosing and repairing common household leaks, including toilets
- [University of Missouri Extension – Drywall Repairs](https://extension.missouri.edu/publications/gp250) - Educational guide on patching and repairing damaged interior walls
Key Takeaway
The most important thing to remember from this article is that this information can change how you think about DIY Solutions.


