Small problems at home have a habit of snowballing—tiny leaks turn into stained ceilings, loose handles become broken doors, and a clogged drain can shut down a whole bathroom. The good news: many of these issues are absolutely fixable without calling a pro, as long as you follow clear steps and stay safe. This guide walks you through five common household problems with simple, practical instructions you can actually do today.
---
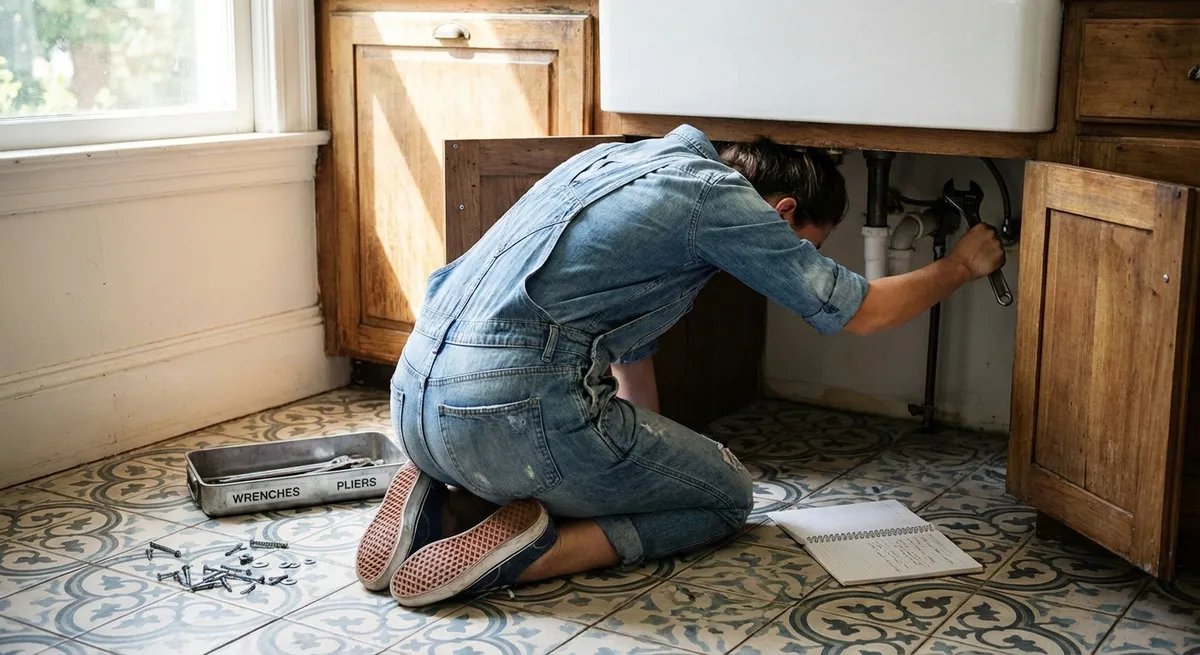
1. Dripping Faucet: How to Stop the Constant Drip
A dripping faucet wastes water, raises your bill, and is annoying to listen to—yet it’s usually a worn-out rubber or silicone part you can swap in under an hour.
Tools & materials
- Adjustable wrench or basin wrench
- Flathead and Phillips screwdriver
- Replacement cartridge or rubber washers/O-rings (match to your faucet brand/model)
- Plumber’s grease (silicone-based)
- Rag or towel
Step‑by‑step
**Turn off the water supply**
Look under the sink for two shutoff valves (hot and cold). Turn them clockwise until they stop. Open the faucet to confirm water is off and to relieve pressure.
**Plug the drain**
Use the sink stopper or a rag. Tiny screws and O-rings love to fall into open drains.
**Remove the handle**
- Pop off any decorative cap to reveal the screw. - Unscrew it and lift the handle off. - Keep parts in order as you remove them.
**Identify your faucet type**
Most household faucets are: - Cartridge - Ball - Ceramic disc - Compression (older style with rubber washer)
Look up your faucet brand and model online if you’re unsure; this helps you buy the correct replacement parts.
**Disassemble the valve**
Use your wrench to loosen the nut or retaining clip holding the cartridge or stem. Pull it straight up and out. Note orientation (take a phone photo as a reference).
**Inspect and replace seals**
Check O-rings and rubber washers for cracks, flattening, or wear. Replace with identical-sized parts. For cartridge faucets, often the whole cartridge is swapped.
**Lubricate moving parts**
Apply a thin layer of plumber’s grease to O-rings and moving pieces. Do not use petroleum jelly—it can damage rubber.
**Reassemble and test**
Put everything back in the reverse order. Turn the shutoff valves back on slowly, then test the faucet. If it still drips, tighten the retaining nut slightly—but don’t overtighten, or you can damage internal parts.
---
2. Slow or Clogged Sink Drain: Clear It Without Harsh Chemicals
A slow drain is usually a buildup of hair, soap scum, or grease—not a broken pipe. You can often fix it with basic tools and a little patience.
Tools & materials
- Rubber plunger (cup-style for sinks)
- Drain snake or plastic drain cleaning strip
- Bucket
- Old toothbrush or cleaning brush
- Baking soda and white vinegar (optional)
- Rubber gloves
Step‑by‑step
**Remove the stopper or drain cover**
For bathroom sinks, gently twist and pull up the stopper. If it doesn’t come out, you may need to unscrew the pivot rod nut under the sink to release it. Kitchen drains may have a removable strainer—just lift it out.
**Manually remove visible gunk**
Put on gloves and pull out as much hair and debris as you can reach. Wipe it onto a paper towel and dispose of it in the trash, not the drain.
**Use a drain snake or cleaning strip**
- Feed the tool into the drain as far as it will go. - Wiggle and rotate to catch hair and buildup. - Pull it out and clean off debris. Repeat until you no longer pull out significant material.
**Try plunging (if still slow)**
- Block any overflow holes with a damp rag. - Fill the sink with a few inches of water. - Place the plunger over the drain and plunge firmly 10–15 times. - Lift to see if water drains faster; repeat if needed.
**Optional: Baking soda and vinegar rinse**
- Pour about ½ cup baking soda into the drain. - Follow with 1 cup white vinegar. - Let it fizz for 10–15 minutes. - Flush with hot (not boiling) water for 1–2 minutes.
**Clean the stopper and reassemble**
Many stoppers are coated in soap scum and hair. Scrub with an old toothbrush and reattach any rods or nuts under the sink.
**Know when to stop**
If multiple drains in your home are slow or backing up, or if water backs up into other fixtures (like the tub when you run the sink), you may have a main line issue. That’s the point to call a professional.
---
3. Running Toilet: Stop the Constant Refilling and Wasted Water
A toilet that runs every few minutes or doesn’t stop after a flush can waste hundreds of gallons of water a month. Most of the time, it’s a worn flapper or a misadjusted float.
Tools & materials
- Replacement flapper (match to your toilet brand/model if possible)
- Adjustable wrench (sometimes optional)
- Sponge or towel
- White vinegar and brush for cleaning mineral buildup (optional)
Step‑by‑step
**Remove the tank lid and observe**
Flush once and watch what happens inside the tank. You’ll see three main parts: - Fill valve (brings water in) - Float (controls water level) - Flapper (rubber seal over the flush valve at the bottom)
**Check the flapper first**
- Push down on the flapper when the toilet is running. - If the running stops, the flapper likely isn’t sealing properly. - Inspect for warping, cracks, or slime buildup.
**Replace the flapper if needed**
- Turn off the water supply (valve behind or beside the toilet, turn clockwise). - Flush to empty most of the water from the tank. - Unhook the chain from the flush lever and remove the old flapper from the side pegs. - Attach the new flapper and reattach the chain, leaving a little slack (but not so much that it tangles).
**Adjust the float level**
If water rises too high and spills into the overflow tube, the toilet will keep running. - For a ball float: Bend the metal rod slightly downward so the ball stops the water at a lower level. - For a vertical float: Turn the adjustment screw or squeeze the clip and slide the float down the rod. Aim for the water line marked inside the tank.
**Check the refill tube**
The thin tube from the fill valve should be clipped to the top of the overflow tube, not shoved down inside it. If it’s inserted too far, it can siphon water and cause refilling cycles.
**Turn water back on and test**
Let the tank refill. Listen for running water after the fill cycle ends. If it’s quiet and the water line stops just below the overflow tube, you’ve solved it.
**Consider full fill-valve replacement if issues persist**
If adjustments don’t work or the fill valve is very old and noisy, replacing it is often a better long-term fix. Follow the new valve’s instructions or consult a reliable how-to video from a reputable source.
---
4. Wobbly Chair or Table: Tighten Joints That Actually Stay Tight
A wobbly chair or table is usually about loose screws or joints that have dried out glue—not a lost cause. A thoughtful tightening and re-gluing can extend furniture life for years.
Tools & materials
- Screwdriver (Phillips and flathead)
- Hex/Allen keys (if applicable)
- Wood glue (interior use; PVA)
- Clamps or heavy books (for pressure)
- Sandpaper or small file (optional)
- Damp cloth
Step‑by‑step
**Flip the furniture over and inspect**
Lay the chair or table gently on its side. Check each joint, screw, and bolt. Wiggle legs individually to see where movement happens.
**Tighten all mechanical fasteners**
- Use the correct screwdriver or Allen key. - Tighten each screw or bolt snugly, but don’t overtighten and strip the wood or threads. - Replace stripped screws with slightly larger diameter ones if needed.
**Identify loose glued joints**
If a leg moves even though screws are tight, the glued joint may have failed. See if the joint can be gently separated without force. If it can’t, don’t force it—focus on what you can safely access.
**Clean and prepare the joint**
- For a separated joint, scrape away old, flaky glue with a small file or sandpaper. - Wipe off dust with a damp cloth and let the area dry completely.
**Apply wood glue**
- Run a thin bead of glue along the mating surfaces—too much will just squeeze out. - Fit the pieces firmly together, ensuring the leg or part is properly aligned.
**Clamp and let cure**
- Use clamps to apply even pressure across the joint. If you don’t have clamps, use tight rope or straps plus heavy books for downward pressure. - Wipe away squeeze-out glue with a damp cloth. - Let it cure per the glue instructions (often 24 hours for full strength).
**Final check on flat surface**
Once glue is cured and all screws are tight, place the furniture upright on a flat floor. Test for wobble and adjust felt pads under the legs if necessary to correct minor unevenness.
---
5. Door That Won’t Close Smoothly: Fix Sticking, Sagging, and Misalignment
A door that scrapes, sticks, or won’t latch properly is usually fighting gravity and hardware wear, not a “bad frame.” Adjusting hinges and strike plates can restore smooth operation.
Tools & materials
- Phillips screwdriver
- Wood screws (slightly longer than existing hinge screws, if needed)
- Utility knife or sandpaper
- Pencil
- Hammer and small wood block (optional)
- Chisel (for advanced adjustments; optional)
Step‑by‑step
**Diagnose the problem**
Close the door slowly and watch: - Does it rub at the top or side? - Does the latch not align with the strike plate? - Does the door spring open or refuse to stay closed? These clues tell you whether the door is sagging or just slightly misaligned.
**Tighten hinge screws**
Open the door and tighten all hinge screws on both the door and the frame. Loose screws over time can cause the door to drop slightly.
**Replace stripped screws with longer ones**
If a screw spins without tightening, the wood is likely stripped. - Remove the screw. - Replace it with a longer screw of the same diameter, driving it into deeper, solid wood (ideally into the framing stud). Focus especially on the top hinge on the frame side—that’s where sagging often begins.
**Adjust hinge position if needed**
If the top of the door is rubbing the frame on the latch side, you may need a slight hinge adjustment. - For minor tweaks, you can place a thin cardboard shim behind the lower hinge on the frame to nudge the door upward on the latch side. - For the top hinge, removing any old shims or tightening with longer screws can pull the door back into square.
**Check latch alignment**
Close the door slowly and see where the latch contacts the strike plate. - If it hits above or below the hole, lightly mark the contact point with a pencil. - For small misalignments, slightly loosen the strike plate screws and nudge it up or down, then retighten.
**Enlarge the strike plate opening (if needed)**
For stubborn misalignment: - Remove the strike plate. - Use a utility knife or chisel to carefully adjust the mortise (recess) and enlarge it slightly in the needed direction. - Reinstall the plate and test.
**Lightly sand sticking areas**
If the door only sticks at a painted edge due to humidity or thick paint buildup: - Mark the contact area with a pencil. - Lightly sand only that section until the door closes freely. - If you remove bare wood, seal or repaint that spot to protect it from moisture.
---
Conclusion
Most everyday home annoyances—dripping faucets, slow drains, running toilets, wobbly furniture, and stubborn doors—can be fixed with basic tools, a bit of time, and a clear process. By tackling these yourself, you save money, prevent bigger damage, and get your home feeling comfortable and functional again.
If you ever feel unsure about shutting off water, working near electrical parts, or handling tools, pause and look up your specific fixture or model from a reliable source before continuing. Small, confident repairs done right beat rushed “quick fixes” every time.
---
Sources
- [U.S. Environmental Protection Agency – Fix a Leak](https://www.epa.gov/watersense/fix-leak-week) - Explains how household leaks (like faucets and toilets) waste water and offers basic guidance on finding and fixing them.
- [Family Handyman – How to Fix a Leaking Faucet](https://www.familyhandyman.com/project/how-to-fix-a-leaking-faucet/) - Detailed walk-throughs for different faucet types with photos and troubleshooting tips.
- [Mayo Clinic – Household Chemical Safety](https://www.mayoclinic.org/healthy-lifestyle/adult-health/in-depth/household-chemicals/art-20046488) - Guidance on safe use of household chemicals, relevant if you consider chemical drain cleaners.
- [This Old House – How to Fix a Running Toilet](https://www.thisoldhouse.com/plumbing/21015139/how-to-fix-a-running-toilet) - Step-by-step repair advice for common toilet tank problems.
- [University of Missouri Extension – Repairing Wood Furniture](https://extension.missouri.edu/publications/g6800) - Explains furniture joinery, adhesives, and methods for strengthening loose joints.
Key Takeaway
The most important thing to remember from this article is that this information can change how you think about Household Repairs.


