Stuff breaks, leaks, sticks, and squeaks—usually at the worst possible moment. You don’t always need a pro, a full toolbox, or a free weekend to get things back on track. With a few basic supplies and a clear plan, you can knock out a lot of annoying issues on your own.
Below are five common problems you can solve with simple, step‑by‑step fixes. No jargon, no guesswork—just practical repairs you can do today.
1. Quiet A Squeaky Door Or Cabinet Hinge
A squeaky hinge is mostly friction and dust—not a sign the door is about to fail. A few minutes of targeted cleaning and lubrication usually solves it.
Step 1: Identify the noisy hinge.
Open and close the door slowly to confirm which hinge is making the noise. Sometimes it’s only the top or bottom hinge.
Step 2: Protect the area.
Place an old towel or paper towel under the hinge area to catch drips. This keeps lubricant off paint, flooring, and hardware.
Step 3: Clean the hinge.
Wipe the hinge with a dry cloth to remove dust and loose grime. If it’s very dirty, dampen the cloth slightly and wipe again, then dry it thoroughly.
Step 4: Apply lubricant correctly.
Use a silicone spray, light machine oil, or even petroleum jelly in a pinch. Apply a small amount directly where the hinge pin meets the hinge plates. Avoid over-spraying; a little goes a long way.
Step 5: Work it in.
Open and close the door 10–15 times to draw the lubricant into the moving parts. Wipe away any excess that squeezes out.
Step 6: Re-check and repeat if needed.
If the squeak persists, add a tiny bit more lubricant and work the hinge again. Persistent noise usually means dirt is still inside—wipe and re-lubricate once more.
Step 7: Prevent future squeaks.
Once or twice a year, give high-use doors and cabinets a quick wipe and a light re-application of lubricant.
---
2. Stop A Running Toilet Without Calling A Plumber
A constantly running toilet wastes water and money, but the cause is usually inside the tank and easy to fix with no special tools.
Step 1: Remove the tank lid safely.
Lift the lid straight up with both hands and set it somewhere stable. The water inside the tank is clean, so don’t worry about touching it.
Step 2: Identify what’s happening.
Flush once and watch. Common issues:
- Water rises above the overflow tube and keeps flowing
- The flapper doesn’t fully seal after flushing
- The float never rises high enough to shut off water
Step 3: Check the flapper.
Gently press down on the rubber flapper at the bottom of the tank. If the running sound stops, the flapper isn’t sealing properly.
- Make sure the chain isn’t too tight; leave a little slack so the flapper can close.
- Straighten any tangles in the chain.
Step 4: Adjust the water level.
If water flows into the overflow tube:
- For a float arm: Gently bend the metal arm down so the float shuts the valve earlier.
- For a float cup: Look for a screw or clip on the fill valve and move the float down.
Step 5: Clean minor mineral buildup.
If the flapper looks rough or crusty, turn off the water valve behind the toilet, flush to empty most of the tank, and gently scrub the flapper and the valve seat with an old toothbrush. Turn the water back on and test.
Step 6: Replace a bad flapper if needed.
If the flapper is warped, cracked, or still leaks, buy a matching replacement at a hardware store (take the old one for reference).
Unclip the old flapper, clip the new one on the same pegs, attach the chain, and adjust slack so it lifts cleanly when you flush but closes fully afterwards.
Step 7: Final test.
Flush several times. The toilet should fill, stop, and stay quiet. Listen for 2–3 minutes to be sure the slow running has stopped.
---
3. Fix A Loose Door Handle So It Feels Solid Again
A wobbly door handle feels cheap and can eventually fail. Most of the time, all it needs is a straightforward tightening and alignment.
Step 1: Inspect the handle style.
Look for visible screws on the inside of the door handle plate. If you don’t see any, there’s usually a decorative cover hiding them.
Step 2: Access the mounting screws.
- For exposed screws: Skip to the next step.
- For covered screws: Look for a small slot or seam on the side of the trim plate. Insert a flathead screwdriver or a small, stiff card into the slot and gently pry the cover off.
Step 3: Tighten gradually.
Using the correct screwdriver, tighten the visible screws a bit at a time, alternating between them to keep the plate evenly snug. Don’t overtighten; stop when the handle feels firm and no longer wobbles.
Step 4: Check handle operation.
Turn the handle several times and latch the door. Make sure it turns smoothly and the latch fully retracts and extends. If it’s stiff, back off each screw a quarter-turn.
Step 5: Align the latch (if it’s catching).
If the latch scrapes or doesn’t fully engage:
- Close the door slowly and see where the latch meets the strike plate.
- If it hits high or low, slightly loosen the screws on the strike plate, shift it in the needed direction, then retighten.
Step 6: Reattach any decorative cover.
Snap or slide the trim plate back into place, making sure it sits flush against the door.
Step 7: Reinforce if it keeps loosening.
If screws won’t stay tight because the holes are stripped in a wooden door:
- Remove the screws.
- Insert wooden toothpicks or matchsticks dipped in wood glue into the hole.
- Break them flush, let dry, then reinstall the screws into the now-firm material.
---
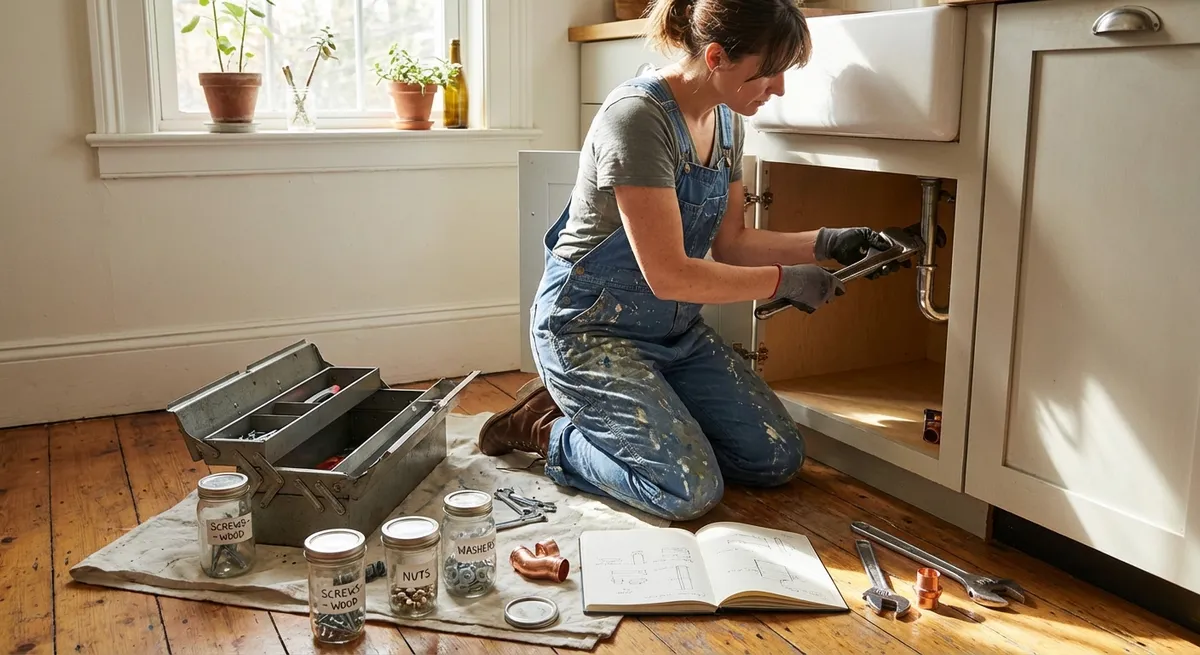
4. Clear A Slow Draining Sink Without Harsh Chemicals
A slow sink drain is often hair, soap scum, or food buildup—not a major clog. You can usually clear it safely with basic tools and patience.
Step 1: Remove the stopper or drain cover.
- Bathroom sink: Look for a lift rod behind the faucet. Under the sink, loosen the small nut on the horizontal rod, pull the rod out, then lift the stopper from the sink.
- Kitchen sink: If there’s a removable strainer, lift it out.
Step 2: Manually remove debris.
Use a gloved hand, a bent wire hanger, or a plastic drain hair tool to pull out hair and gunk near the top of the drain. Remove as much as you can—this alone often solves the problem.
Step 3: Try a hot water flush.
Boil a kettle or pot of water. Carefully pour hot (not violently boiling) water down the drain in two or three stages, pausing a few seconds between pours. This helps melt soap and grease.
Step 4: Use a plunger correctly.
If it’s still slow:
- Block any overflow hole with a damp cloth.
- Add enough water to cover the plunger cup.
- Place the plunger flat over the drain and push down gently to expel air, then plunge firmly 10–15 times.
- Lift quickly to see if water drains faster.
Step 5: Clean the P-trap (if the clog persists).
Place a bucket under the curved pipe (P-trap) under the sink. Loosen the slip nuts by hand or with pliers and remove the trap.
- Empty the contents into the bucket.
- Rinse the trap in a different sink or with a hose.
- Reassemble, making sure the washers are seated correctly.
Step 6: Test for leaks.
Run water for 1–2 minutes. Check all joints you touched for drips. Tighten slightly if needed, but don’t force plastic fittings.
Step 7: Prevent future slowdowns.
Use a mesh drain screen, avoid washing coffee grounds and heavy grease down the sink, and do a monthly hot water flush.
---
5. Patch A Small Wall Hole So It Practically Disappears
Nail holes, old anchor holes, or small dings can make walls look tired. A quick patch and blend-in can restore a clean, solid look.
Step 1: Assess the damage size.
This method works best for holes about the size of a nail up to roughly a coin. Larger holes need backing support and a different patch.
Step 2: Clean and slightly widen the edges.
Use the tip of a screwdriver or a utility knife to remove loose paint and crumbling drywall around the hole. Creating a clean, slightly beveled edge helps the patch material grip.
Step 3: Apply lightweight spackling.
Using a putty knife or even a stiff plastic card, press a small amount of lightweight spackle into the hole. Hold the knife at about a 45° angle and pull across the hole, leaving a thin, smooth layer just slightly raised above the wall surface.
Step 4: Let it dry fully.
Follow the drying time on the product (often 30–60 minutes for small repairs). Don’t rush—sanding too early will tear the patch.
Step 5: Sand it smooth.
Use fine-grit sandpaper (180–220 grit). Lightly sand in a circular motion until the patched area is flush with the surrounding wall. Run your fingertips over it; if you can’t feel an edge, you’re good.
Step 6: Spot prime the repair.
Apply a thin coat of primer to the patched area. This keeps the patch from “flashing” (showing through) when you paint, and helps the finish coat look even.
Step 7: Paint to blend.
Once primer is dry, touch up with matching wall paint using a small brush or mini roller. Feather the edges of your paint outward so there’s no hard line where new paint meets old.
---
Conclusion
Most everyday problems around your home don’t need to wait for a service visit—they just need a clear plan and a few minutes of focused effort. By quieting noisy hinges, stopping a running toilet, tightening loose handles, clearing slow drains, and patching small wall damage, you’re not just fixing annoyances—you’re stretching the life of what you already own.
Tackle one fix at a time, keep your steps simple, and you’ll build the kind of confidence that makes the next repair easier. When you hit an issue that feels bigger than this guide covers, that’s when Repair Now has your back with deeper walkthroughs and pro-level tips.
Key Takeaway
The most important thing to remember from this article is that this information can change how you think about DIY Solutions.


