Keeping your home in good shape doesn’t always require a pro or expensive tools. With a bit of guidance and basic supplies, you can handle many everyday issues yourself—safely and effectively. This guide walks you step-by-step through five practical household repairs that almost every home will face, focusing on clear actions and simple tools you likely already have.
---
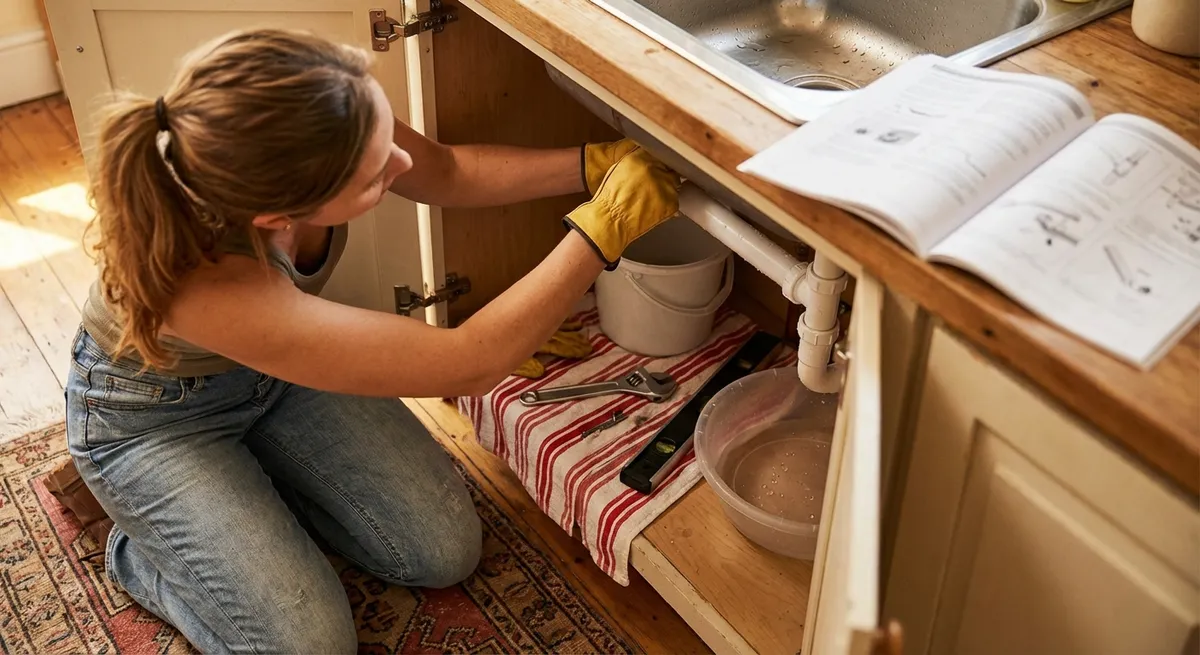
Stop a Dripping Faucet
A dripping faucet wastes water and money, and the sound is annoying. Most leaks in kitchen or bathroom faucets come from worn internal parts you can replace in under an hour.
What you’ll need
- Adjustable wrench
- Screwdriver (Phillips and flathead)
- Replacement cartridge or washers/O-rings (specific to your faucet model)
- Plumber’s grease (optional but helpful)
- Towel or rag
- Bowl or small container for small parts
Step-by-step
**Shut off the water supply**
Look under the sink for the hot and cold shutoff valves. Turn each valve clockwise until it stops. Turn the faucet handle to confirm water is off.
**Plug the drain**
Use the sink stopper or a rag to block the drain so you don’t lose screws or small parts.
**Remove the handle**
- Look for a decorative cap on the handle (often labeled “H” or “C”); pry it off gently with a flathead screwdriver. - Unscrew the handle screw underneath and pull the handle off.
**Access the cartridge or stem**
Under the handle, you’ll see a retaining nut or clip. - Use the adjustable wrench to loosen the nut. - Carefully pull out the cartridge or stem assembly.
**Inspect and replace worn parts**
- Check O-rings, rubber seals, and washers for cracks, flattening, or wear. - Take the old parts (or the whole cartridge) to a hardware store to match the exact replacements. - Lightly coat new O-rings and seals with plumber’s grease before installing.
**Reassemble the faucet**
- Insert the new cartridge or reassembled stem. - Tighten the retaining nut—snug, not over-tight. - Reinstall the handle and decorative cap.
**Turn water back on and test**
- Slowly open the shutoff valves. - Turn on the faucet and watch for drips. - If it still leaks, double-check that the cartridge is fully seated and the correct parts were used.
---
Quiet a Running Toilet
A toilet that keeps running after you flush is usually caused by a problem inside the tank—not the bowl. Fixing it can reduce water waste dramatically and is often a simple adjustment or low-cost part swap.
What you’ll need
- Replacement flapper or fill valve (if needed)
- Adjustable wrench or pliers
- Towel or sponge
Step-by-step
**Remove the tank lid and observe**
Flush the toilet with the lid off. Watch what happens as the tank refills. Running usually comes from: - A worn or misaligned flapper - A fill valve that’s not shutting off - Water level too high, flowing into the overflow tube
**Check the flapper**
- The flapper is the rubber piece at the bottom of the tank connected to the handle chain. - If it’s warped, cracked, or doesn’t seal tightly, replace it.
**Replace a faulty flapper (common fix)**
- Turn off water to the toilet at the shutoff valve behind or beside the toilet. - Flush to empty most of the water from the tank. - Unclip the old flapper from the overflow tube and detach it from the chain. - Attach the new flapper to the overflow tube and connect the chain, leaving a slight slack (no tension when at rest).
**Adjust the chain length**
If the chain is too tight, the flapper can’t seal; too loose and it won’t lift enough. - Aim for about 1/4 inch (6–7 mm) of slack.
**Adjust water level**
- If water flows into the overflow tube, lower the float. - On float-cup types, squeeze the metal clip and slide the float down the rod. - On older float-ball types, gently bend the float arm downward.
**Check the fill valve (if still running)**
- If the valve never shuts off or makes constant noise, it may need replacing. - Follow the instructions on the replacement kit—most modern fill valves are designed for DIY installation.
**Turn water back on and test**
- Turn the shutoff valve counterclockwise. - Let the tank fill and listen. The toilet should stop running within a minute and remain quiet.
---
Fix a Door That Won’t Latch or Closes By Itself
Doors that swing open, won’t latch, or scrape are usually suffering from minor alignment issues, not structural problems. Small hinge and strike plate adjustments often solve this quickly.
What you’ll need
- Screwdriver
- Wood toothpicks or wooden matchsticks
- Wood glue (optional but helpful)
- Hammer and nail (if adjusting strike plate)
- Chisel (optional for more serious misalignment)
- Level (optional but useful)
Step-by-step
**Tighten hinge screws**
- Open the door and inspect the hinge screws on both the door and frame. - Tighten any loose screws; often, this alone solves the problem.
**Fix stripped hinge screw holes**
If a screw just spins and won’t tighten: - Remove the screw. - Fill the hole with wood toothpicks dipped in wood glue, breaking them flush with the surface. - Let the glue set for at least 30–60 minutes. - Reinsert and tighten the screw—it should now hold securely.
**Check if the door is square in the frame**
- Close the door slowly and watch where it binds or fails to latch. - If the latch doesn’t align with the strike plate hole, note if it’s too high, too low, or too far in/out.
**Adjust the strike plate (small misalignment)**
- If the latch is just barely off, loosen the strike plate screws slightly and shift the plate up, down, or sideways as needed. - Retighten screws and test.
**Lower a self-closing door (common issue)**
Doors that swing shut often have slightly out-of-plumb hinges. One simple fix: - Remove the top hinge pin. - Lay it on a hard surface and gently tap it with a hammer to create a slight bend. - Reinsert the pin; the added friction often keeps the door from swinging on its own. - Repeat with the middle hinge pin if needed.
**Minor strike plate modification (if needed)**
- If the latch still doesn’t catch, you may need to slightly enlarge the strike plate opening. - Use a chisel to carefully remove a small amount of wood from the latch side of the opening. - Reinstall and test; only remove a little material at a time.
---
Unclog a Slow Sink Drain Without Harsh Chemicals
A slow-draining sink is usually caused by hair, soap scum, or grease buildup. You can often clear it without resorting to aggressive drain cleaners that can damage pipes.
What you’ll need
- Bucket or bowl
- Old toothbrush
- Rubber gloves
- Zip-it style plastic drain cleaning strip or small drain snake
- Baking soda and vinegar (optional)
- Plunger (optional)
Step-by-step
**Clear out items under the sink**
You’ll need room to work around the drainpipe and P-trap (the U-shaped section).
**Remove and clean the stopper (bathroom sinks)**
- Look under the sink for the horizontal rod connected to the drain. - Loosen the nut that holds the rod in place and gently pull the rod out. - Lift the stopper out from the top of the sink. - Clean hair and gunk from the stopper and drain opening with a toothbrush.
**Use a drain strip or small snake**
- Insert the plastic strip into the drain. - Wiggle it up and down and twist slightly to catch hair and debris. - Pull it out and clean off the gunk. Repeat until you bring up little or nothing.
**Flush with hot water**
- Run hot water for several minutes to help wash away loosened buildup. - Check if drainage has improved.
**Optional: Baking soda and vinegar rinse**
- Pour about 1/2 cup of baking soda into the drain. - Follow with 1 cup of white vinegar. - Let it fizz for 10–15 minutes, then flush with a kettle of hot (not boiling) water.
**Clean the P-trap if still slow**
- Place a bucket under the P-trap. - Loosen the slip nuts on each side of the trap by hand or with pliers. - Remove the trap and dump contents into the bucket. - Clean the inside with a brush, then reassemble, hand-tightening the nuts.
**Test for leaks**
- Run water and check around the P-trap connections. - If you see drips, slightly snug the slip nuts further, but don’t overtighten.
---
Patch a Small Hole in Drywall
From door handles to picture hangers, walls take a lot of abuse. Small holes and dents are usually fast to fix with basic patching materials and a bit of patience.
What you’ll need
- Spackling paste or lightweight joint compound
- Putty knife (2–4 inch)
- Sanding sponge or fine-grit sandpaper
- Damp cloth or sponge
- Primer and matching paint
- Self-adhesive patch (for larger holes, about 1–4 inches)
Step-by-step
**Assess the size of the damage**
- Nail or screw holes, small dents: spackle alone is often enough. - Larger holes (up to a few inches): use a self-adhesive drywall patch.
**Prepare the area**
- Use the putty knife to scrape away any loose material or flaking paint. - Wipe the area with a damp cloth to remove dust and let it dry.
**Fill small holes and dents**
- Scoop a small amount of spackle onto the putty knife. - Press it firmly into the hole, slightly overfilling. - Smooth it out so it’s level or just slightly raised above the wall surface.
**Patch larger holes (up to about 4")**
- Apply the self-adhesive mesh patch centered over the hole. - Spread joint compound over the patch with the putty knife, feathering the edges outward so it blends with the wall. - Let it dry according to the product instructions.
**Sand smooth**
- Once fully dry, lightly sand the patched area until it’s smooth and flush with the wall. - Avoid over-sanding; you just want to eliminate ridges.
**Wipe and prime**
- Wipe away dust with a damp cloth. - Apply primer over the repaired area so the final paint coat adheres properly and doesn’t flash (show a different sheen).
**Paint to match**
- Use leftover paint from the original job if possible. - Feather the paint slightly beyond the patch so it blends with the surrounding wall. - Let dry and apply a second coat if needed.
---
Conclusion
You don’t need to be a professional contractor to solve common household problems. With a few basic tools, a methodical approach, and a focus on safety, you can stop water leaks, tame noisy toilets, realign stubborn doors, clear slow drains, and restore damaged walls. The more of these tasks you tackle, the more confident and efficient you’ll become—saving money, reducing downtime, and keeping your home in better shape year-round.
---
Sources
- [U.S. Environmental Protection Agency – Fix a Leak](https://www.epa.gov/watersense/fix-leak-week) - Explains how small leaks in faucets and toilets waste water and why timely repair matters
- [Family Handyman – How to Fix a Leaky Faucet](https://www.familyhandyman.com/project/fix-a-dripping-faucet/) - Detailed visual guide to common faucet repairs and parts replacement
- [Energy.gov – Water Heating and Usage](https://www.energy.gov/energysaver/reduce-hot-water-use-energy-savings) - Provides context on how leaks and inefficient fixtures affect home energy and water use
- [This Old House – How to Fix a Running Toilet](https://www.thisoldhouse.com/plumbing/21015115/how-to-fix-a-running-toilet) - Step-by-step tutorial with photos for diagnosing and fixing running toilets
- [Lowe’s – How to Patch and Repair Drywall](https://www.lowes.com/n/how-to/patch-and-repair-drywall) - Covers materials, patch types, and finishing techniques for drywall repairs
Key Takeaway
The most important thing to remember from this article is that this information can change how you think about Household Repairs.


