Minor problems can snowball into big headaches (and big bills) if you ignore them. The good news: you can safely fix a lot of them yourself with basic tools and a clear process. This guide walks you through five common issues and exactly how to solve them—step by step—so you can get your home back on track without waiting on a pro.
---
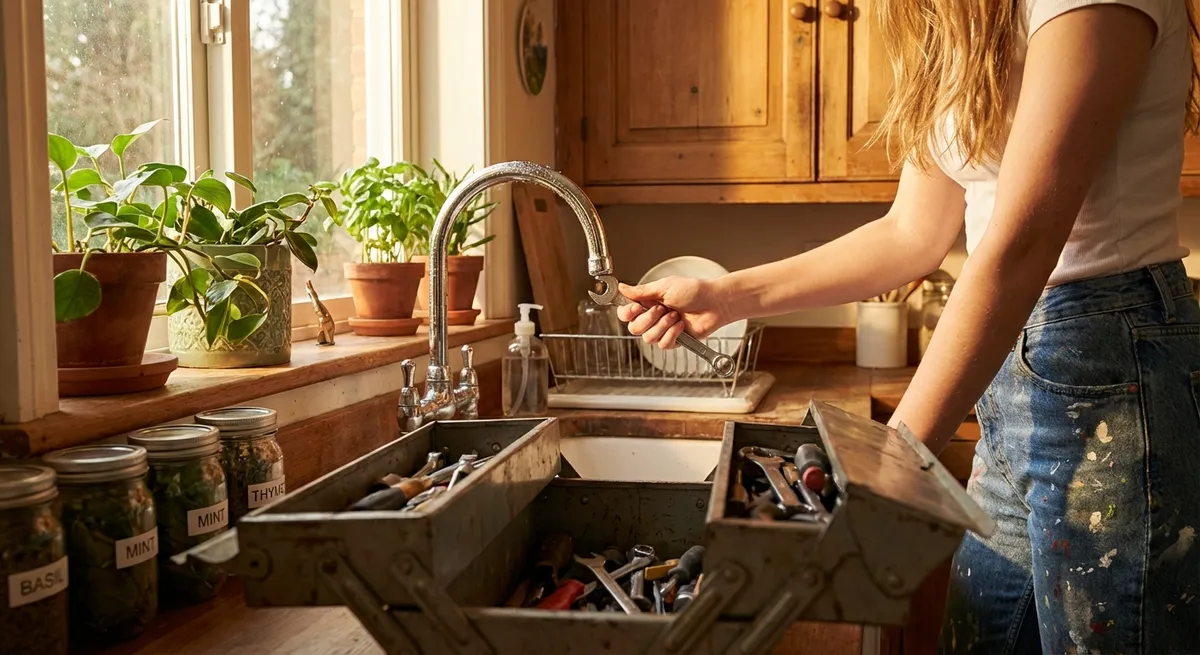
1. Dripping Faucet That Won’t Quit
A dripping faucet wastes water, raises your bill, and is just plain annoying. In most cases, the culprit is a worn-out washer or cartridge—not a full faucet replacement.
What you’ll need
- Adjustable wrench
- Flathead and Phillips screwdrivers
- Replacement washer or cartridge (match your faucet model or take the old part to the store)
- Plumber’s tape (optional but helpful)
- Small towel or rag
Step-by-step fix
**Shut off the water supply**
Look under the sink for two small shutoff valves (hot and cold). Turn both clockwise until they stop. Open the faucet to release any remaining water.
**Plug the drain**
Use a sink stopper or a rag so tiny screws don’t disappear down the drain while you work.
**Remove the handle**
- Pry off the decorative cap (if there is one) with a flathead screwdriver. - Unscrew the handle screw and pull the handle off. - If it’s stuck, wiggle gently—avoid forcing it so you don’t crack the finish.
**Access the cartridge or stem**
Under the handle you’ll see a retaining nut or clip. Use your wrench to loosen the nut or remove the clip, then lift out the cartridge (for cartridge faucets) or stem (for compression faucets).
**Inspect the parts**
Look for torn rubber washers or brittle O-rings. If they’re worn, that’s likely your leak source.
**Replace with matching parts**
- Either take the old parts to the hardware store to match them, or use your faucet brand/model to buy the correct kit. - Install the new washer, O-rings, or cartridge in the same orientation as the old ones. - Optional: add a small wrap of plumber’s tape on threaded sections for a better seal.
**Reassemble the faucet**
Reverse the disassembly steps: reinstall the stem or cartridge, tighten the retaining nut (snug, not over-tight), put the handle back, and replace the cap.
**Turn the water back on and test**
Open the shutoff valves slowly and test the faucet. If it still drips, gently tighten the handle nut a bit more. Persistent leaks may indicate a damaged valve seat that needs a professional.
---
2. Wobbly Chair or Table That Feels Unstable
Loose furniture joints aren’t just annoying—they’re a safety risk. Most of the time, you can stabilize them with glue, clamps, and a little patience.
What you’ll need
- Wood glue
- Clamps (bar clamps or strap clamps work best)
- Sandpaper (medium and fine grit)
- Wood shims or toothpicks (for slightly enlarged holes)
- Damp cloth
Step-by-step fix
**Identify the loose joints**
Gently rock the chair or table. Notice which legs or rails move. Flip the piece upside down so you can see the joints clearly.
**Disassemble the loose area**
If possible, fully pull apart the loose joint (leg, rail, or spindle). Don’t force tight joints; focus on the ones that already move freely.
**Clean old glue and debris**
Scrape off old glue with a putty knife or sandpaper. Wipe surfaces with a damp cloth and let them dry. Fresh glue bonds best to clean wood, not old hardened glue.
**Tighten enlarged holes if needed**
- If a dowel or tenon wiggles in its socket, insert a thin wood shim or a few toothpicks coated in glue to fill the gap. - Trim any excess flush with the surface once it dries.
**Apply wood glue generously (but neatly)**
Squeeze glue onto the mating surfaces and spread it evenly. You want full coverage but not so much that it pours out everywhere.
**Reassemble and clamp firmly**
Fit the parts together, then clamp the joint so everything is held tight and aligned. Wipe away squeeze-out glue with a damp cloth before it hardens.
**Let it cure fully**
Follow the glue’s instructions—usually 30 minutes for initial set, 24 hours for full strength. Avoid sitting on or moving the piece until it’s fully cured.
**Final stability check**
After curing, remove clamps and carefully test the piece. If any other joints feel loose, repeat the process there.
---
3. Slow Draining Sink or Tub (Without Harsh Chemicals)
A slow drain usually means hair, soap scum, or grease buildup—not a broken pipe. You can usually clear it without caustic drain cleaners.
What you’ll need
- Drain snake or plastic drain cleaning tool
- Cup plunger (for sinks/tubs)
- Baking soda
- White vinegar
- Kettle or pot for boiling water
- Rubber gloves
Step-by-step fix
**Remove the stopper or drain cover**
Unscrew or lift out the stopper. Many bathroom stoppers have a small set screw or a pivot rod under the sink—check your faucet’s manual if it’s tricky.
**Physically remove gunk first**
- Use a plastic drain tool or small drain snake to pull hair and debris from the drain. - Work it down and pull up slowly; repeat until it comes up mostly clean.
**Use the plunger (if needed)**
- Fill the sink or tub with enough water to cover the plunger cup. - Block any overflow holes with a damp rag. - Plunge up and down quickly 10–15 times, keeping the seal tight. - Test the drain. If it’s better but not perfect, plunge again.
**Flush with a baking soda and vinegar mix**
- Pour about 1/2 cup baking soda into the drain. - Follow with 1/2–1 cup white vinegar. - Let it fizz for 10–15 minutes to break down soap scum and mild clogs.
**Rinse with hot water**
Carefully pour a kettle of hot (not boiling on PVC) water down the drain to wash away loosened debris.
**Prevent future clogs**
- Install a hair catcher or screen in bathroom drains. - Avoid pouring grease, coffee grounds, or food scraps down kitchen sinks. - Do a baking soda + hot water flush monthly as maintenance.
If water backs up into other fixtures (like the tub when you run the sink), the clog may be deeper in the line—time to call a plumber.
---
4. Door That Won’t Latch or Scrapes the Floor
Doors that stick, scrape, or won’t latch properly are usually caused by hinge issues, humidity, or a misaligned strike plate. You can often fix this without replacing the door.
What you’ll need
- Phillips screwdriver
- Wood screws (slightly longer than the existing hinge screws)
- Wood filler or toothpicks + wood glue
- Sandpaper
- Utility knife or hand planer (for minor trimming)
- Pencil
Step-by-step fix
**Check the hinges first**
Open the door halfway and gently lift it. If you feel movement, the hinge screws are likely loose.
**Tighten all hinge screws**
Use a screwdriver (hand tightening is better than over-torquing with a drill). Check both the door-side and frame-side hinges.
**Reinforce stripped screw holes**
- If a screw spins without tightening, remove it. - Insert toothpicks dipped in wood glue into the hole, break them off flush, and reinsert the screw. - This gives the screw fresh wood to bite into. - For heavier doors, you can use longer screws that reach the wall stud on the top hinge.
**Test the latch alignment**
Close the door slowly and watch where the latch hits the strike plate. Mark any misalignment with a pencil.
**Adjust the strike plate (if needed)**
- If the latch is slightly too high or low, you can file the strike plate opening or move the plate. - Unscrew the plate, reposition slightly up/down, and reattach. - Fill old screw holes with wood filler or the toothpick + glue trick.
**Fix rubbing or scraping**
- For minor rubs at the top or side, lightly sand the door edge or use a hand planer. - For bottom scraping, first ensure hinges are tight; if the door still drags, you may need to trim the bottom slightly, which is easier if you can remove the door and plane or sand it flat on sawhorses.
**Repaint or seal trimmed edges**
Any newly exposed wood should be primed and painted or sealed to prevent swelling from moisture.
---
5. Peeling Caulk Around the Tub or Sink
Cracked, moldy, or peeling caulk looks bad and lets water sneak behind walls and fixtures. Re-caulking is simple, low-cost, and protects against hidden damage.
What you’ll need
- Caulk remover tool or utility knife
- Caulk (100% silicone for tubs/showers; paintable latex for sinks/backsplashes if you plan to paint)
- Caulk gun (for standard tubes)
- Painter’s tape
- Rubbing alcohol or mild cleaner
- Paper towels or rags
- Small bowl of water + a drop of dish soap
Step-by-step fix
**Remove old caulk completely**
- Use a caulk removal tool or sharp utility knife to cut and peel away every bit of old caulk. - Take your time: new caulk won’t adhere well to old material.
**Clean and dry the area thoroughly**
- Scrub away any soap scum, mildew, or residue with a cleaner. - Rinse and let the surface dry completely—ideally several hours. Moisture trapped under fresh caulk can lead to mold.
**Mask the joint for a clean line**
Run painter’s tape on both sides of the joint where you’ll apply caulk, leaving a gap as wide as the bead you want.
**Prepare the caulk tube**
- Cut the nozzle at a 45-degree angle with a small opening (you can always cut more if needed). - Puncture the inner seal if required.
**Apply a smooth, continuous bead**
- Hold the gun at a 45-degree angle and move steadily along the joint. - Aim for a consistent bead without stopping and starting.
**Tool the caulk line**
- Dip your finger in the soapy water and gently smooth the caulk, pressing it into the joint and shaping a neat line. - Wipe away excess on a rag as you go.
**Remove painter’s tape carefully**
Pull the tape away at an angle while the caulk is still wet to maintain clean edges.
**Let it cure before getting it wet**
Check the tube for cure time—typically 24 hours for silicone. Avoid showers or splashing water directly on the new caulk until fully cured.
---
Conclusion
Most “call a repair person” moments start with small, fixable issues. With basic tools and a step-by-step approach, you can stop drips, stabilize furniture, clear drains, realign doors, and reseal wet areas yourself—saving money and preventing bigger problems later.
Tackle one fix at a time, work safely, and know your limits: if something involves structural changes, gas lines, or electrical systems you’re not trained to handle, bring in a pro. For the everyday hassles, though, you’re more capable than you think—and your home will show it.
---
Sources
- [U.S. Environmental Protection Agency – Fix a Leak](https://www.epa.gov/watersense/fix-leak-week) - Explains how small plumbing leaks waste water and provides guidance on basic leak detection and repair
- [Family Handyman – How to Fix a Leaky Faucet](https://www.familyhandyman.com/project/how-to-fix-a-leaky-faucet/) - Detailed walkthroughs for different faucet types and common leak causes
- [This Old House – How to Fix a Wobbly Chair](https://www.thisoldhouse.com/furniture/21016755/how-to-fix-a-wobbly-chair) - Classic step-by-step method for regluing and stabilizing loose furniture joints
- [U.S. Department of Energy – Reducing Hot Water Use](https://www.energy.gov/energysaver/reducing-hot-water-use) - Explains the impact of water waste and tips for efficient water use in the home
- [Mayo Clinic – Mold Exposure](https://www.mayoclinic.org/diseases-conditions/mold-allergy/symptoms-causes/syc-20351550) - Background on mold health risks and why keeping wet areas properly sealed matters
Key Takeaway
The most important thing to remember from this article is that this information can change how you think about DIY Solutions.


