Most household problems don’t need a contractor, a full weekend, or a power-tool collection. With a few basic tools and a clear plan, you can handle a surprising number of repairs yourself—and stop small issues from turning into expensive calls to the pros.
This guide walks you through five common problems and gives you clear, step‑by‑step fixes. No fluff, no specialized jargon—just practical instructions you can follow today.
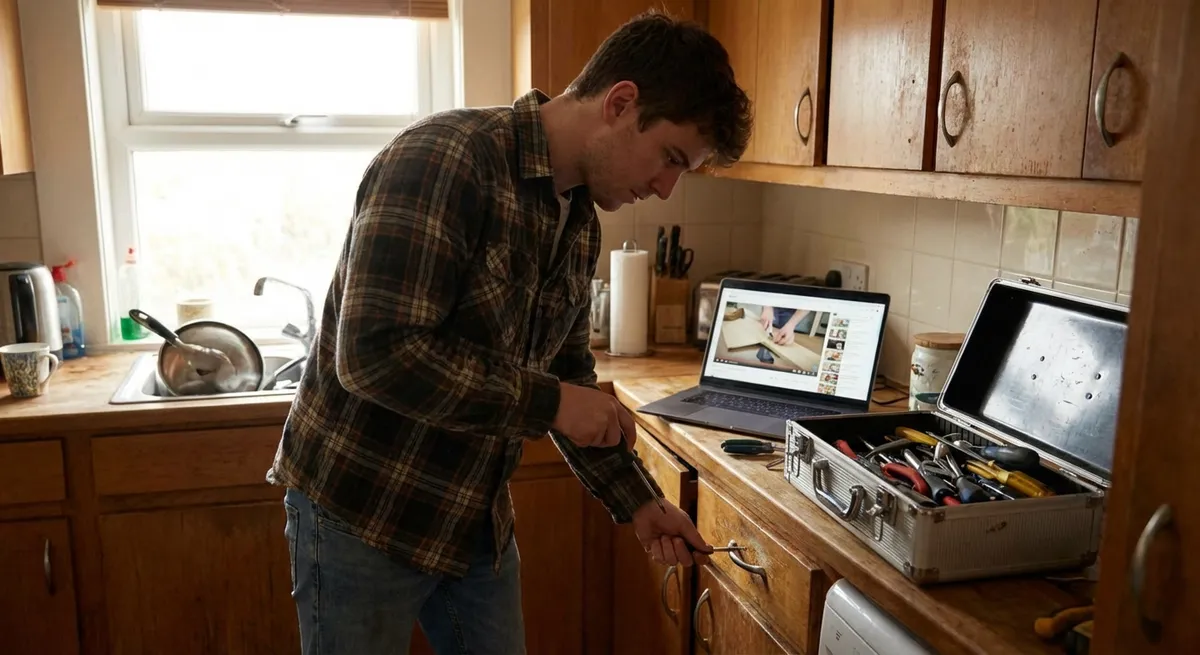
Stop a Dripping Faucet
A dripping faucet wastes water and slowly raises your bill. In most cases, the cause is a worn-out washer, cartridge, or O‑ring. The fix is usually simple and takes under an hour.
**Turn off the water**
Find the shutoff valves under the sink (small oval or round handles). Turn them clockwise until they stop. If there are no local valves, turn off the main water supply to your home.
**Plug the drain and prepare the area**
Close the sink stopper or place a rag over the drain so you don’t lose small parts. Lay a towel down to protect the surface and catch drips.
**Disassemble the faucet handle**
Look for a decorative cap or small screw on the handle. Pop off the cap with a flathead screwdriver or pry tool. Unscrew the handle and gently pull it off to expose the internal parts.
**Identify your faucet type**
You’ll usually see either a cartridge, a ball mechanism, or a simple stem with a washer on the end. Take a clear photo of what you see—this helps when buying replacement parts.
**Remove the worn parts**
Loosen retaining nuts with an adjustable wrench, turning gently to avoid stripping. Pull out the cartridge or stem. Check rubber washers and O‑rings for cracking, flattening, or damage.
**Match and replace the parts**
Take the old parts (or your photos) to a hardware store. Ask staff to help you match the cartridge, washers, and O‑rings. Install the new parts in the same order and orientation as the originals.
**Reassemble and test**
Reinstall the retaining nut, handle, and cap. Turn the shutoff valves counterclockwise to restore water. Slowly open the faucet and check for drips. If it still leaks, gently tighten the retaining nut a bit more—but don’t force it.
Quiet a Squeaky Door
Squeaky doors are annoying but usually easy to fix. The noise comes from friction between the hinge pin and the hinge. Lubricating or cleaning the hinges almost always solves it.
**Identify the noisy hinge**
Open and close the door slowly. Listen and watch which hinge moves when you hear the squeak. Often it’s the top hinge, but not always.
**Support the door if needed**
If you plan to fully remove the hinge pin, place a sturdy wedge or thick book under the door to support its weight, especially for heavy exterior doors.
**Loosen the hinge pin**
Use a flathead screwdriver under the head of the hinge pin and gently tap the handle of the screwdriver with a hammer to lift it. For hinges without an exposed head, tap a small nail into the bottom opening to push the pin up.
**Clean the pin and hinge**
Wipe the hinge pin with a rag to remove old grease, dust, and rust. If it’s dirty or rusty, use steel wool or a scouring pad to clean it until smooth. Wipe inside the hinge barrel as well.
**Apply lubricant correctly**
Use a silicone spray, white lithium grease, or a small amount of petroleum jelly. Avoid cooking oils—they gum up over time. Coat the hinge pin lightly and add a drop or two inside the hinge barrel.
**Reinstall the pin and work the hinge**
Slide the pin back into the hinge. Tap it gently with a hammer until fully seated. Open and close the door several times to work the lubricant in. Wipe away any excess that squeezes out.
**Tighten hinge screws**
While you’re there, check all hinge screws. Tighten loose ones with a screwdriver. If a screw just spins, remove it and replace it with a slightly longer screw to bite into fresh wood.
Fix a Running Toilet
A toilet that keeps running wastes a lot of water. Most of the time, the problem is in the tank: a worn flapper, a misadjusted float, or a fill valve issue. You can usually fix it without special tools.
**Remove the tank lid and observe**
Gently lift the lid off the tank and set it on a towel. Flush the toilet and watch what happens inside: note how the flapper, chain, and float move and where water flows.
**Check the flapper seal**
After the tank refills, see if water is trickling into the bowl. If yes, press down on the rubber flapper at the bottom of the tank. If the sound stops, the flapper is likely worn or not seating properly.
**Inspect and adjust the chain**
The chain between the handle lever and the flapper should have a little slack, not be tight or overly loose. If it’s too tight, the flapper can’t seal; if it’s too loose, it may not lift fully. Move the hook on the chain to adjust length.
**Replace a worn flapper if needed**
Turn off the water to the toilet using the valve on the wall. Flush to empty most of the tank. Unhook the old flapper from the overflow tube and chain. Take it to a hardware store to match the size and style. Install the new one and reconnect the chain.
**Adjust the water level**
The water should stop about 1 inch below the top of the overflow tube. If it’s too high, water constantly spills into the tube, making the toilet run. For float-cup valves, turn the adjustment screw or squeeze the metal clip and slide the float down. For float balls, turn the metal arm gently downward.
**Test the fill valve**
Turn the water back on and let the tank fill. Listen: the fill valve should shut off cleanly. If it keeps hissing or the water level creeps up and overflows into the tube, the fill valve may be failing and need replacement (usually a simple swap following the kit instructions).
**Do a final leak check**
Drop a few drops of food coloring into the tank (not the bowl) and wait 15–20 minutes without flushing. If color appears in the bowl, you still have a leak around the flapper or valve area that needs rechecking.
Patch a Small Wall Hole
Small wall damage—from door handles, screws, or accidents—looks bad but is straightforward to patch. For holes up to about 2 inches in drywall, you can get a smooth, paint-ready surface with a basic kit.
**Clean and prep the hole**
Remove loose drywall or flaking paint around the damage with a utility knife or putty knife. Lightly sand the edges to create a clean surface. Wipe away dust with a dry cloth.
**Choose the right repair method**
For nail and screw holes, lightweight spackle alone is enough. For larger holes (like a doorknob dent), use a self-adhesive wall patch or mesh tape plus joint compound.
**Apply spackle or compound**
For small holes, load a putty knife with spackle and press it firmly into the hole, scraping in multiple directions to fill it completely. For larger holes with a patch, stick the patch over the hole, then spread joint compound over the entire patch, feathering the edges.
**Feather the edges**
Hold the putty knife at a shallow angle and smooth the compound outward from the center, thinning it toward the edges so it blends with the surrounding wall. Remove excess material rather than leaving a thick blob.
**Let it dry fully**
Check the drying time on the package; it’s often 1–24 hours depending on product and thickness. Don’t rush this step—sanding wet compound will create a mess and ruin the finish.
**Sand smooth**
Use fine-grit sandpaper (120–220 grit). Sand lightly in a circular motion until the patch is level with the wall and edges are invisible to the touch. Wipe away dust with a damp cloth and let it dry.
**Prime and paint**
Apply a small amount of primer to the patched area so the final paint doesn’t soak in unevenly. Once dry, paint over with your wall color, feathering the paint out to blend with the surrounding area.
Unclog a Slow Drain Without Harsh Chemicals
Slow sinks or tubs are usually caused by hair, soap scum, and debris buildup. Instead of harsh chemical drain cleaners (which can damage pipes), use mechanical and mild methods first.
**Remove the stopper or drain cover**
For bathroom sinks, twist or lift out the stopper. Some have a nut under the sink holding the pivot rod; loosen it to remove the stopper. For tubs, remove screws from the drain cover or overflow plate if needed.
**Pull out visible debris**
Use a bent wire hanger, plastic drain snake, or your fingers (with gloves) to pull out hair and gunk. Work slowly so you don’t push the clog deeper. Have a trash bag handy for the waste.
**Flush with hot water**
Run very hot tap water down the drain for a minute or two to help dissolve soap and grease buildup. Don’t use boiling water on PVC pipes—very hot tap water is enough.
**Use a plunger correctly**
For sinks, block any overflow openings with a wet cloth. Fill the sink or tub with enough water to cover the plunger cup. Place the plunger over the drain, press down to seal, then plunge vigorously 10–15 times. Lift to see if water drains better; repeat if needed.
**Try a baking soda and vinegar treatment**
Pour about half a cup of baking soda into the drain, followed by a cup of plain white vinegar. It will fizz. Let it sit for 15–30 minutes, then flush with hot water. This helps break down mild organic buildup.
**Use a drain snake for stubborn clogs**
If water still drains poorly, feed a manual drain snake into the pipe, turning the handle as you go. When you feel resistance, gently work the snake back and forth to break up or grab the clog. Pull it out, clean off debris, and repeat until the line feels clear.
**Reassemble and prevent future clogs**
Reinstall the stopper or cover. To reduce future problems, use drain screens, avoid pouring grease or coffee grounds down kitchen sinks, and do a periodic hot-water flush or baking soda/vinegar treatment.
Conclusion
Most “annoying but tolerable” home issues—dripping faucets, squeaky doors, running toilets, wall dings, and slow drains—are warning signs, not background noise. Tackling them early keeps your home in good shape and saves you money over time.
Start with the one problem that bothers you most and follow the steps methodically. Once you see how manageable these fixes are, you’ll be more confident taking on the next repair instead of putting it off—or paying for a service call you don’t really need.
Key Takeaway
The most important thing to remember from this article is that this information can change how you think about Household Repairs.


