Small problems have a habit of turning into expensive emergencies when you ignore them. The good news: a lot of “uh-oh” moments around your home and devices can be stabilized or fully fixed in minutes with basic tools and a clear plan. This guide walks you through five common issues and exactly what to do, step by step, so you can stop the problem from getting worse—and often solve it completely.
---
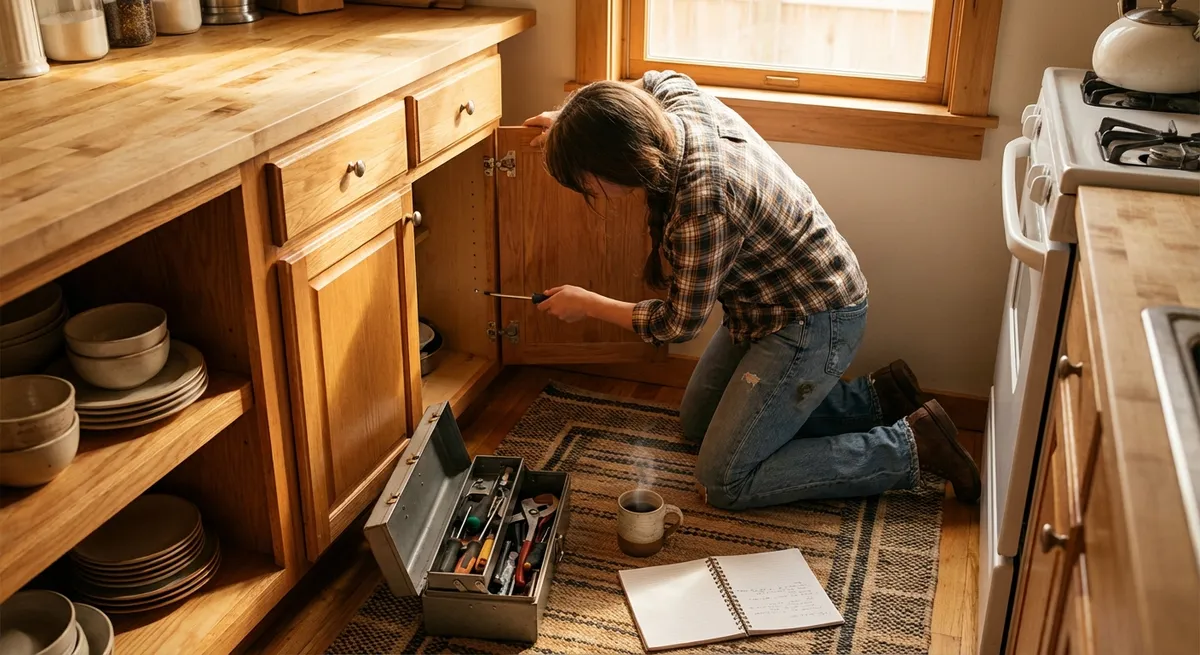
Stop a Leaking Sink Trap (Under‑Sink Pipe Drip)
A slow drip under the sink can quietly soak cabinets, warp wood, and grow mold. Most of the time, the leak is at the P‑trap (the curved pipe under your sink) and can be tightened, cleaned, or re‑sealed without calling a plumber.
What you’ll need
- Bucket or large bowl
- Old towel or rag
- Adjustable wrench or channel‑lock pliers
- Latex/nitrile gloves (optional but useful)
- Plumber’s tape (Teflon tape) or replacement washers if needed
Step‑by‑step
- **Clear the area and protect the cabinet.**
Empty the cabinet under the sink. Lay down a towel and place a bucket under the P‑trap.
- **Identify where it’s leaking.**
Run water briefly in the sink, then shut it off. Watch where the drip forms: at a joint, the bottom of the trap, or a threaded connection.
- **Tighten the slip nuts by hand first.**
Most traps have plastic slip nuts you can turn by hand. Gently snug them up—do not overtighten. If they’re metal, use your adjustable wrench, adding only a quarter‑turn at a time.
- **Test again.**
Run water for 15–30 seconds and check for drips. If the leak stops, dry everything and you’re done. Recheck in a few hours to confirm.
- **If it still leaks, disassemble the trap.**
- Turn off the faucet.
- Loosen the slip nuts and remove the trap, letting water drain into the bucket.
- Check the washers (rubber rings) for cracks, flattening, or debris.
- **Clean and reassemble with fresh seals.**
- Wipe the pipe ends and inside the fittings.
- Replace worn washers.
- For threaded metal connections, wrap plumber’s tape clockwise around the threads (2–3 wraps).
- Reinstall the P‑trap and tighten the nuts snugly.
- **Final test.**
Run hot and cold water for a few minutes while you watch closely. No drips? Dry the cabinet and put items back.
When to call a pro: If the trap is badly corroded, cracked, or the leak is coming from inside the wall, stop and contact a plumber.
---
Quiet a Running Toilet That Won’t Stop Filling
A constantly running toilet wastes water and money, but the basic mechanism in the tank is simple. Most issues come from a misaligned flapper, chain, or float.
What you’ll need
- Old towel
- Optional: replacement flapper (inexpensive, often universal)
- Optional: small pair of scissors or pliers
Step‑by‑step
- **Take the tank lid off carefully.**
Place it flat on a towel to avoid cracking.
- **Understand the three key parts.**
- **Flapper:** Rubber piece at the bottom that lifts when you flush.
- **Chain:** Connects the flapper to the flush handle.
- **Float/fill valve:** Controls water level; can be a ball float or vertical float on the fill valve.
- **Check the flapper seal.**
- Gently press the flapper down with your finger.
- If the running sound stops, the flapper isn’t sealing properly.
- **Adjust the chain.**
- There should be a bit of slack in the chain, but not so much that it gets trapped under the flapper.
- If it’s too tight or too loose, move the clip up or down on the chain to adjust the length.
- Test flush again and listen.
- **Adjust the water level.**
- Look for a line or mark inside the tank that indicates ideal water level.
- On a vertical float, there’s often a screw on top—turn clockwise to lower water level, counterclockwise to raise.
- For a ball float on an arm, gently bend the arm down slightly to lower fill level.
- **Replace a worn flapper if needed.**
- Turn off water at the shut‑off valve behind the toilet.
- Flush to empty most of the water from the tank.
- Unhook the flapper from the overflow tube and disconnect the chain.
- Install the new flapper, attach the chain, and turn water back on.
- Adjust chain slack so the flapper closes cleanly after each flush.
- **Listen for a full minute.**
After the toilet refills, it should go completely quiet. If it keeps hissing or trickling, recheck flapper alignment and water level.
When to call a pro: If water is leaking around the base of the toilet or the shut‑off valve doesn’t work, stop and get professional help.
---
Recover a Phone That Won’t Charge Reliably
Before you assume your phone or battery is dead, rule out simple issues: dirty charging ports, bad cables, or software glitches.
What you’ll need
- A known good charging cable and power adapter
- Wooden or plastic toothpick (not metal)
- Soft brush (clean, dry toothbrush or anti‑static brush)
- Access to Wi‑Fi for software checks
Step‑by‑step
- **Test with a different outlet, cable, and adapter.**
- Plug a different device into the same outlet to verify it works.
- Use a cable and power brick you know are good.
This isolates whether the problem is your phone or accessories.
- **Inspect and clean the charging port.**
- Power the phone off.
- Shine a light into the port. Lint and dust often pack in and prevent full contact.
- Gently insert a wooden/plastic toothpick and scrape out any debris.
- Use a soft brush to loosen remaining dust.
- Do not use metal tools, water, or compressed air directly into the port.
- **Try a different charging method.**
- If your phone supports wireless charging, test it on a wireless pad.
- If wireless works but cable charging doesn’t, the port or its internal connection may be damaged.
- **Check for software or battery issues.**
- Make sure your operating system is updated to the latest version.
- On many phones, you can view battery health in settings (e.g., “Battery Health” on iOS or device care/battery info on many Android phones).
- Restart the phone after updates or changes.
- **Perform a safe reboot or reset of charging logic (if supported).**
- Some devices respond to a “soft reset” (holding power + volume down for several seconds).
- Follow your manufacturer’s instructions only—don’t attempt random button combinations you aren’t sure about.
- **Monitor behavior.**
- Note whether the phone only charges when the cable is held at a certain angle—that typically indicates a loose or damaged port.
- If it intermittently charges even with a good cable and clean port, internal hardware may be failing.
When to call a pro: If cleaning doesn’t help and the port feels loose or wobbly, stop trying to force cables in and get a technician to inspect or replace the port.
---
Reset a Tripped Breaker Without Making Things Worse
When a section of your home suddenly loses power, it’s often just a tripped circuit breaker. Resetting it correctly—and safely—prevents repeat trips and protects your wiring.
What you’ll need
- Flashlight
- Dry hands and dry floor (for safety)
Step‑by‑step
- **Locate your electrical panel.**
Common spots: basement, garage, utility closet, or hallway. Use a flashlight if lighting is out.
- **Identify the tripped breaker.**
- Look for a switch that’s not fully in the ON position, often sitting between ON and OFF.
- Some breakers show a colored indicator or feel “spongy” compared to the others.
- **Turn off or unplug devices on that circuit.**
- Lamps, space heaters, hair dryers, microwaves, or power strips that were running when it tripped should be turned off/unplugged.
- This reduces the load when you restore power.
- **Reset the breaker correctly.**
- Firmly push the tripped breaker all the way to the OFF position.
- Then push it back to ON with steady pressure. You should feel a distinct click.
- **Test the circuit.**
- Go back to the room and turn one device on at a time.
- Avoid running multiple high‑demand appliances on the same circuit simultaneously (e.g., space heater + hair dryer + vacuum).
- **Watch for repeat trips.**
- If the breaker trips again immediately, leave it OFF.
- Don’t keep resetting a breaker that repeatedly trips—this is a safety signal, not an inconvenience.
When to call a pro: If you smell burning, see scorch marks on outlets or the panel, or a breaker won’t reset or keeps tripping with minimal load, contact a licensed electrician promptly.
---
Get a Stuck Interior Door Working Smoothly Again
A door that sticks, scrapes, or doesn’t latch properly can usually be fixed with minor adjustments, not replacement. Addressing it early also prevents strain on hinges and locks.
What you’ll need
- Pencil
- Phillips screwdriver
- Sandpaper (medium and fine grit) or sanding sponge
- Bar of plain soap or a wax candle
- Optional: wood filler and touch‑up paint for bigger adjustments
Step‑by‑step
- **Find exactly where it’s sticking.**
- Open and close the door slowly.
- Note whether it drags on the floor, rubs against the jamb, or misaligns at the latch.
- Lightly mark tight spots with a pencil.
- **Tighten hinge screws.**
- With the door slightly open, use a screwdriver to snug up all hinge screws on both the door and frame.
- Loose hinges can make the door sag and scrape.
- **Test again.**
- Sometimes just tightening brings the door back into alignment.
- If it still sticks, proceed.
- **Lubricate the sticking edge and latch.**
- Rub a dry bar of soap or candle wax along the door edge that’s rubbing.
- Operate the door several times to spread the lubricant.
- Lightly rub the latch bolt with soap as well.
- **Lightly sand high spots.**
- If the rubbing is minor, remove the door pins (if needed) and lay the door flat, or carefully sand with the door in place.
- Sand only the marked rub points along the edge, checking progress often. Don’t remove more material than necessary.
- Wipe away dust and test fit frequently.
- **If the latch doesn’t catch, adjust the strike plate.**
- Close the door slowly and see where the latch meets the strike plate.
- If it’s hitting too high or low, slightly loosen the strike plate screws and adjust its position.
- Retighten screws and test again.
- In stubborn cases, you may need to file the opening in the plate a bit wider.
- **Finish and protect.**
- If you sanded through paint or finish, touch up that area to protect the wood from swelling and moisture.
When to call a pro: If the frame itself is warped, you see signs of structural movement, or the door issue comes after water damage, consider professional evaluation.
---
Conclusion
Most everyday problems don’t start as disasters—they start as small annoyances: a drip here, a hum there, a door that kind of sticks. The difference between a quick, cheap fix and a major repair bill is how quickly and confidently you act. With a few basic tools and clear steps, you can stop leaks before cabinets rot, silence toilets before water bills spike, make phones usable again, reset power safely, and keep doors running smoothly.
These fixes aren’t about becoming a full‑time DIY expert; they’re about knowing what you can handle, doing it safely, and knowing when to stop and call in a professional. Start with one problem, follow the steps, and build your repair confidence one small win at a time.
---
Sources
- [U.S. Environmental Protection Agency – Fix a Leak](https://www.epa.gov/watersense/fix-leak-week) – Explains the impact of household leaks and basic detection tips
- [Energy.gov – Resolving Electrical Problems](https://www.energy.gov/energysaver/common-electrical-problems-home) – Overview of common household electrical issues and safety considerations
- [Family Handyman – How to Fix a Running Toilet](https://www.familyhandyman.com/project/how-to-fix-a-running-toilet/) – Detailed visuals and guidance on toilet tank components and repairs
- [Apple Support – If your iPhone or iPad won’t charge](https://support.apple.com/en-us/HT207414) – Official troubleshooting steps for Apple devices that won’t charge
- [International Association of Certified Home Inspectors – Door Problems and Solutions](https://www.nachi.org/door-problems.htm) – Explains common interior door issues and typical fixes
Key Takeaway
The most important thing to remember from this article is that this information can change how you think about Quick Fixes.


