Most home and tech annoyances don’t need a pro or a big budget—just a clear plan and a bit of patience. This guide walks you through five practical, step‑by‑step fixes you can handle today with basic tools and everyday supplies. Each solution is focused on safety, clarity, and results you can actually achieve.
---
Fix 1: A Wobbly Chair or Table That Won’t Sit Still
A shaky chair or table is annoying—and dangerous if it suddenly gives way. The core problems are usually loose fasteners, worn joints, or uneven legs. Here’s a straightforward way to stabilize it.
What you’ll need
- Screwdriver (Phillips or flathead, depending on screws)
- Wood glue (for wood furniture)
- Small adjustable wrench (if bolts are present)
- Sandpaper or a sanding block
- Furniture pads or shims (rubber, cork, or felt)
- Damp rag
Step‑by‑step
**Flip and inspect safely**
Place the chair or table on a soft surface (rug or blanket) and turn it upside down. Check each leg, joint, and fastener. Look for loose screws, cracked joints, or legs that don’t touch the floor evenly.
**Tighten all fasteners**
Use a screwdriver or wrench to snug up every screw and bolt, not just the loose ones. Tighten until firm, but don’t over‑torque—you can strip the screw or damage the wood.
**Reinforce loose wood joints**
If you see gaps where legs meet the seat or apron: - Gently pull the joint apart slightly (if possible). - Wipe away dust with a damp rag. - Apply wood glue into the joint, then press the pieces together. - Clamp if you have a clamp; if not, use straps or heavy books to hold it tight while drying. - Wipe away excess glue. Let it cure according to the label (usually 24 hours).
**Check for uneven legs**
Flip the furniture upright on a truly flat surface (kitchen counter or tile floor). Rock it gently. Identify which leg is not touching or is shorter.
**Level the legs**
- For a **slightly short leg**: add a furniture pad or felt disk to the bottom. - For a **slightly long leg**: carefully sand the bottom of the longer leg, testing frequently so you don’t remove too much. - For **major differences**: use a small shim (rubber or cork) under the short leg, then attach with glue or a pad.
**Final stability test**
Sit on the chair or press down on the table from different angles. If it still wobbles, recheck joints and shims. Make small adjustments until the movement is gone.
---
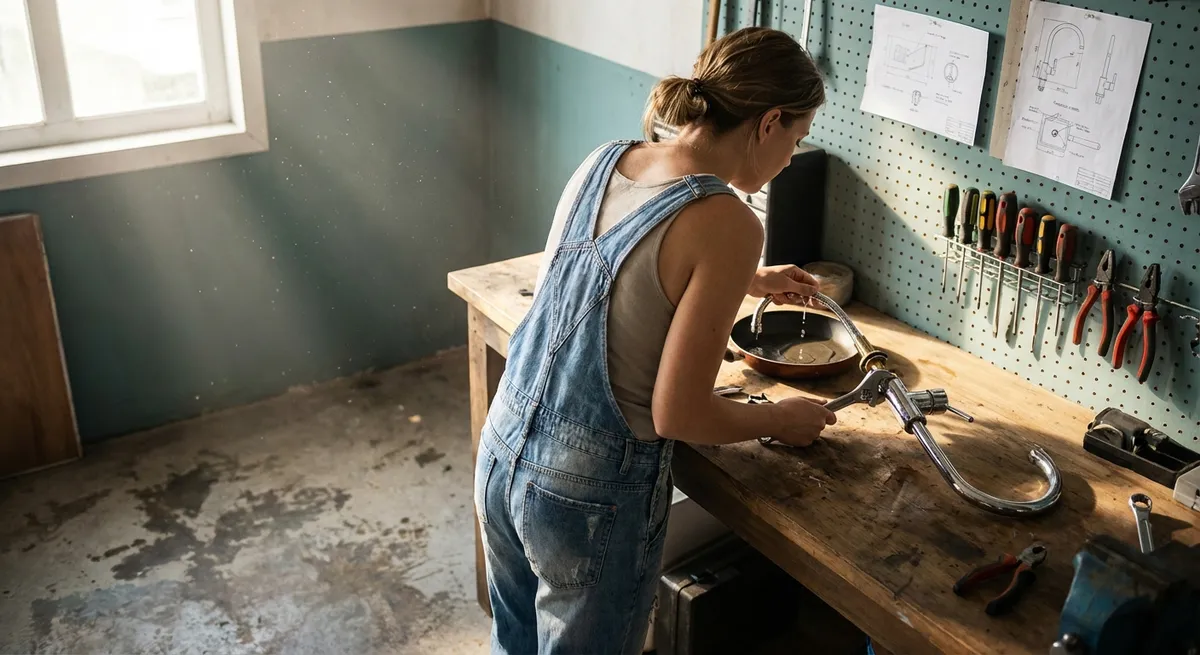
Fix 2: A Slow‑Draining Bathroom Sink
A sluggish sink is usually caused by hair, soap scum, and gunk trapped near the drain—not a deep pipe issue. You can often restore normal flow without harsh chemical cleaners.
What you’ll need
- Rubber gloves
- Old toothbrush or small nylon brush
- Bucket or bowl
- Plastic drain snake (or a straightened wire hanger with a small hook)
- Baking soda and white vinegar (optional, for cleaning)
- Towel
Step‑by‑step
**Clear the area and protect the space**
Remove items from under the sink. Lay a towel on the cabinet bottom. Place a bucket under the P‑trap (the curved pipe).
**Remove and clean the stopper**
- In many sinks, the stopper is held by a pivot rod under the sink. - Unscrew the nut on the back of the drainpipe where the rod enters, then pull the rod out. - Lift the stopper from the sink. It will likely be coated with hair and soap scum. - Clean it thoroughly with the toothbrush and warm, soapy water.
**Pull out clogs near the drain**
Insert the plastic drain snake into the drain opening. Push down, then pull up, twisting gently to grab hair and debris. Repeat several times until you stop pulling out material.
**Optional: Remove and flush the P‑trap**
If the sink is still slow: - Loosen the slip nuts at both ends of the P‑trap by hand or with pliers. - Remove the trap carefully and dump its contents into the bucket. - Rinse the trap with warm water and scrub any buildup. - Reassemble, making sure gaskets are seated and nuts are hand‑tightened firmly.
**Use a baking soda + vinegar flush (optional)**
- Pour about ½ cup baking soda into the drain. - Add ½–1 cup white vinegar. It will fizz; let it sit 10–15 minutes. - Flush with hot (not boiling) water for a minute to clear remaining residue.
**Reinstall the stopper and test**
- Drop the stopper back into the drain. - Reinsert the pivot rod under the sink into the hole on the stopper stem. - Tighten the nut. - Run water for a few minutes and confirm that it drains smoothly and no leaks appear under the sink.
---
Fix 3: A Door That Scrapes, Sticks, or Won’t Latch
A sticking door is usually about alignment and friction, not a “bad” door. Humidity, loose hinges, and shifted frames are typical culprits. You can often fix it without replacing hardware.
What you’ll need
- Phillips screwdriver
- Pencil or masking tape
- Sandpaper or sanding block (medium and fine grit)
- Utility knife or chisel (for tighter spots)
- Lubricant (dry lubricant or petroleum jelly for latch, not WD‑40 on wood)
- Safety glasses and dust mask if sanding heavily
Step‑by‑step
**Identify where it’s rubbing or sticking**
Open and close the door slowly. Feel and listen for rubbing along the top, sides, or bottom. Look for fresh scrape marks on the door edge or frame. Mark these spots with a pencil or a small piece of masking tape.
**Tighten the hinges**
- With the door closed, use a screwdriver to snug all hinge screws on both the door and the frame. - If a screw just spins or won’t tighten, remove it and insert a toothpick or wooden matchstick dabbed with wood glue into the hole, then reinsert the screw. This gives the screw fresh material to grab.
**Check for hinge sag and quick shimming**
If the door sags (larger gap at top on latch side, smaller at bottom): - Loosen (don’t remove) the top hinge screws on the frame side. - Insert a thin piece of cardboard or business card behind the hinge leaf as a shim. - Retighten screws. This lifts the latch side slightly and often eliminates rubbing.
**Sand down high spots**
If scraping is minor and limited to a small area: - Remove the door from its hinges (support it while removing hinge pins). - Lay it on a stable surface. - Sand the marked area along the edge in long, even strokes, checking frequently. - For tight corners, use a utility knife to shave very small amounts of wood. - Once it closes without rubbing, smooth with fine‑grit sandpaper.
**Adjust the latch and strike plate**
If the door won’t latch but swings freely: - Close the door gently and see where the latch hits the strike plate. You may see rub marks or chipped paint. - Loosen the screws on the strike plate slightly and shift it up, down, in, or out as needed, then retighten. - For small mismatches, a few firm taps with a hammer and wood block can slightly recess or shift the plate.
**Lubricate the latch (not the wood)**
Apply a small amount of dry lubricant or petroleum jelly to the latch bolt. Operate the handle and latch several times to distribute. Avoid getting lubricant on painted wood, which can affect finishes.
**Final test**
Open and close the door multiple times. Confirm it doesn’t scrape, closes fully, and latches with normal pressure.
---
Fix 4: A Phone That Won’t Charge Reliably
If you have to wiggle the cable to get your phone to charge, don’t assume the port is dead yet. Dust, lint, and worn cables are far more common than actual hardware failure.
What you’ll need
- A known‑good charging cable and wall adapter
- Wooden or plastic toothpick (not metal)
- Compressed air (optional)
- Flashlight
Step‑by‑step
**Rule out the simple stuff first**
- Try a different outlet. - Test with a different cable and adapter that you know works with another device. - If the phone charges normally with the alternate setup, replace the bad cable or adapter.
**Power down your phone**
Turn the device completely off before you touch the charging port. This reduces risk if you accidentally contact internal components.
**Inspect the charging port**
Use a flashlight to look inside the port. You may see lint, dust, or compressed debris blocking the contacts or preventing the plug from seating fully.
**Gently remove debris**
- Use a wooden or plastic toothpick to gently scrape along the bottom and sides of the port. Work slowly and avoid force. - Tilt the phone so debris can fall out. - If you have compressed air, give a few short bursts at an angle (not straight in at high pressure).
**Check the cable connection fit**
Insert the cable into the cleaned port. It should click or feel snug, with no major wobbling. If it still feels loose, test another cable to rule out worn connectors on the cable itself.
**Try charging and monitor the behavior**
Plug into a wall outlet and leave it undisturbed. Watch the charging indicator for a minute or two. If it starts and stops intermittently: - Slightly adjust the cable orientation and see if reliability changes. - If only one angle works and multiple cables behave the same, the port may be physically damaged.
**Know when to stop DIY and seek repair**
If cleaning doesn’t restore reliable charging, or you see bent pins or obvious damage, stop trying to fix it yourself. At that point, a professional port replacement or warranty service is the safest route.
---
Fix 5: A Running Toilet That Won’t Stop Filling
A constantly running toilet wastes water and money, but the underlying issues—flapper, fill valve, or float—are usually simple to fix with no special plumbing skills.
What you’ll need
- Adjustable wrench (optional)
- Replacement flapper (match your toilet model if possible)
- Towel or sponge
- Scissors (to trim chain if needed)
Step‑by‑step
**Turn off water and inspect the tank**
- Locate the shutoff valve behind or beside the toilet and turn it clockwise to close. - Remove the tank lid carefully and set it aside. - Flush once to lower the water level so you can see the parts clearly.
**Understand the main parts**
Inside the tank you’ll see: - The **flapper** at the bottom (rubber piece covering the flush valve). - The **fill valve** (tall assembly where water enters). - The **float** (either a ball on an arm or a cylinder on the fill valve). - The **chain** connecting flush handle to the flapper.
**Check and adjust the flapper and chain**
- If the flapper is warped, cracked, or coated in mineral buildup, it may not seal. Replace it. - Ensure the chain has slight slack when the flapper is closed. Too tight and the flapper can’t seal; too loose and it may not open properly. Adjust length or trim excess if needed.
**Replace the flapper (if needed)**
- Unhook the old flapper from the pegs or ring at the base of the overflow tube. - Attach the new flapper in the same configuration. - Connect the chain so the handle lifts the flapper fully when you flush, but leaves it fully closed when at rest.
**Adjust the water level**
A high water level can cause overflow into the overflow tube, making the toilet run: - For a float arm: gently bend the arm downward so the float closes the fill valve sooner. - For a vertical float: look for an adjustment screw or clip and move the float downward. - Aim for the water line labeled in the tank or about 1 inch below the top of the overflow tube.
**Turn water back on and test**
- Slowly open the shutoff valve. Let the tank refill. - Watch and listen: when the tank is full, the water should stop completely. - Flush a few times. Confirm the flapper closes cleanly and no water trickles into the bowl between flushes.
**If it still runs**
If the toilet continues running after these steps, the fill valve itself may be worn and need replacement. Modern fill valves often come with clear instructions and can still be a DIY job, but if you’re uncomfortable with it, call a plumber.
---
Conclusion
Minor problems around your home and with your devices rarely require expensive service calls. With a steady, step‑by‑step approach, you can stabilize wobbly furniture, clear slow drains, unstick doors, revive unreliable phone charging, and silence a running toilet. Start with safety, use the right basic tools, and make small adjustments instead of aggressive changes. Over time, these practical fixes build your confidence—and keep more of your repair budget in your pocket.
---
Sources
- [U.S. Department of Energy – Reducing Water Use](https://www.energy.gov/energysaver/reducing-water-use) - Explains how leaks like running toilets waste water and money, highlighting why this DIY fix matters
- [Los Angeles County Sanitation Districts – Household Plumbing Tips](https://www.lacsd.org/services/wastewater/sewer-system/household-plumbing-tips) - Offers general guidance on dealing with slow drains and basic sewer‑safe practices
- [Family Handyman – How to Fix a Wobbly Chair](https://www.familyhandyman.com/project/how-to-fix-a-wobbly-chair/) - Demonstrates methods for tightening and reinforcing loose chair joints
- [Washington State Department of Health – Prevent Water Damage](https://doh.wa.gov/community-and-environment/emergencies/prevent-water-damage) - Provides practical tips to avoid leaks and water‑related damage at home
- [Apple – If Your iPhone or iPad Won’t Charge](https://support.apple.com/en-us/HT201559) - Official troubleshooting steps for devices that aren’t charging properly, reinforcing safe port‑cleaning practices
Key Takeaway
The most important thing to remember from this article is that this information can change how you think about DIY Solutions.


