When something breaks at home, the first instinct is often to replace it or call a pro. But many everyday problems don’t need a new purchase or an expensive visit—they just need a clear plan and a bit of your time. This guide walks you through five practical DIY fixes with step‑by‑step instructions you can follow even if you don’t consider yourself “handy.”
Each solution focuses on safety, simple tools, and results you’ll notice right away.
---
Stop a Running Toilet That Won’t Quit
A constantly running toilet wastes water and money, but it’s usually easy to fix without a plumber.
What you’ll need
- Adjustable wrench (optional)
- Replacement flapper (if needed)
- Towel or sponge
Steps
**Confirm the problem**
Lift the tank lid. If water is flowing into the bowl continuously or the tank never fills, you have a running toilet issue.
**Do a quick jiggle test**
Gently lift and lower the flush handle. If the running stops briefly, the problem is likely the flapper or chain.
**Inspect the flapper**
Turn off the water valve behind the toilet (turn clockwise), then flush to empty most of the tank. Check the rubber flapper at the bottom of the tank: - Is it warped, cracked, or slimy? - Does it sit flat over the opening?
**Adjust the chain**
If the chain is too tight, the flapper can’t close. If it’s too loose, it can get stuck under the flapper. - Aim for a small amount of slack—about 1/4 inch when the flapper is closed. - Move the hook to a different link to adjust.
**Replace the flapper if worn**
- Unhook the old flapper from the overflow tube. - Take it to a hardware store to match the size. - Install the new one by clipping it onto the overflow tube and attaching the chain to the flush arm.
**Check the water level**
Turn the water valve back on. Once the tank fills, look for a “water line” mark inside the tank. - If the water is too high and spills into the overflow tube, lower the float (on newer fill valves, turn the adjustment screw; on older ones, bend the float arm slightly down).
**Test and fine‑tune**
Flush several times. The toilet should fill, stop, and stay quiet. Re‑adjust the chain or float if needed.
---
Bring a Slow or Dead Power Strip Back to Life (Safely)
Power strips often “fail” in ways that look worse than they are. Before you throw one out, run through a quick safety‑first check.
What you’ll need
- Small screwdriver
- Non-contact voltage tester (optional but useful)
- Flashlight
Steps
**Unplug everything**
Completely disconnect the power strip from the wall and remove all plugs from its outlets. Never inspect a strip that’s still connected to power.
**Check the reset or switch**
Many strips have: - A power switch - A reset button - An internal circuit breaker Press reset firmly. Flip the power switch off and on. Plug the strip into a *different* wall outlet you know works.
**Inspect for visible damage**
Look for: - Melted or discolored plastic - Burn marks - Loose or cracked casing - A plug that’s warped or feels hot If you see *any* of these, do not use it. Replace the strip—safety first.
**Test the main cord**
Gently flex the cord along its length, especially near the plug and where it enters the strip. If you hear crackling or see exposed wires, the strip is done—replace it.
**Open the casing (if it’s screwed, not glued)**
If the power strip has screws and no warranty or safety seals: - Remove the screws and open the case. - Check for loose wires, burnt components, or corrosion. - Tighten any obviously loose terminal screws, but don’t modify the circuitry.
**Use a non-contact tester (optional but helpful)**
With the strip reassembled and plugged into a known working outlet: - Switch it on. - Test near the input side (where the cord enters) and then near the outlets. - If you have power at the input but not at any outlet and there’s no visible safe fix, retire the strip.
**Decide: repair or replace**
- Minor issue like a loose internal wire with no burn damage? Tighten and re-test. - Any sign of overheating or scorched parts? Replace the strip immediately; it’s not worth the fire risk.
---
Clear a Slow Drain Without Harsh Chemicals
A sluggish sink or shower drain is usually caused by hair, soap, and grease buildup—not a serious plumbing failure.
What you’ll need
- Bucket or bowl
- Old rag or paper towels
- Plastic drain snake or zip‑it tool
- Baking soda and vinegar (optional)
- Kettle or pot to heat water
Steps
**Remove the stopper or cover**
- For a bathroom sink, unscrew or pull out the stopper. Some need a small lever under the sink loosened. - For a shower, remove the drain cover with a screwdriver if needed.
**Physically remove the gunk first**
Chemical cleaners often fail on solid clumps. - Insert the plastic drain snake into the drain. - Twist gently and pull out slowly. - Remove hair and debris with a rag; repeat until the snake comes out mostly clean.
**Flush with hot (not boiling) water**
- Heat water until it’s hot but not violently boiling (especially for PVC pipes). - Slowly pour it down the drain in two or three stages, allowing it to work between pours.
**Use a baking soda and vinegar flush (optional)**
- Pour about 1/2 cup baking soda into the drain. - Follow with about 1/2–1 cup white vinegar. - Let it fizz for 10–15 minutes. - Rinse with more hot water.
**Check the P‑trap if still slow (sink only)**
Place a bucket under the curved pipe (P‑trap) under the sink. - Unscrew the slip nuts by hand or with pliers. - Remove the trap and clear any debris inside. - Reassemble, ensuring the washers are seated correctly to avoid leaks.
**Test and monitor**
Run water for 2–3 minutes. If it drains quickly and doesn’t back up, you’re done. If it’s still very slow or backing up into other fixtures (like the tub when you run the sink), you may have a deeper line issue that needs a pro.
---
Quiet a Squeaky Interior Door Without Specialized Tools
That door that squeals every time someone walks through? You don’t need new hinges—just a few minutes and basic supplies.
What you’ll need
- Old rag or paper towels
- Lubricant: petroleum jelly, bar soap, or silicone spray
- Small hammer and nail (optional, for stubborn hinge pins)
Steps
**Identify where the sound comes from**
Slowly open and close the door while listening closely. Most squeaks come from hinge pins, not the frame.
**Try a quick‑fix lubrication first**
- With the door open, apply a small amount of lubricant directly on the visible part of each hinge pin. - Open and close the door 10–15 times to work it in. Bar soap or petroleum jelly works surprisingly well in a pinch.
**Remove the hinge pin for a deeper fix (optional)**
For a long‑lasting fix: - Close the door so the hinges are aligned and stable. - Starting with the top hinge, place a small nail or screwdriver under the pin head and gently tap upward with a hammer. - Pull the pin out carefully.
**Clean and lubricate the pin**
- Wipe off old dirt and rust. - Coat the pin lightly with lubricant (silicone spray, petroleum jelly, or a multi‑purpose lubricant). - Avoid overdoing it—you don’t want drips on the floor.
**Reinstall and repeat**
- Insert the pin back into the hinge and tap gently until fully seated. - Repeat with the middle and bottom hinges if necessary.
**Final test and clean up**
Open and close the door several times. - If it’s still squeaky, add a bit more lubricant at the hinge joints. - Wipe away any drips or excess from the door and floor to avoid slippery spots.
---
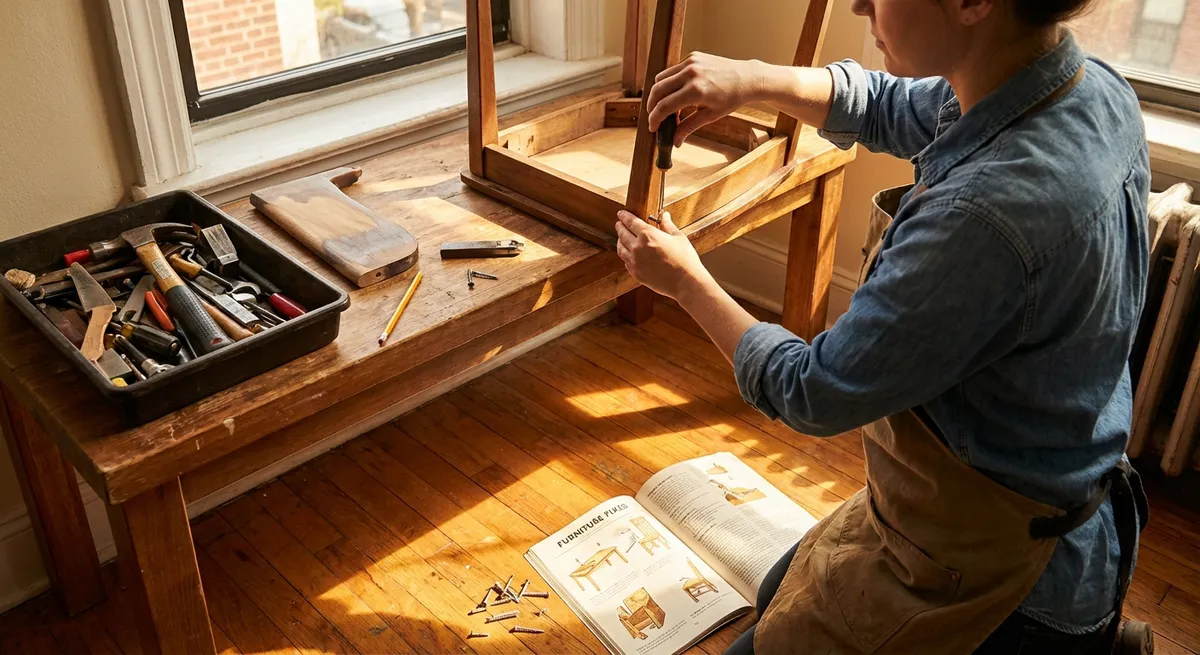
Fix a Loose Chair or Table So It Stops Wobbling
Wobbly furniture is usually a sign of loose joints, not a lost cause. A few adjustments can make it sturdy again.
What you’ll need
- Screwdriver (Phillips and flathead)
- Allen (hex) keys (often included with furniture originally)
- Wood glue (for non‑screw joints)
- Clamps or strong tape (optional)
- Clean rag
Steps
**Flip and inspect the piece**
Place the chair or table upside down on a soft surface (rug or towel). Wiggle each leg and joint to find exactly where the movement is coming from.
**Tighten visible screws and bolts**
- Use the correct screwdriver or hex key. - Tighten each screw and bolt firmly, but don’t overtighten to the point of stripping. - Tighten opposite sides in sequence (like tightening car wheel nuts) to keep things even.
**Check for stripped screw holes**
If a screw turns but never tightens, the wood hole may be stripped. - Remove the screw. - Insert a small wooden matchstick or toothpick dipped in wood glue into the hole. - Break off the excess, then reinsert and tighten the screw. The added material gives the threads something to grip.
**Strengthen loose wood joints**
For joints held by dowels or glue, not screws: - Gently pull the joint apart if possible. - Clean out old, flaky glue with a rag or small tool. - Apply fresh wood glue to the joint surfaces. - Push the pieces back together firmly.
**Clamp while drying (if glued)**
- Use clamps or strong tape to hold the joint tight while the glue cures (follow the time on the glue label, usually several hours). - Wipe away glue squeeze‑out with a damp cloth before it dries.
**Final stability check**
Once everything is dry and reassembled, flip the piece upright and sit or apply pressure gradually. - If there’s still wobble, re‑check for missed screws or joints. - Persistent wobble in old, cracked wood might indicate the piece needs more advanced repair or reinforcement brackets.
---
Conclusion
Many “annoying but not urgent” problems around the home turn into expensive issues simply because they’re ignored or handed off too quickly. A running toilet, a weak power strip, a slow drain, a squeaky door, or a wobbly chair can all be handled with basic tools and a focused 15–45 minutes.
The key is to work safely, diagnose the real cause before buying parts, and know when a fix crosses into “call a pro” territory—especially around electricity, gas, and structural issues. For the rest, tackling these small repairs yourself saves money, reduces waste, and gives you more control over your home.
---
Sources
- [U.S. Environmental Protection Agency – Fixing Household Leaks](https://www.epa.gov/watersense/fix-leak-week) - Guidance on common water leaks like running toilets and how much water they waste
- [The Spruce – How to Fix a Running Toilet](https://www.thespruce.com/how-to-fix-a-running-toilet-1825030) - Step-by-step visuals and explanations for toilet tank components and adjustments
- [Family Handyman – How to Clear a Clogged Drain](https://www.familyhandyman.com/project/how-to-unclog-a-drain/) - Practical, chemical‑free methods for clearing slow and clogged drains
- [This Old House – Stop Squeaky Doors](https://www.thisoldhouse.com/doors/21016809/how-to-fix-a-squeaky-door) - Detailed hinge and lubrication tips for quieting doors
- [Lowe’s – Furniture Repair Basics](https://www.lowes.com/n/how-to/furniture-repair-tips) - Overview of tightening, gluing, and reinforcing loose or damaged furniture joints
Key Takeaway
The most important thing to remember from this article is that this information can change how you think about DIY Solutions.


